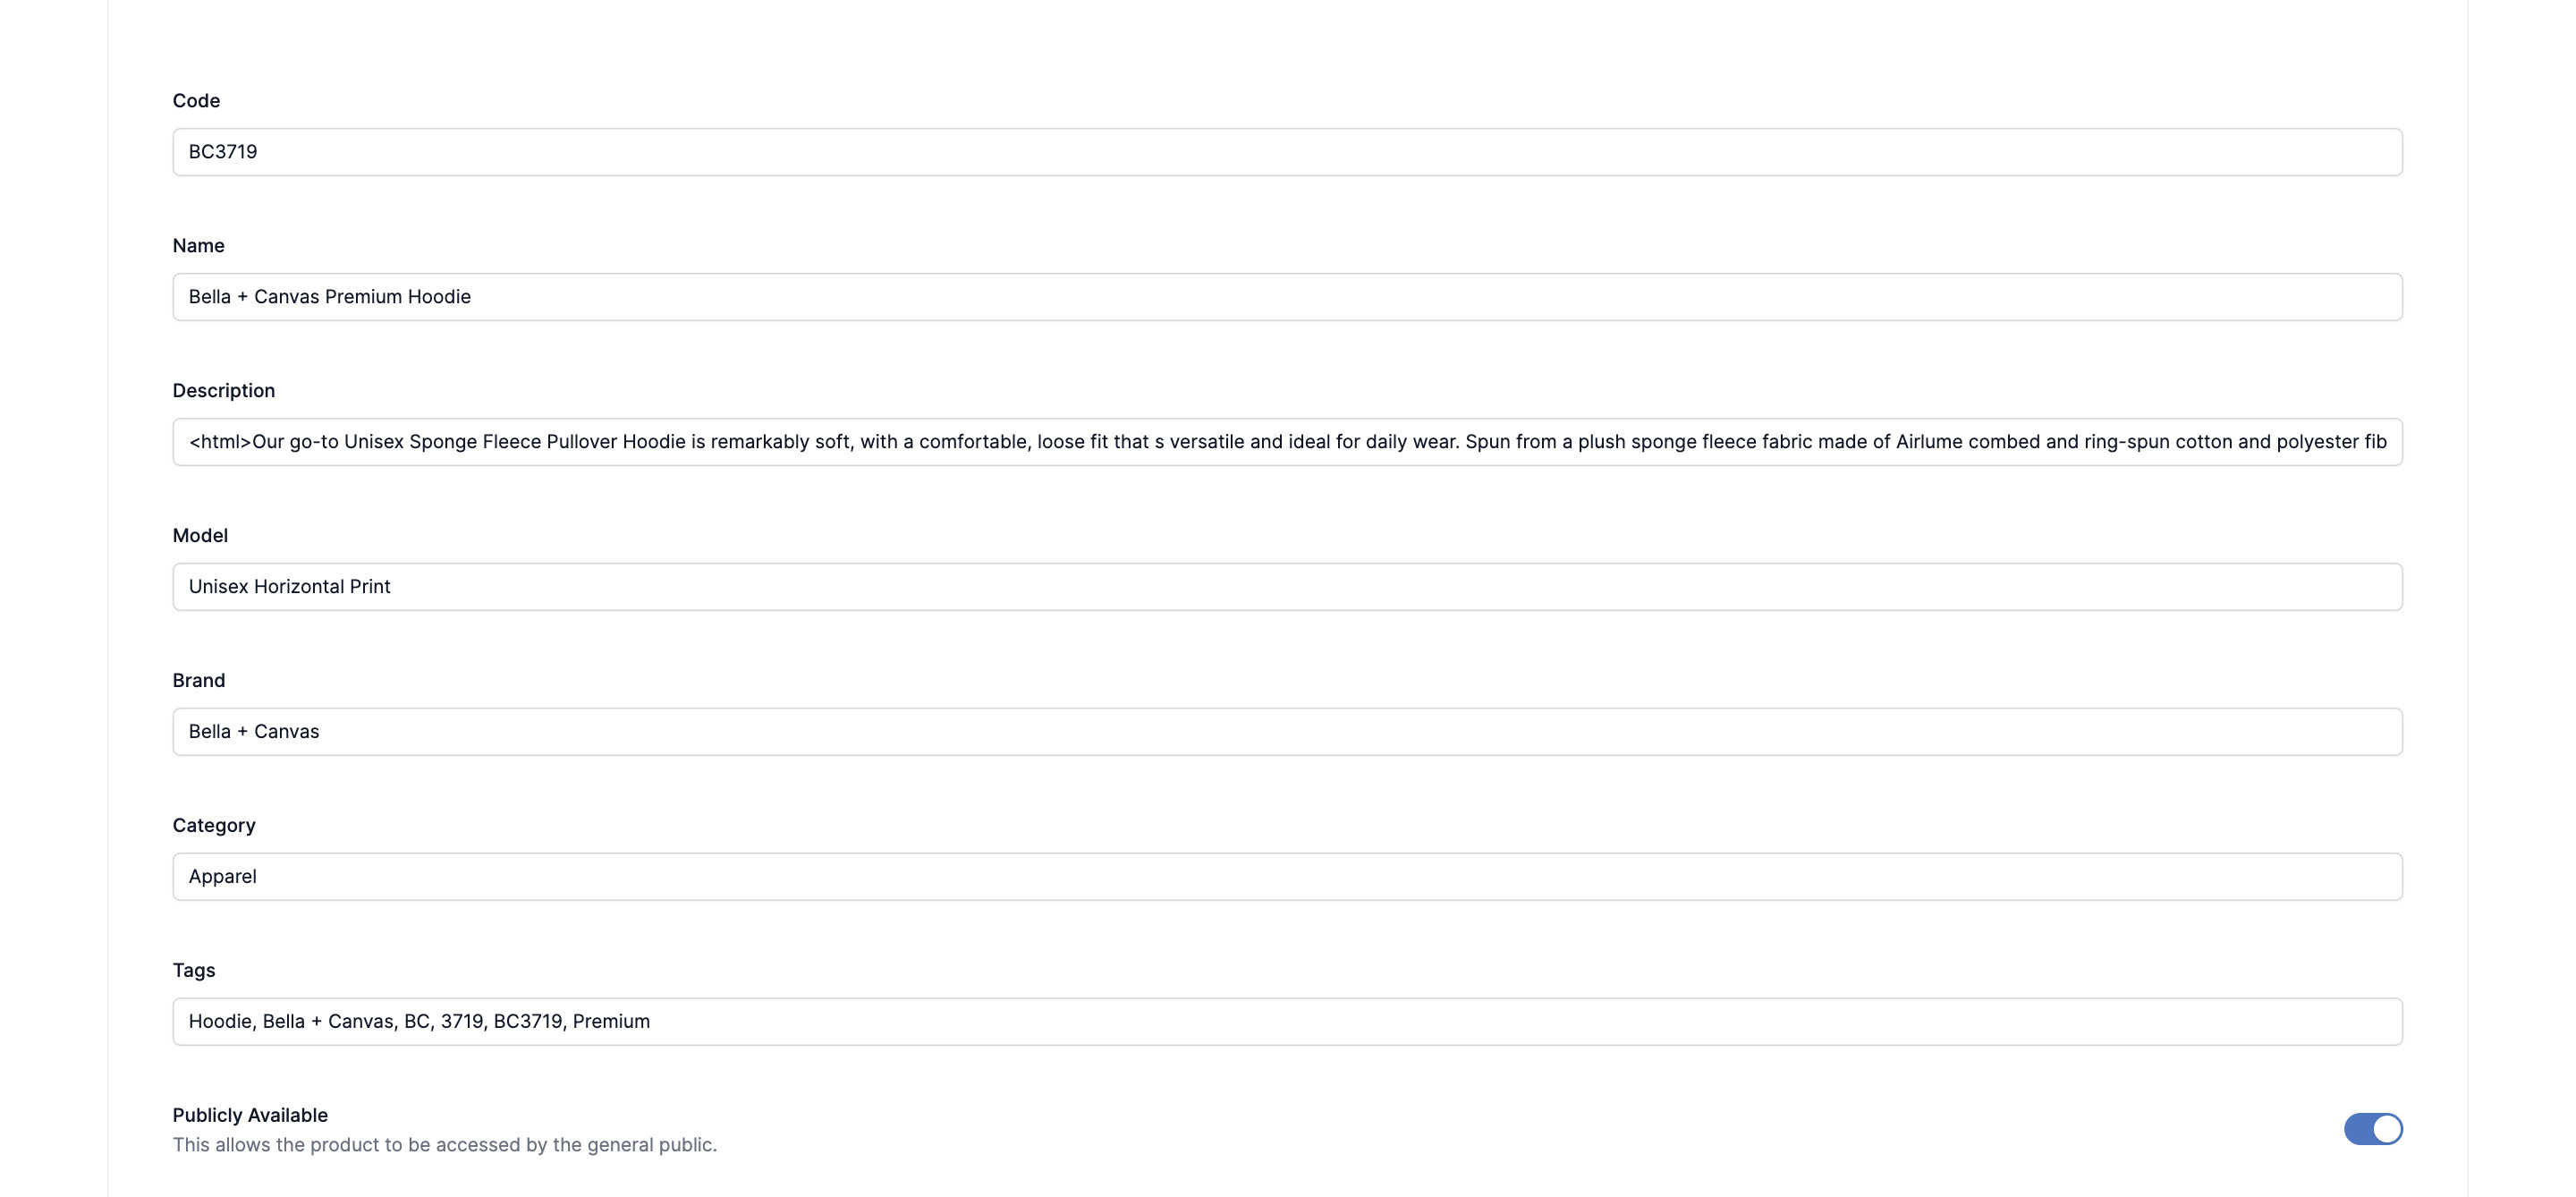
Catalog Form
If your account have privileges for adding your own Photoshop templates, click the Catalog menu item. Click Add Product to create a new product listing template. In the form, you
- must enter a Code that is a unique value. Do not use spaces or special characters, just numbers and upper case letters.
- must enter a Name for the product type that can be used with the listing title
- can enter a Description for the product that can be used with the listing
- can enter a Model that can be used with the listing
- can enter a Brand that can be used with the listing
- can enter a Category
- can enter any tag that can be merged with the design images tags and used in the listing
- click Save to save your changes
After saving the product information, you must add at least one Design Area, one Product Image, one Variant and one Price. Furthermore, you must click the Verify button at the bottom of the page before using the template to make listings.
If you edit/change the Code in the form, you must click the Verify button again.
Design Area and Product Image Forms
In the Design Area form, specify the name of one (or more areas) and the specifications for the print image (height, width, bleed, and PPI) as required by your printer/vendor. Note that design area name is case-sensitive and must be exactly the same name as a smart object in the Photoshop templates.
If your product has asymmetric bleed or is N-up print image, specify 0 for bleed and enter the full height and width of the print image. For more on how this affects your templates files, follow this link.
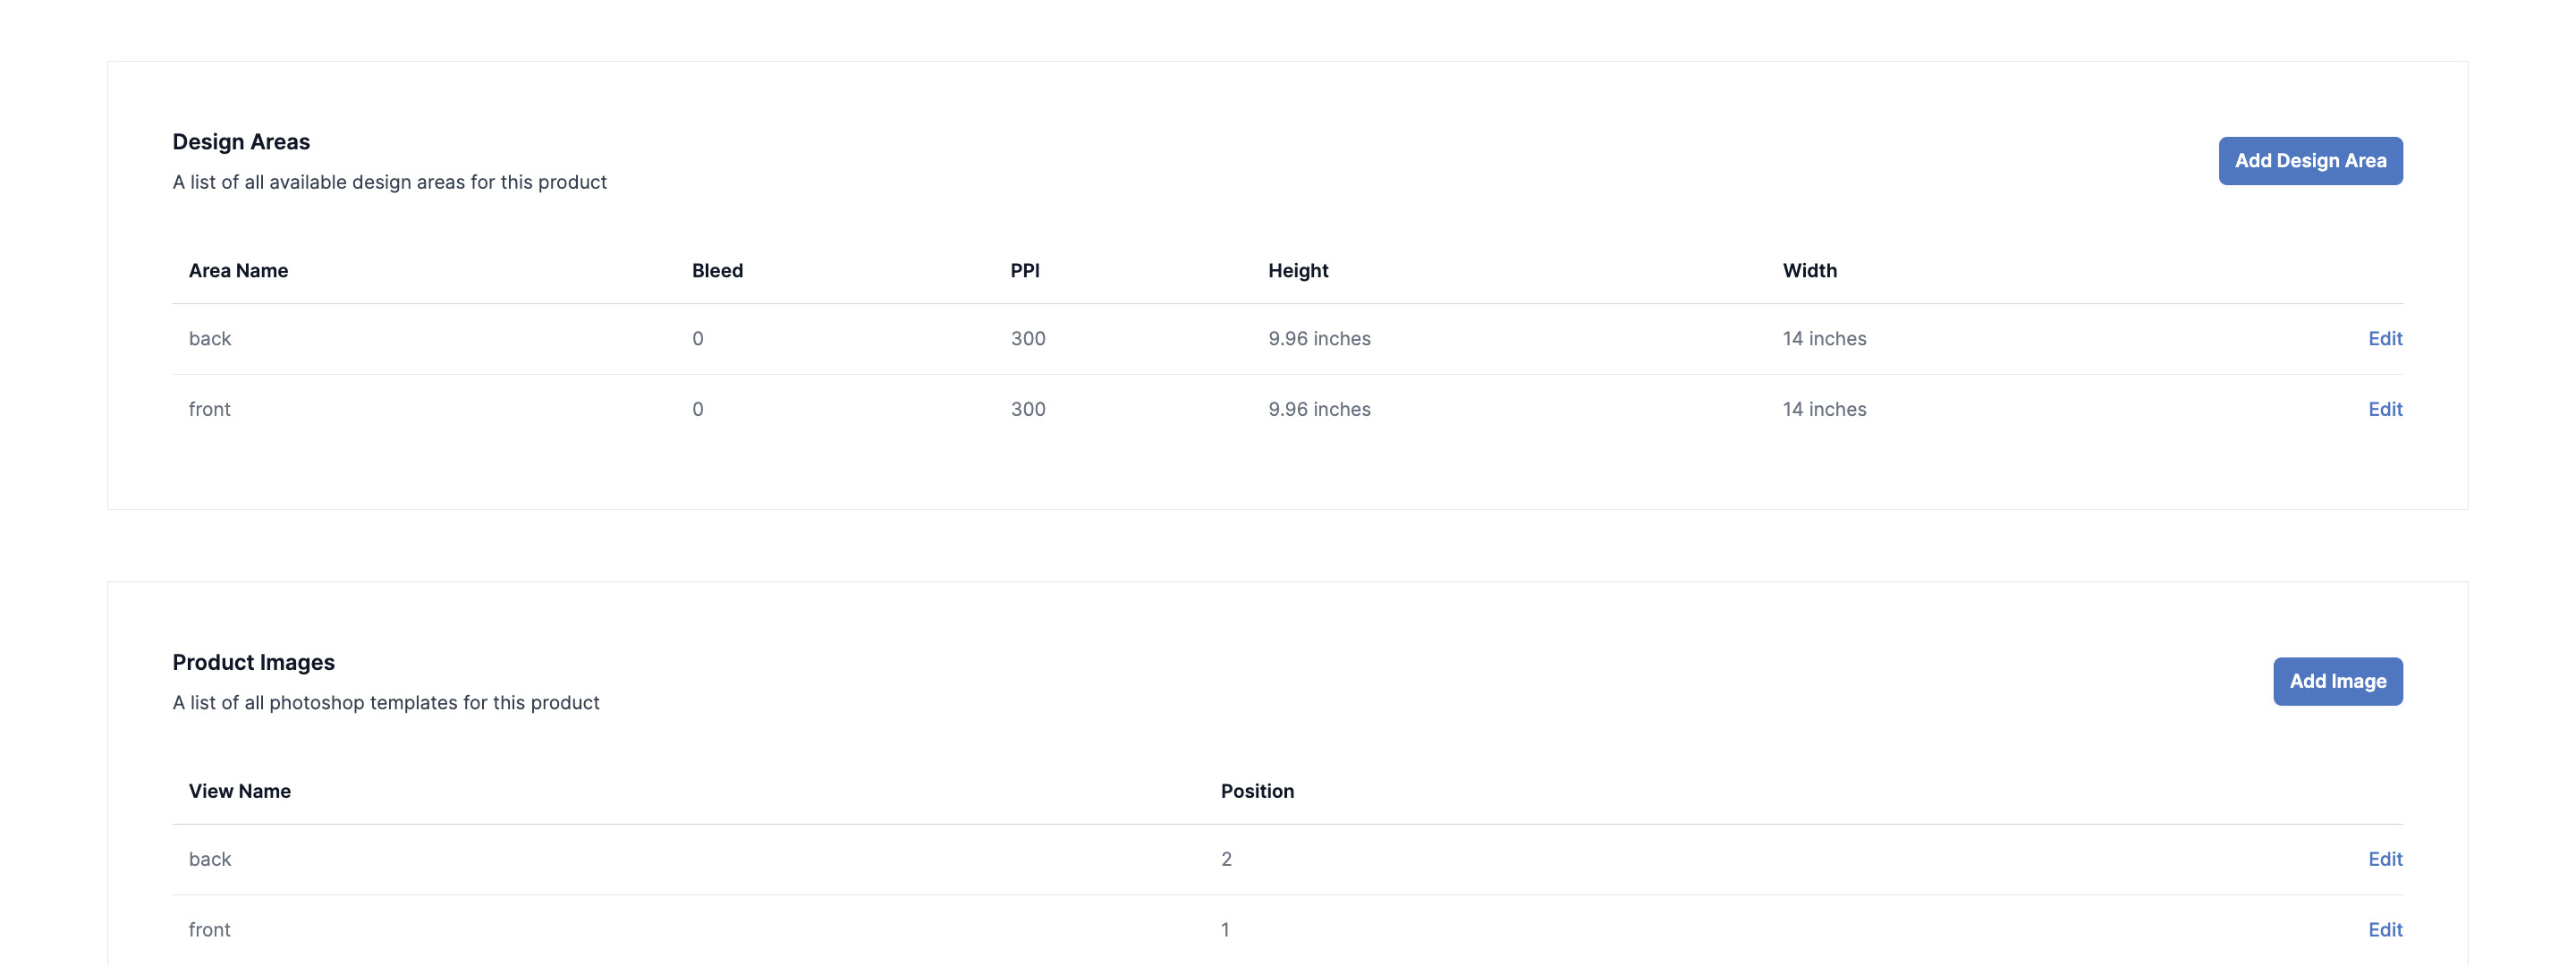
In the Product Image form, upload your Photoshop template, provide a unique name for your the and specify the order that you want the previews made using the template to be shown in your listing. For more specifics on template files, follow this link.
Variants Form
In the Variants form, enter the physical information about your product - its colors, sizes, and dimensions. These values are used to create your Shopify listing or can be passed along to the channel of your choice. Each catalog product must have at least one variant entry even if there is only one variant. Important note: The variant name cannot include "/" or "-" as these characters are reserved by the Art2Cart system.

If your product type has more than one variant, set the order the variants are displayed in the final listing by setting its position.
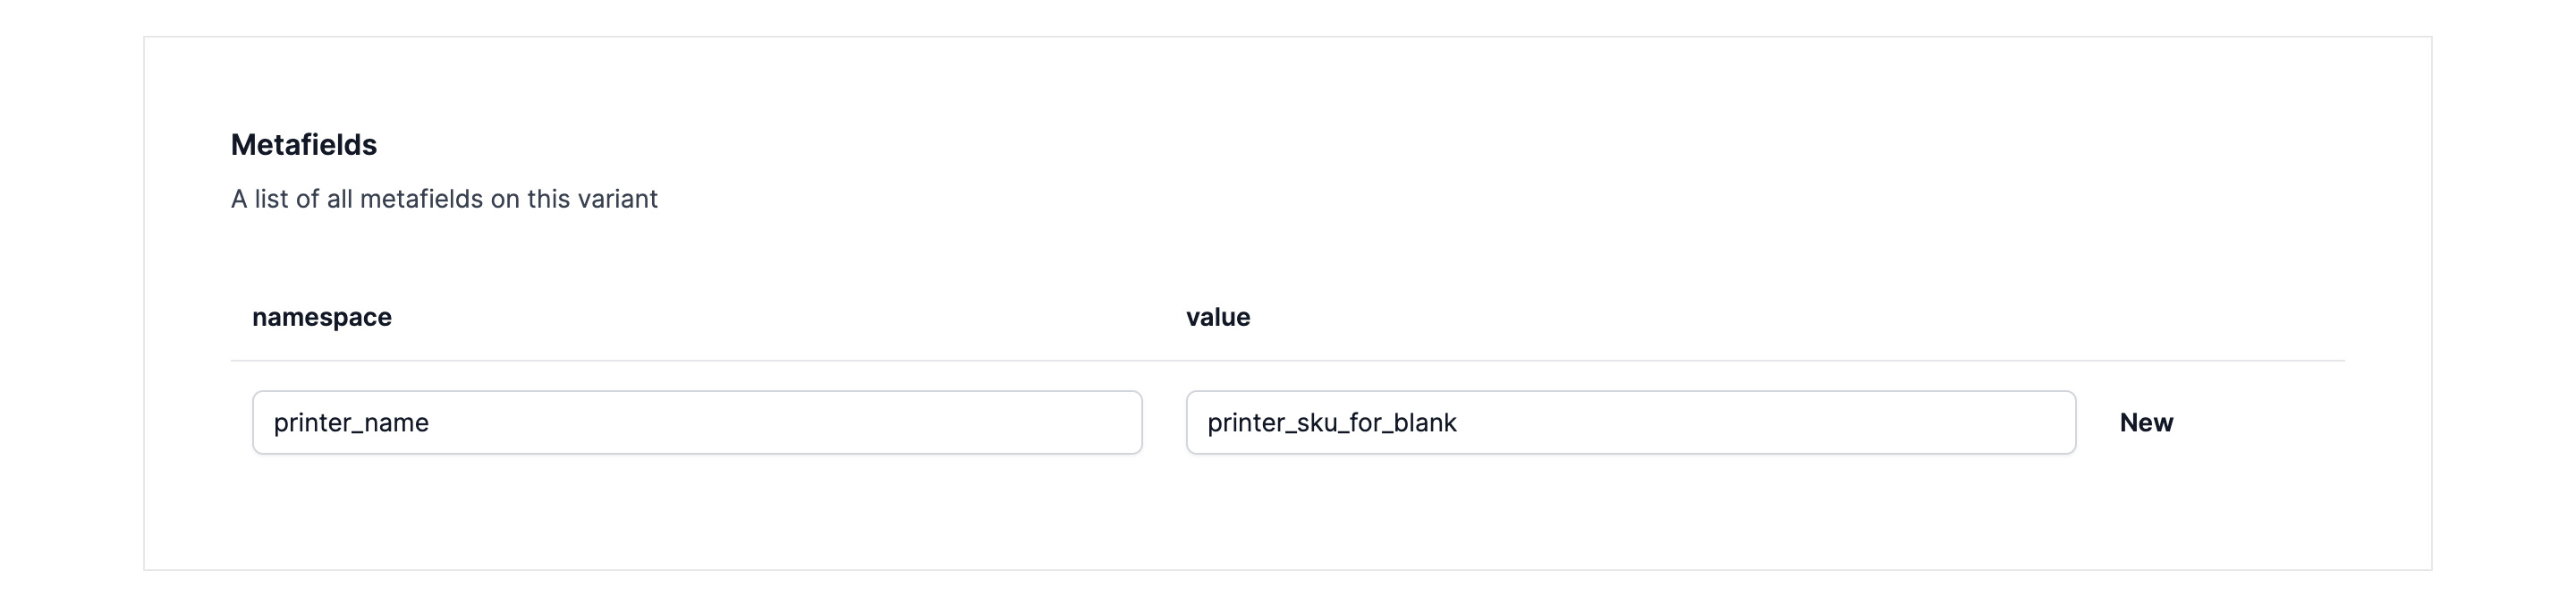
Lastly, metafields can be attached to each variant. These user defined fields enable user defined data to be included in your listing (for example, having a different vendor for XXXL sizes)
Price Form
After all variants have been listed, create pricing groups for the variants as necessary (by different sizes, colors, number of print areas). These prices will be added to your listings. Currently, Art2Cart only support USD pricing. In the future, we may add support for non-US currency.
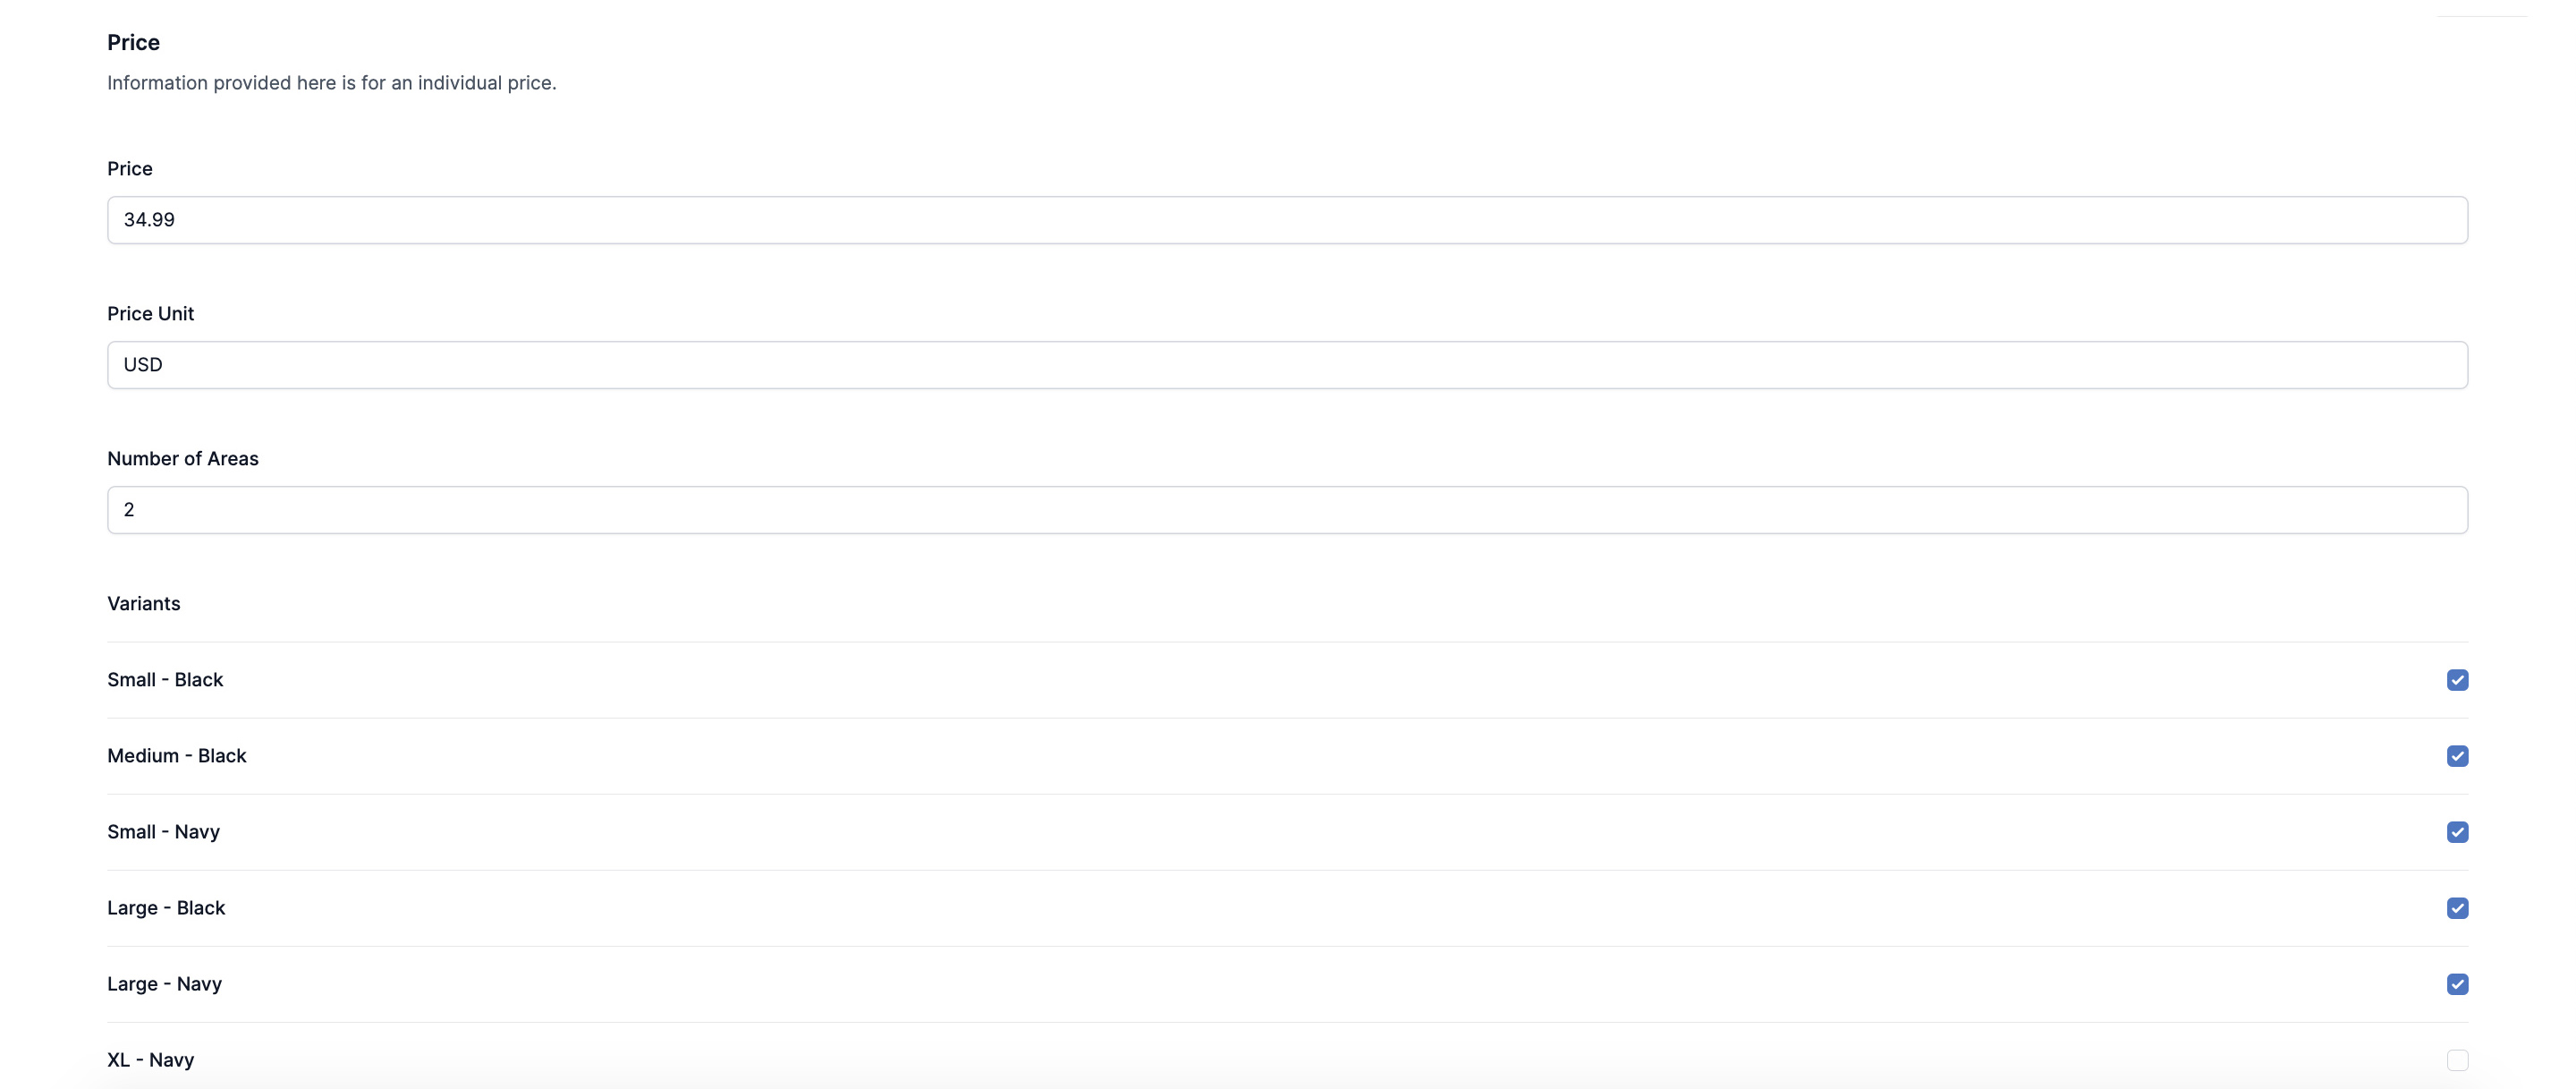
Once all the information for the product type is entered, you must click the Verify button to verify that all the Photoshop files are ready to be used to create listings. Please note the verification process does not check for mismatching data or misspellings within the uploaded Photoshop files.
