Customizable Designs and Listings
One of the most powerful features of Art2Cart is customizing or personalizing designs using a data source. Refer to this section here on how you can create a custom data source. From a single basic design like a football jersey or city/location, you can use variable text data to multiply the number of listings exponentially by replacing matching text objects in your design (similar to a mail merge). For example, your data might be a 53 person NFL active roster that you combine with one design such that in a single listing request you can create all 53 product versions - without having to specify each design and each job individually.
How to setup a customizable AI design file
- Customizable designs must be in Adobe Illustrator .ai format (.ai 2020 or better)
- Customizable Text Objects can be created either with the Text tool or on a Path and must be in the layer named "text"
- Customization is only compatible with Latin languages with text that is read left to right
- The metafield name(s) specified in the data must be the same as the name of the text objects for the text replacement. Furthermore, in the Design form, each customizable field must be specified using a metafield named "layer" with its corresponding value matching the metafield name from the data.
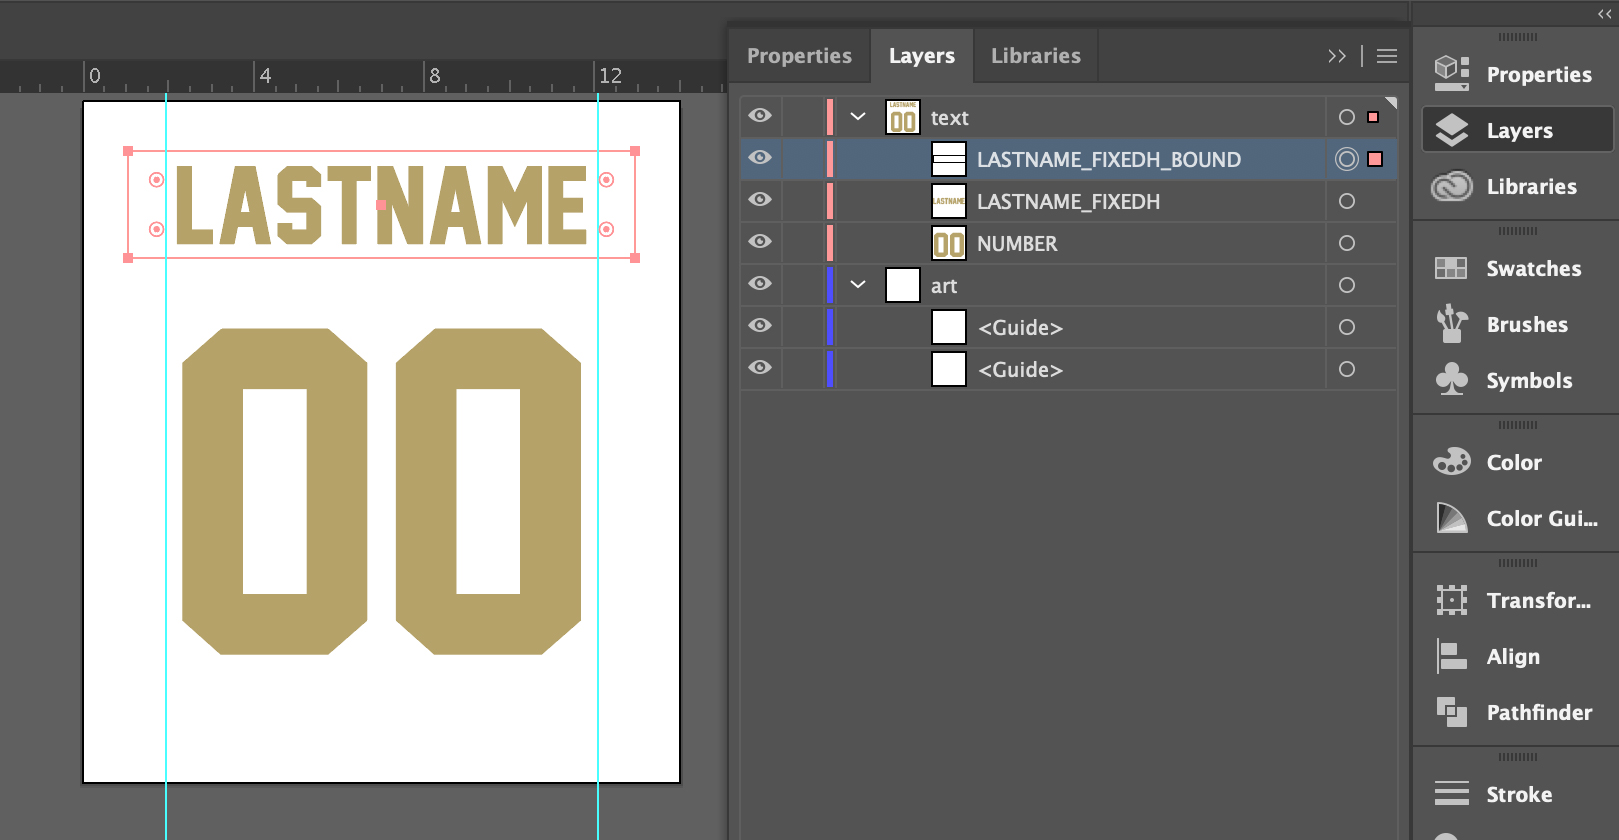
In this example, the Illustrator file has two fields as POINT text objects that accept personalization data in a layer named "text" - LASTNAME and NUMBER. Additionally, a rectangle pathObject with the modifier {fieldname}_BOUND can be used to specify the personalization text fits within an area. Text will be replaced at existing font size or smaller to fit width of _BOUND pathObject. This bounding box must be placed "above" the text in the layer order.
Furthermore, the optional modifier _FIXEDH can be appended to the field name to specify that the font height set in the initial design is maintained. This is something you might see in a sports jersey. Text will be replaced at existing font size and then scaled to height of _BOUND pathObject; or smaller to fit width of _BOUND pathObject and then scaled to to height of _BOUND pathObject.
Not shown: when using PATH text objects, the text will be replaced at the existing font size or smaller to fit the length of the path.
Remaining artwork can be organized as customarily done.
Uploading a customizable AI design file
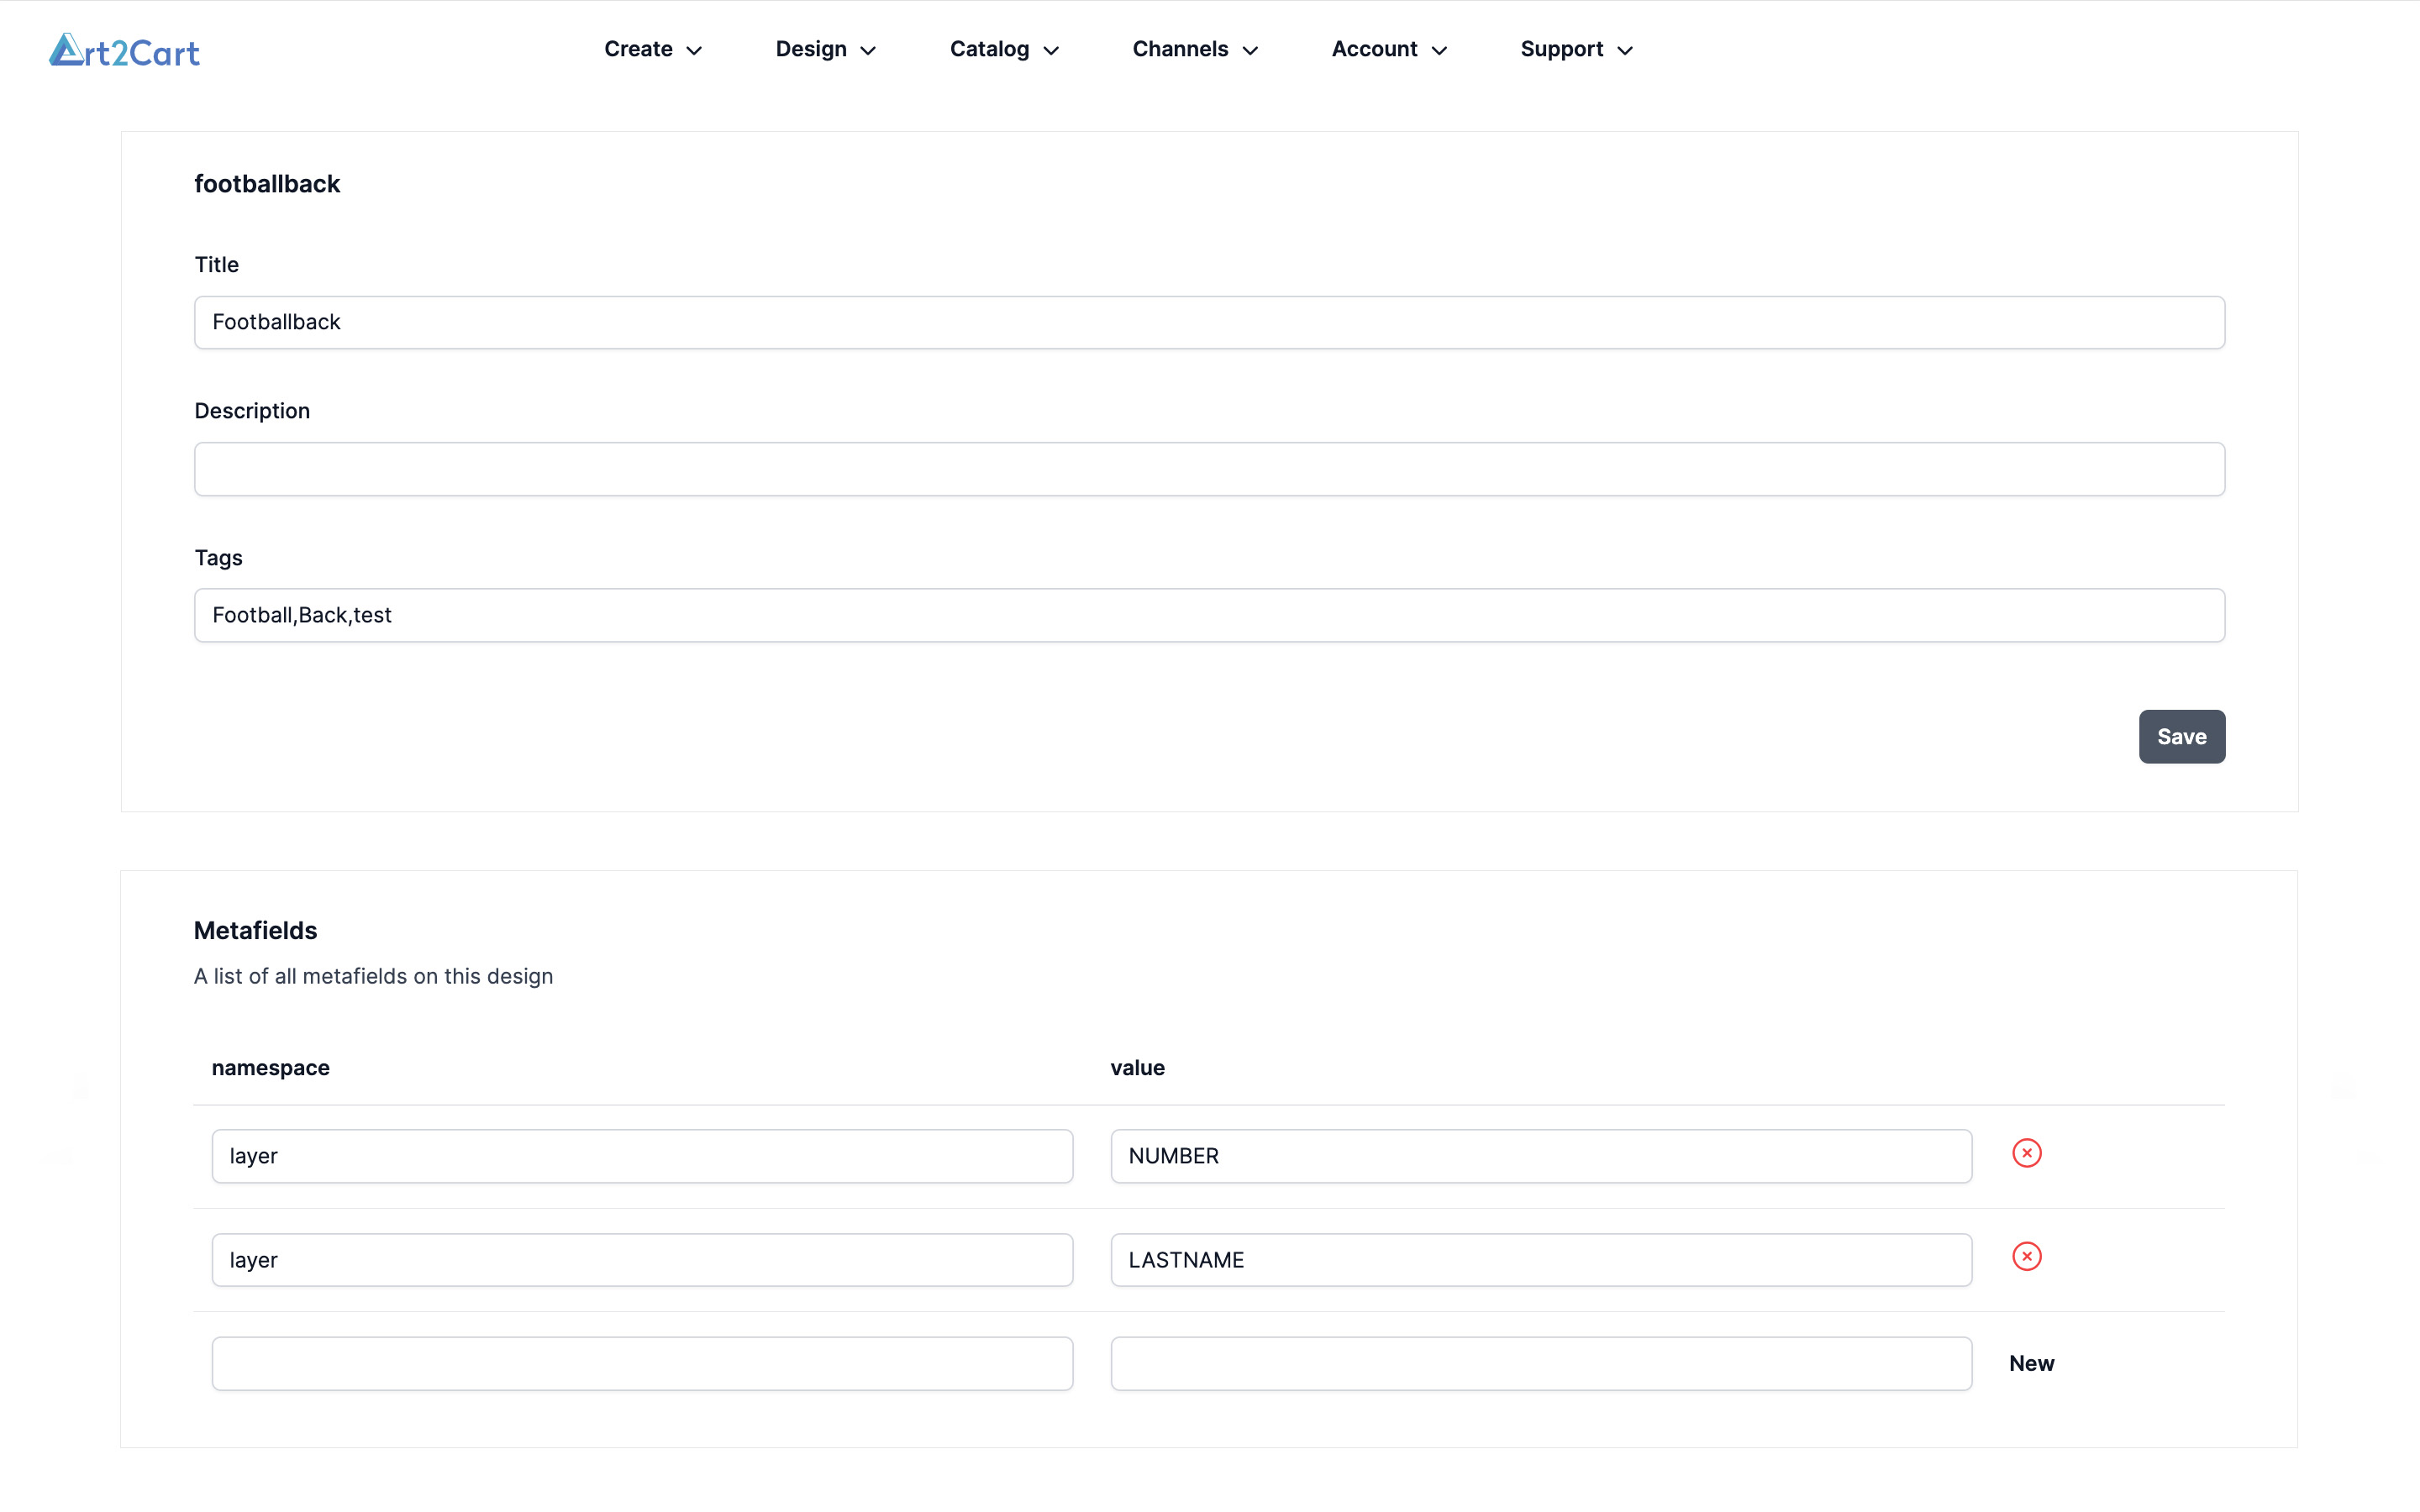
After completing your design, upload it using the Art2Cart design uploader. Once uploaded, go back to the Designs main page and click the View link for your design. On the Design editor page, scroll down to the Metafields section.
For each text field name (but not the bounding box object), enter "layer" for the namespace, and the field name of the data in value. Then click New. The example has two fields - LASTNAME and NUMBER.
More on Designs
Create a Customized Listing for a Customized Design
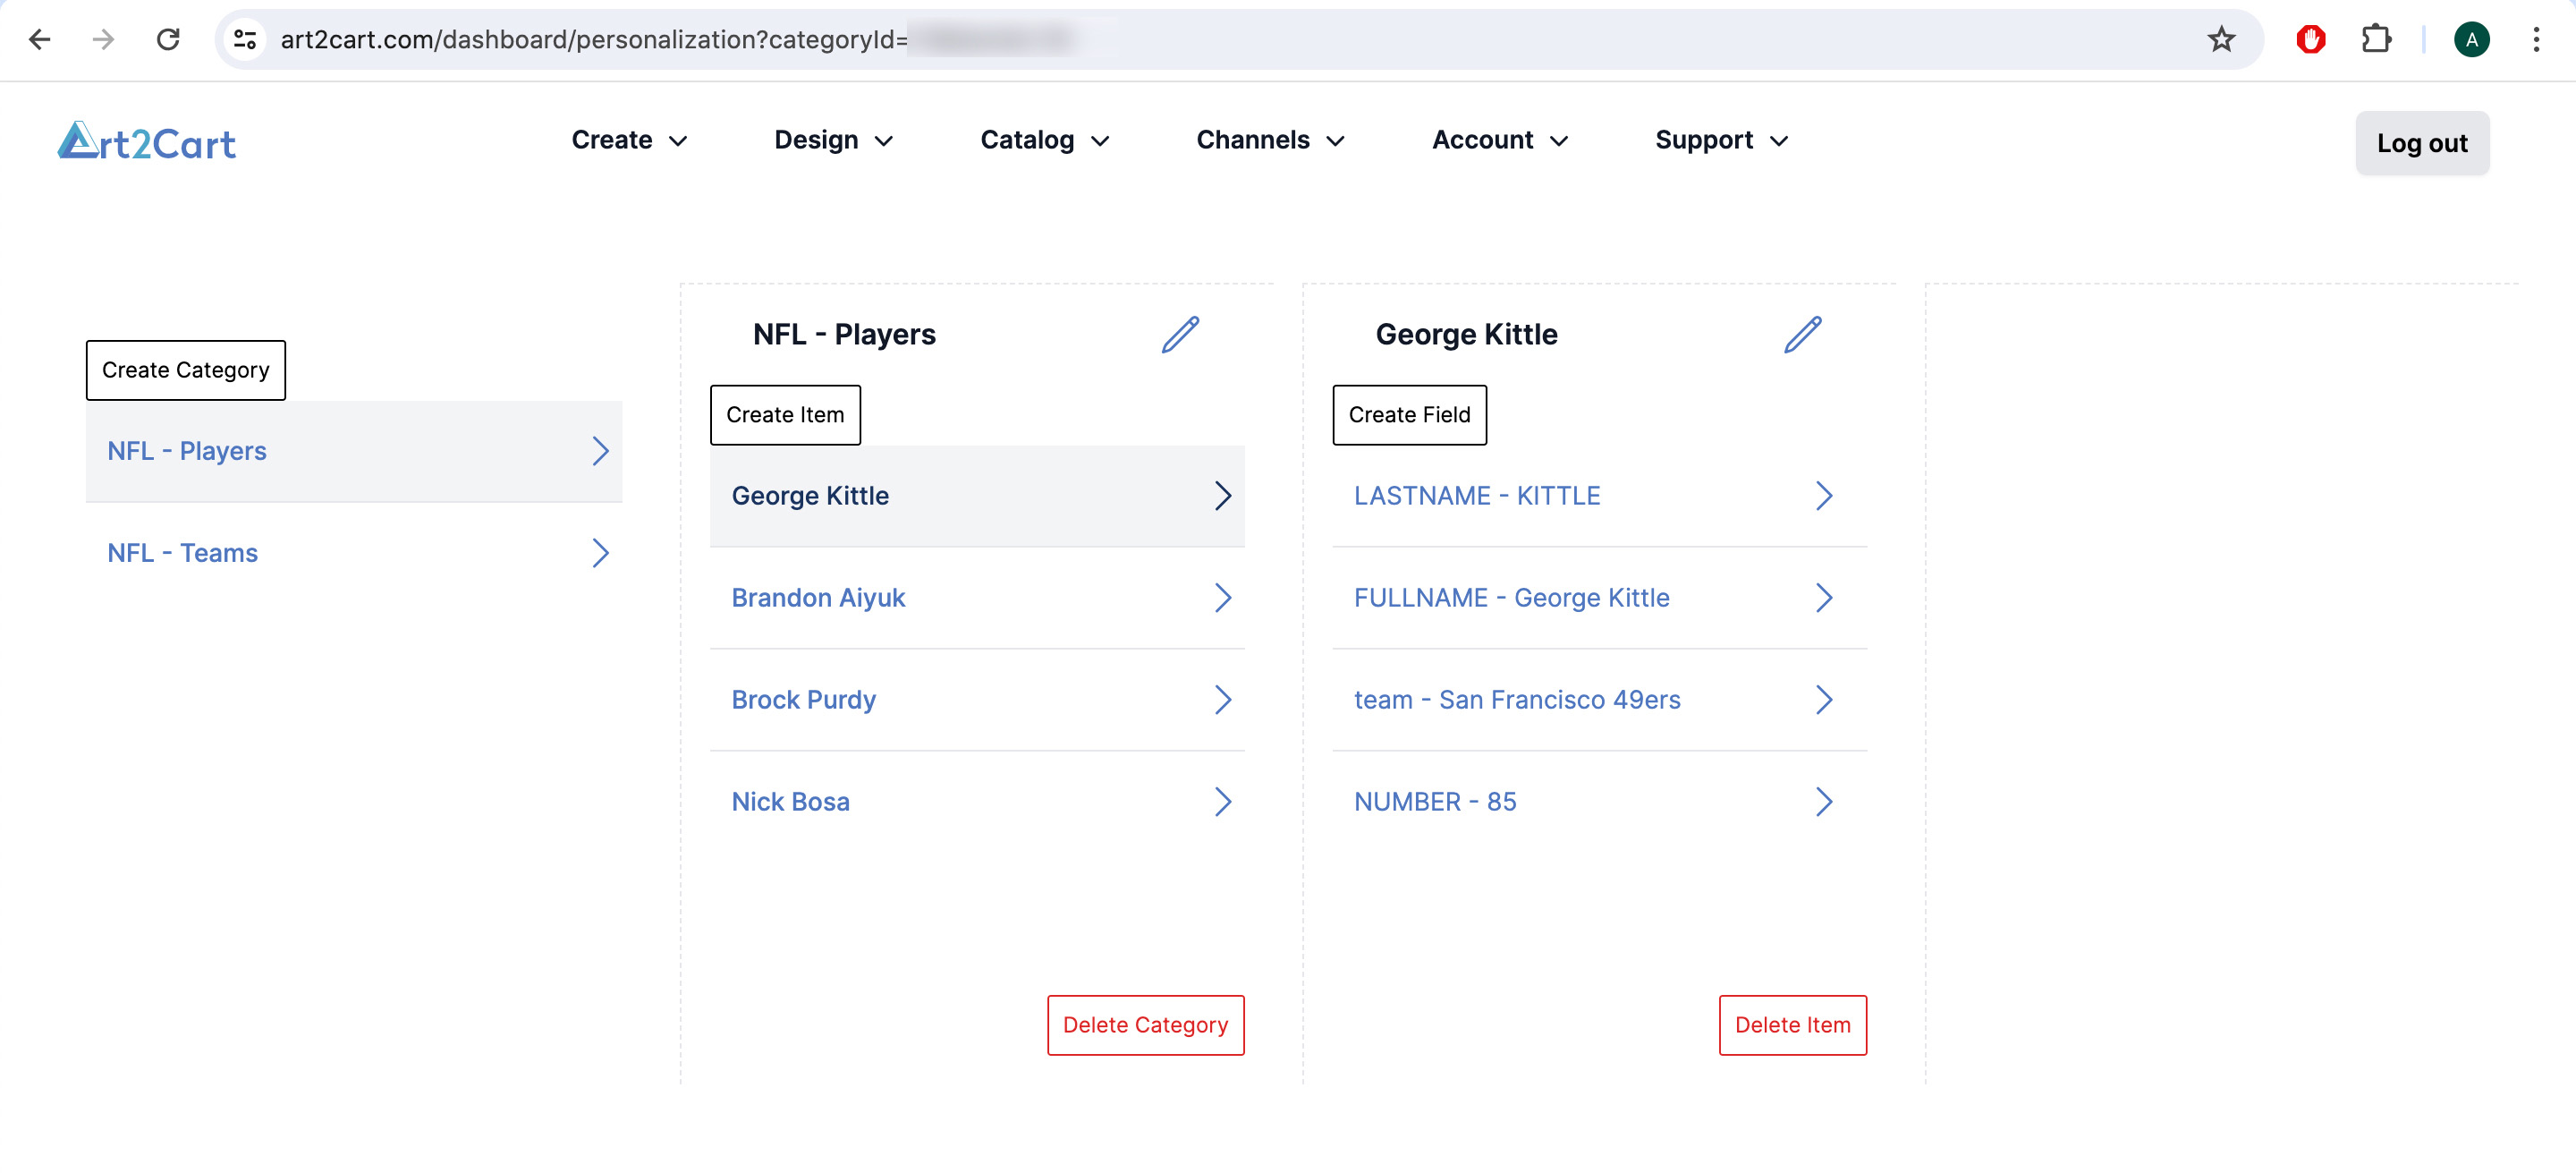
Starting with your data source, identify the fields to be used. For this example, LASTNAME and NUMBER are used in the design, and FULLNAME, CITY, TEAMNAME (not shown) will be used in the listing.
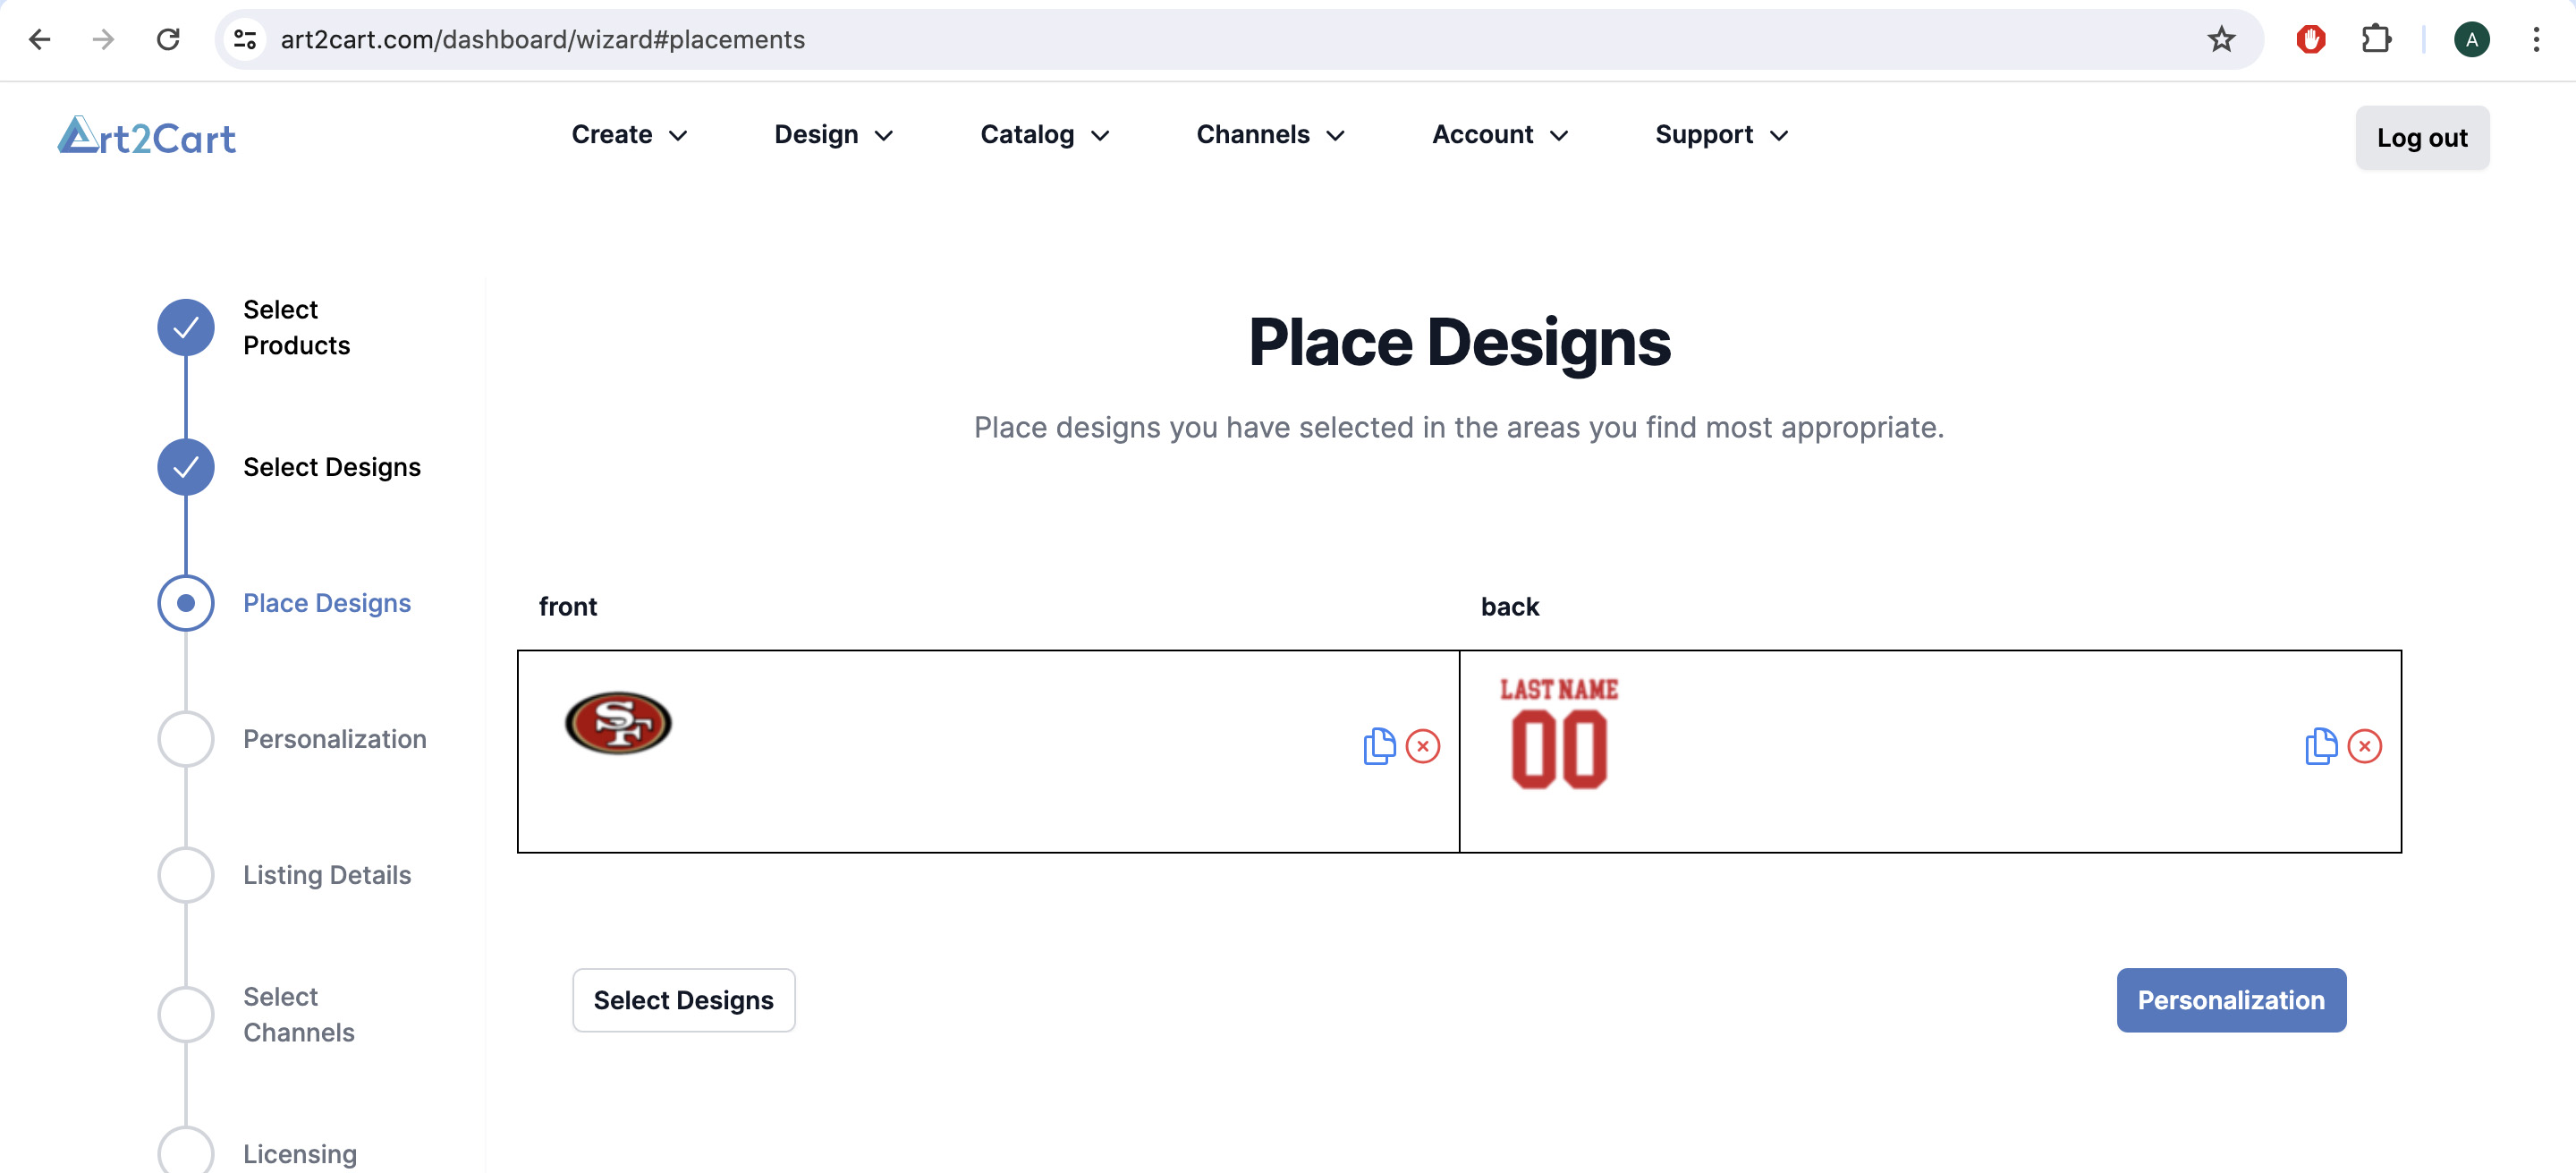
After selecting a catalog product with a front and a back area, select and place the designs. Here, the customizable design example from above is set to the back area.
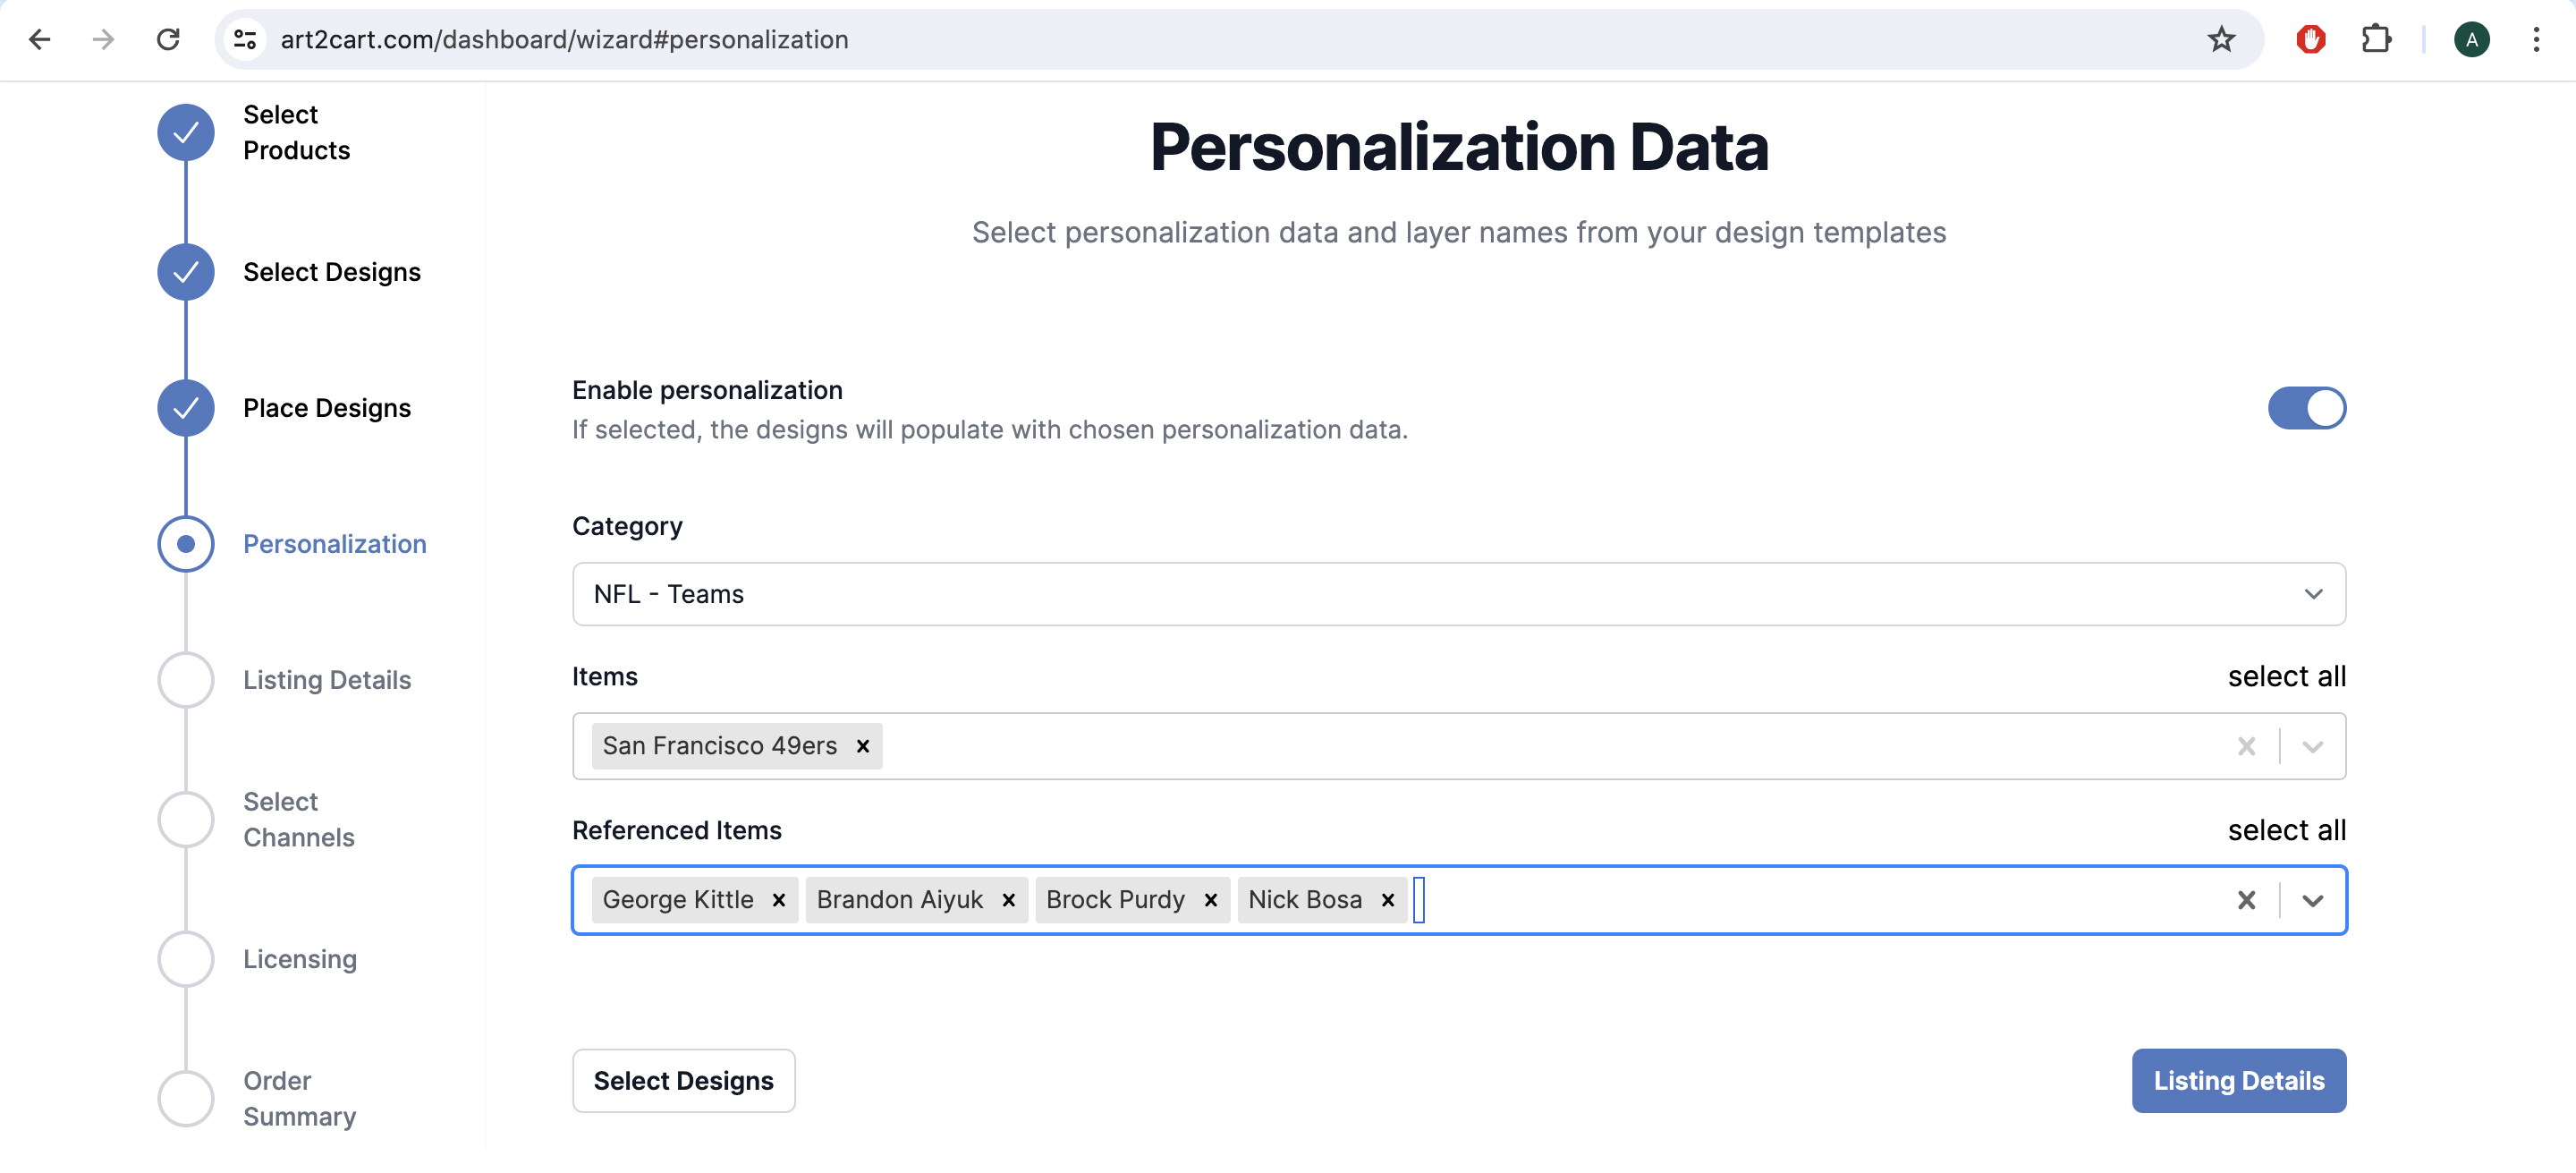
On the Personalization Data page, select the data that is to be used for customizing each design - the data source of all the players includes LASTNAME and NUMBER. For each player selected here, a new design will be created before creating the final product and listing. This will result in 4 listings, one for each player shown in the example.
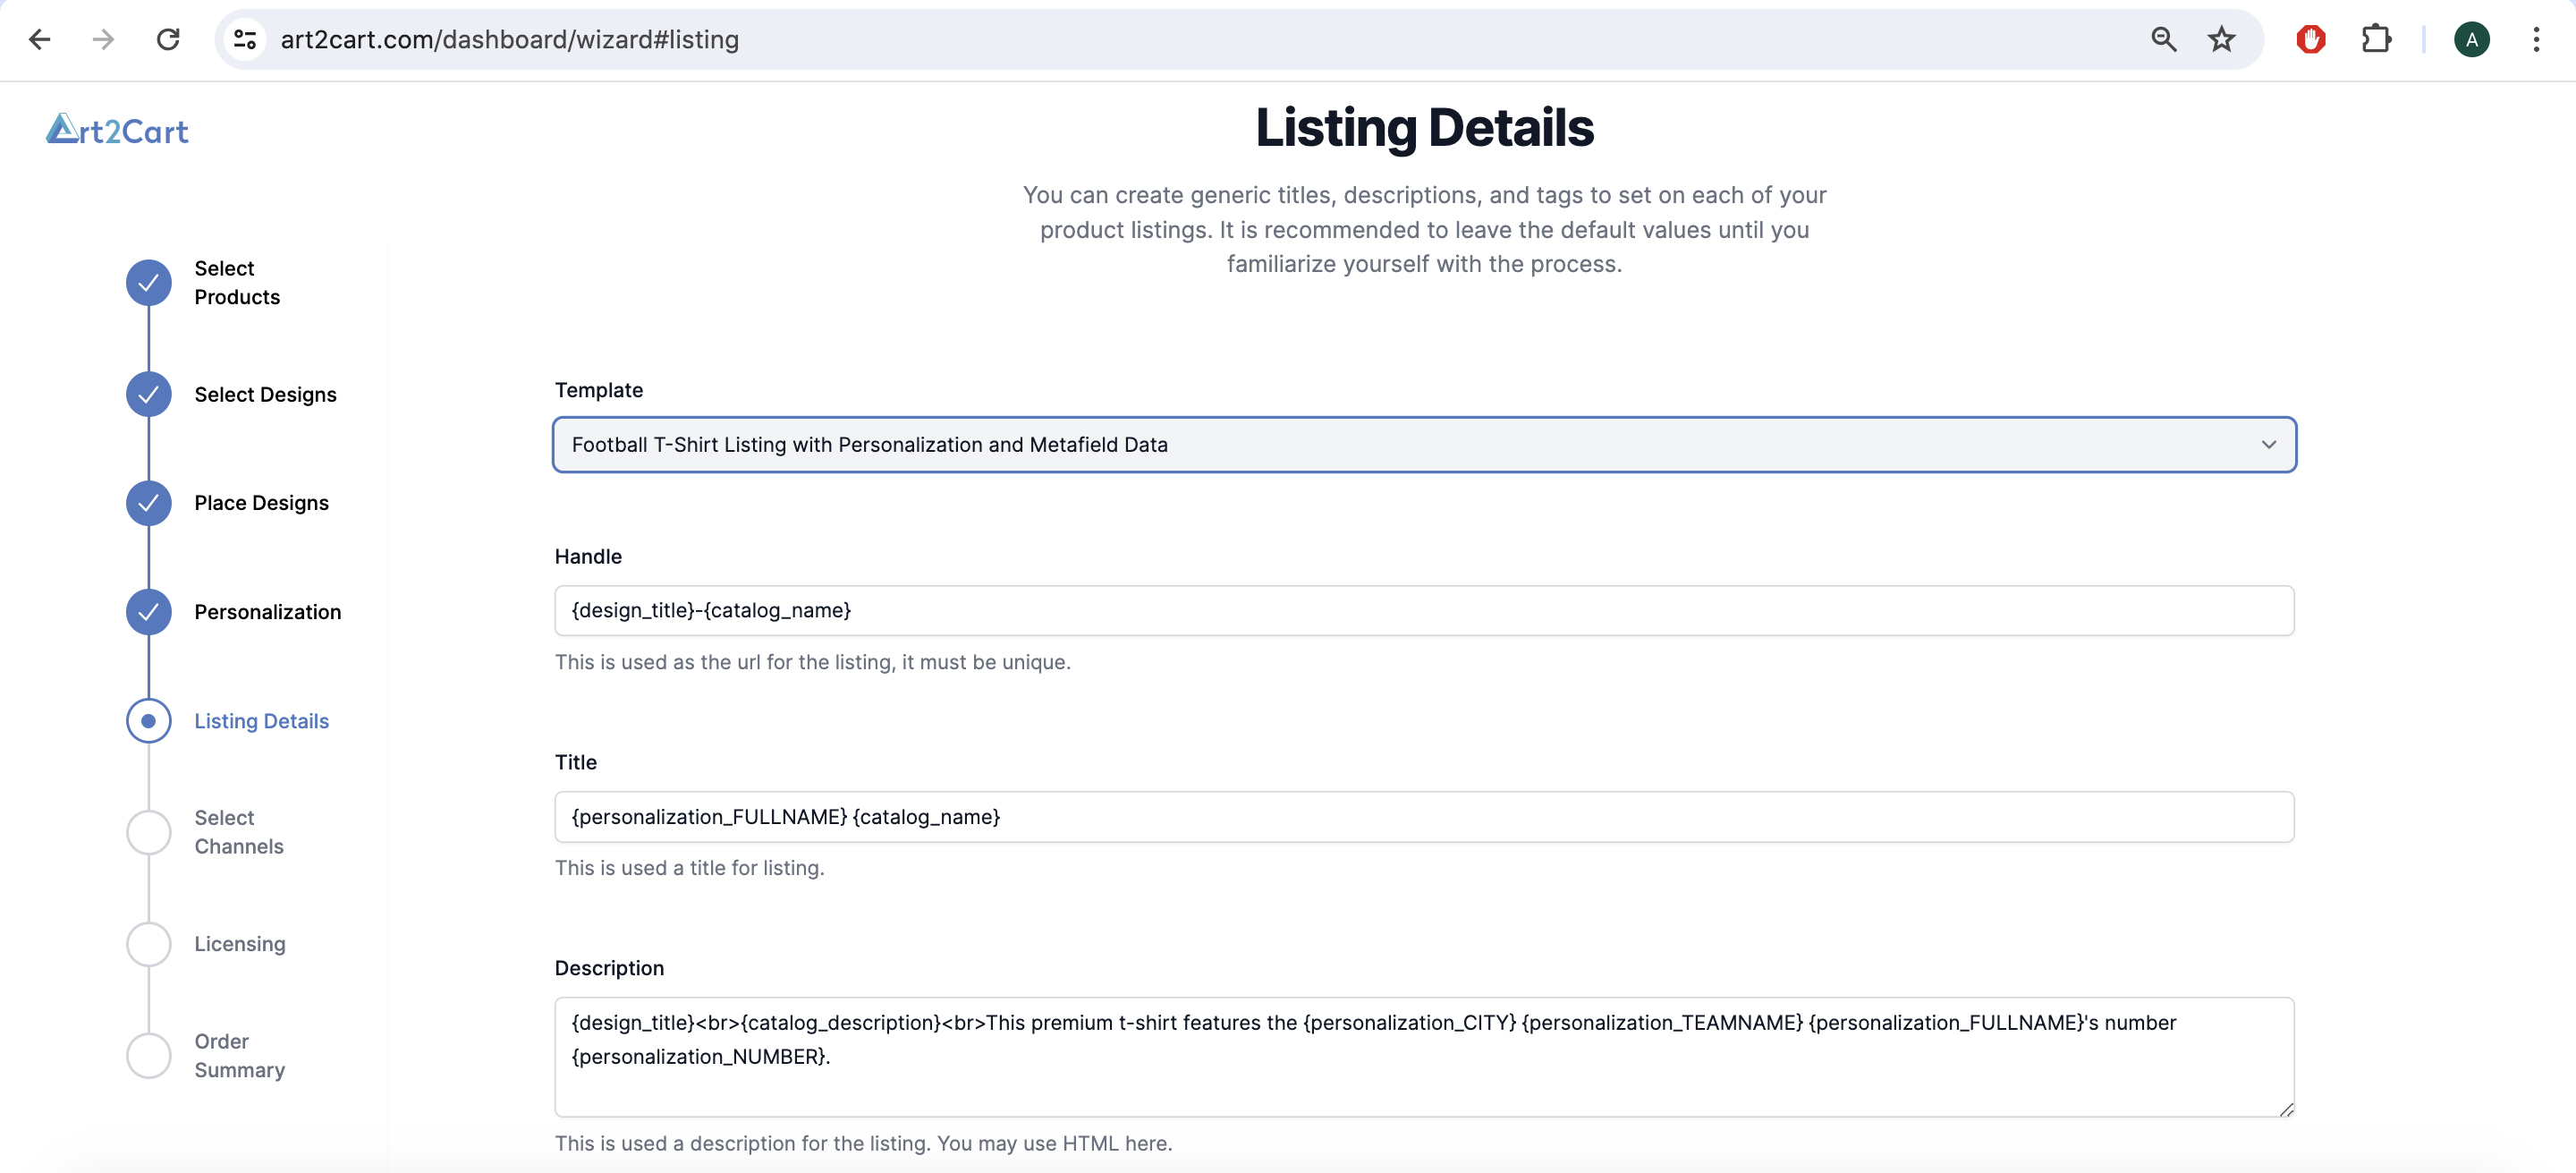
On the Listing Details page, the listing can be create using static text, static metafield tags and dynamic data from the personalization data source. Static metadata is preceeded by (design_ or catalog_), but personalization fields are preceeded by "personalization_" and in this way each listing itself can be customized to match the customized designs created with the job. Save the listing as a template so it can be re-used for other jobs.
More on Listings
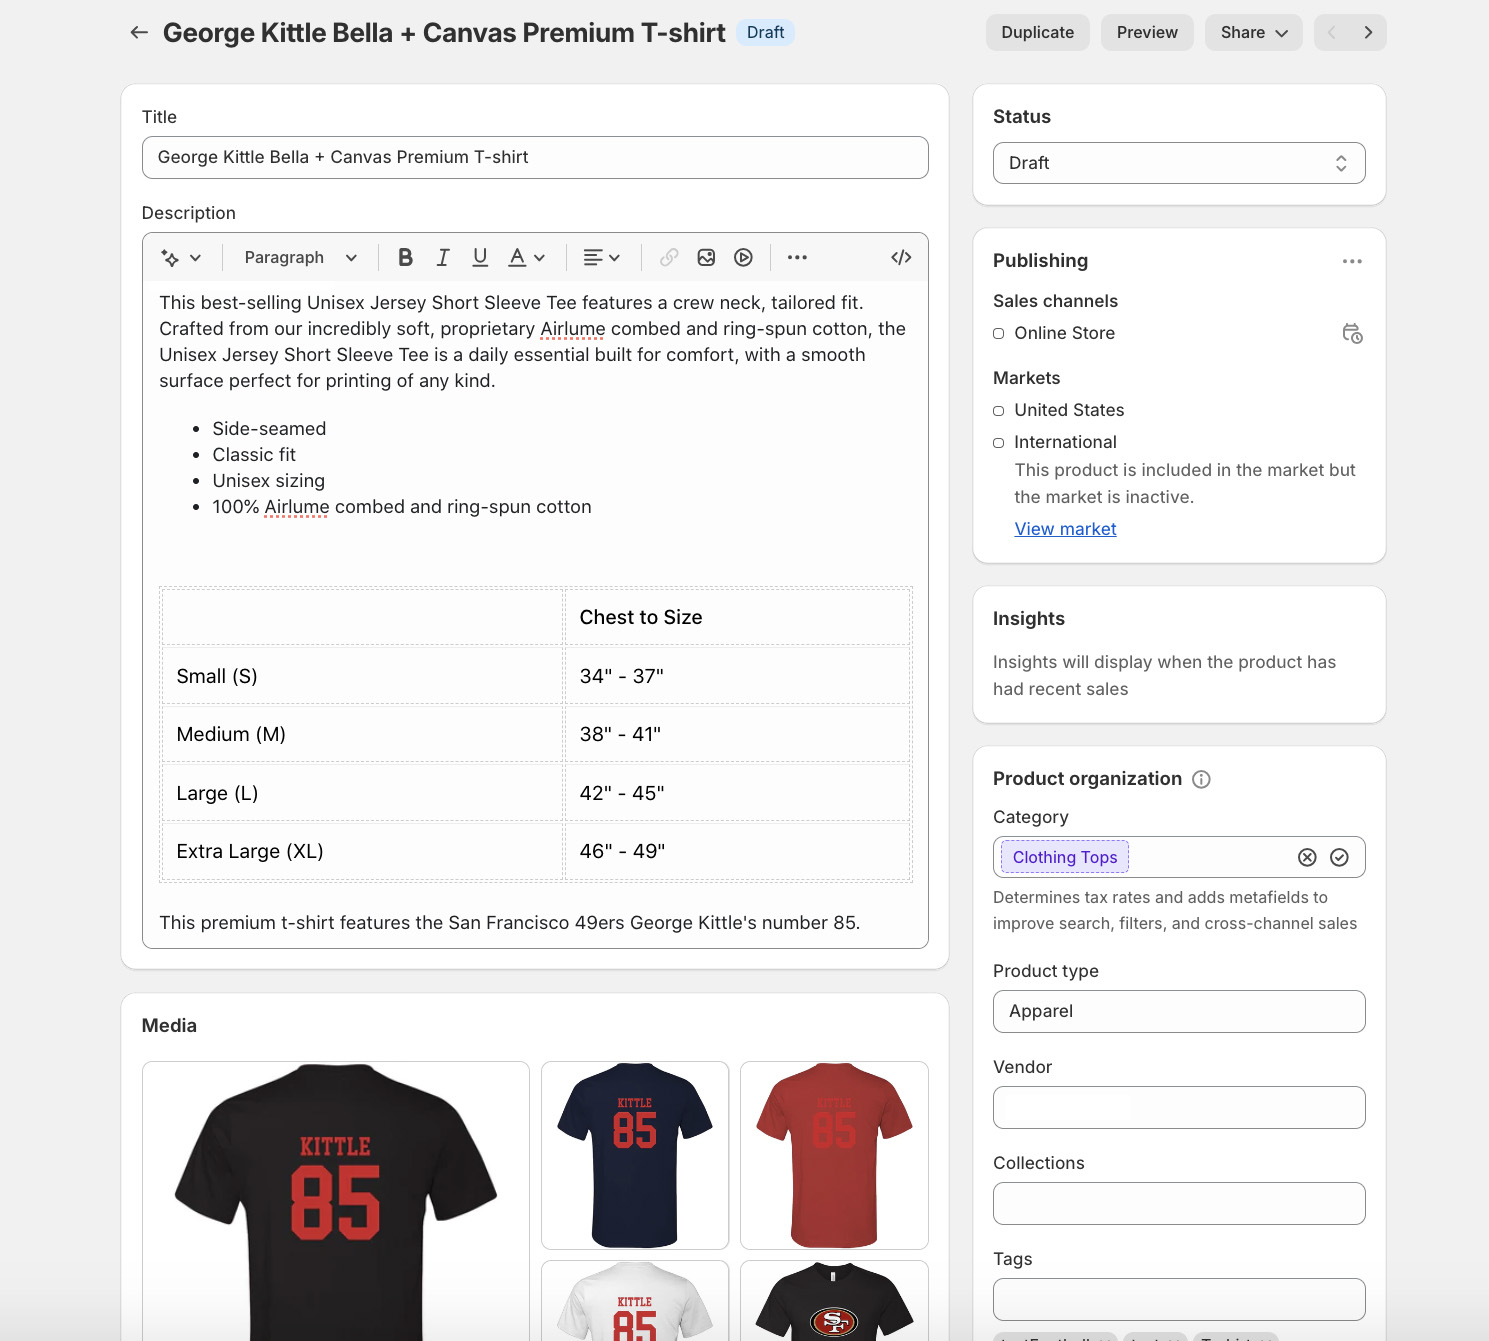
Here is the finished draft mode listing in a Shopify product page. The back design of the shirt is customized with the player's name and number; the title includes the players name and additional personalized data is included in the last line of the product description.