Publishing to E-Commerce Channels
Shopify
-
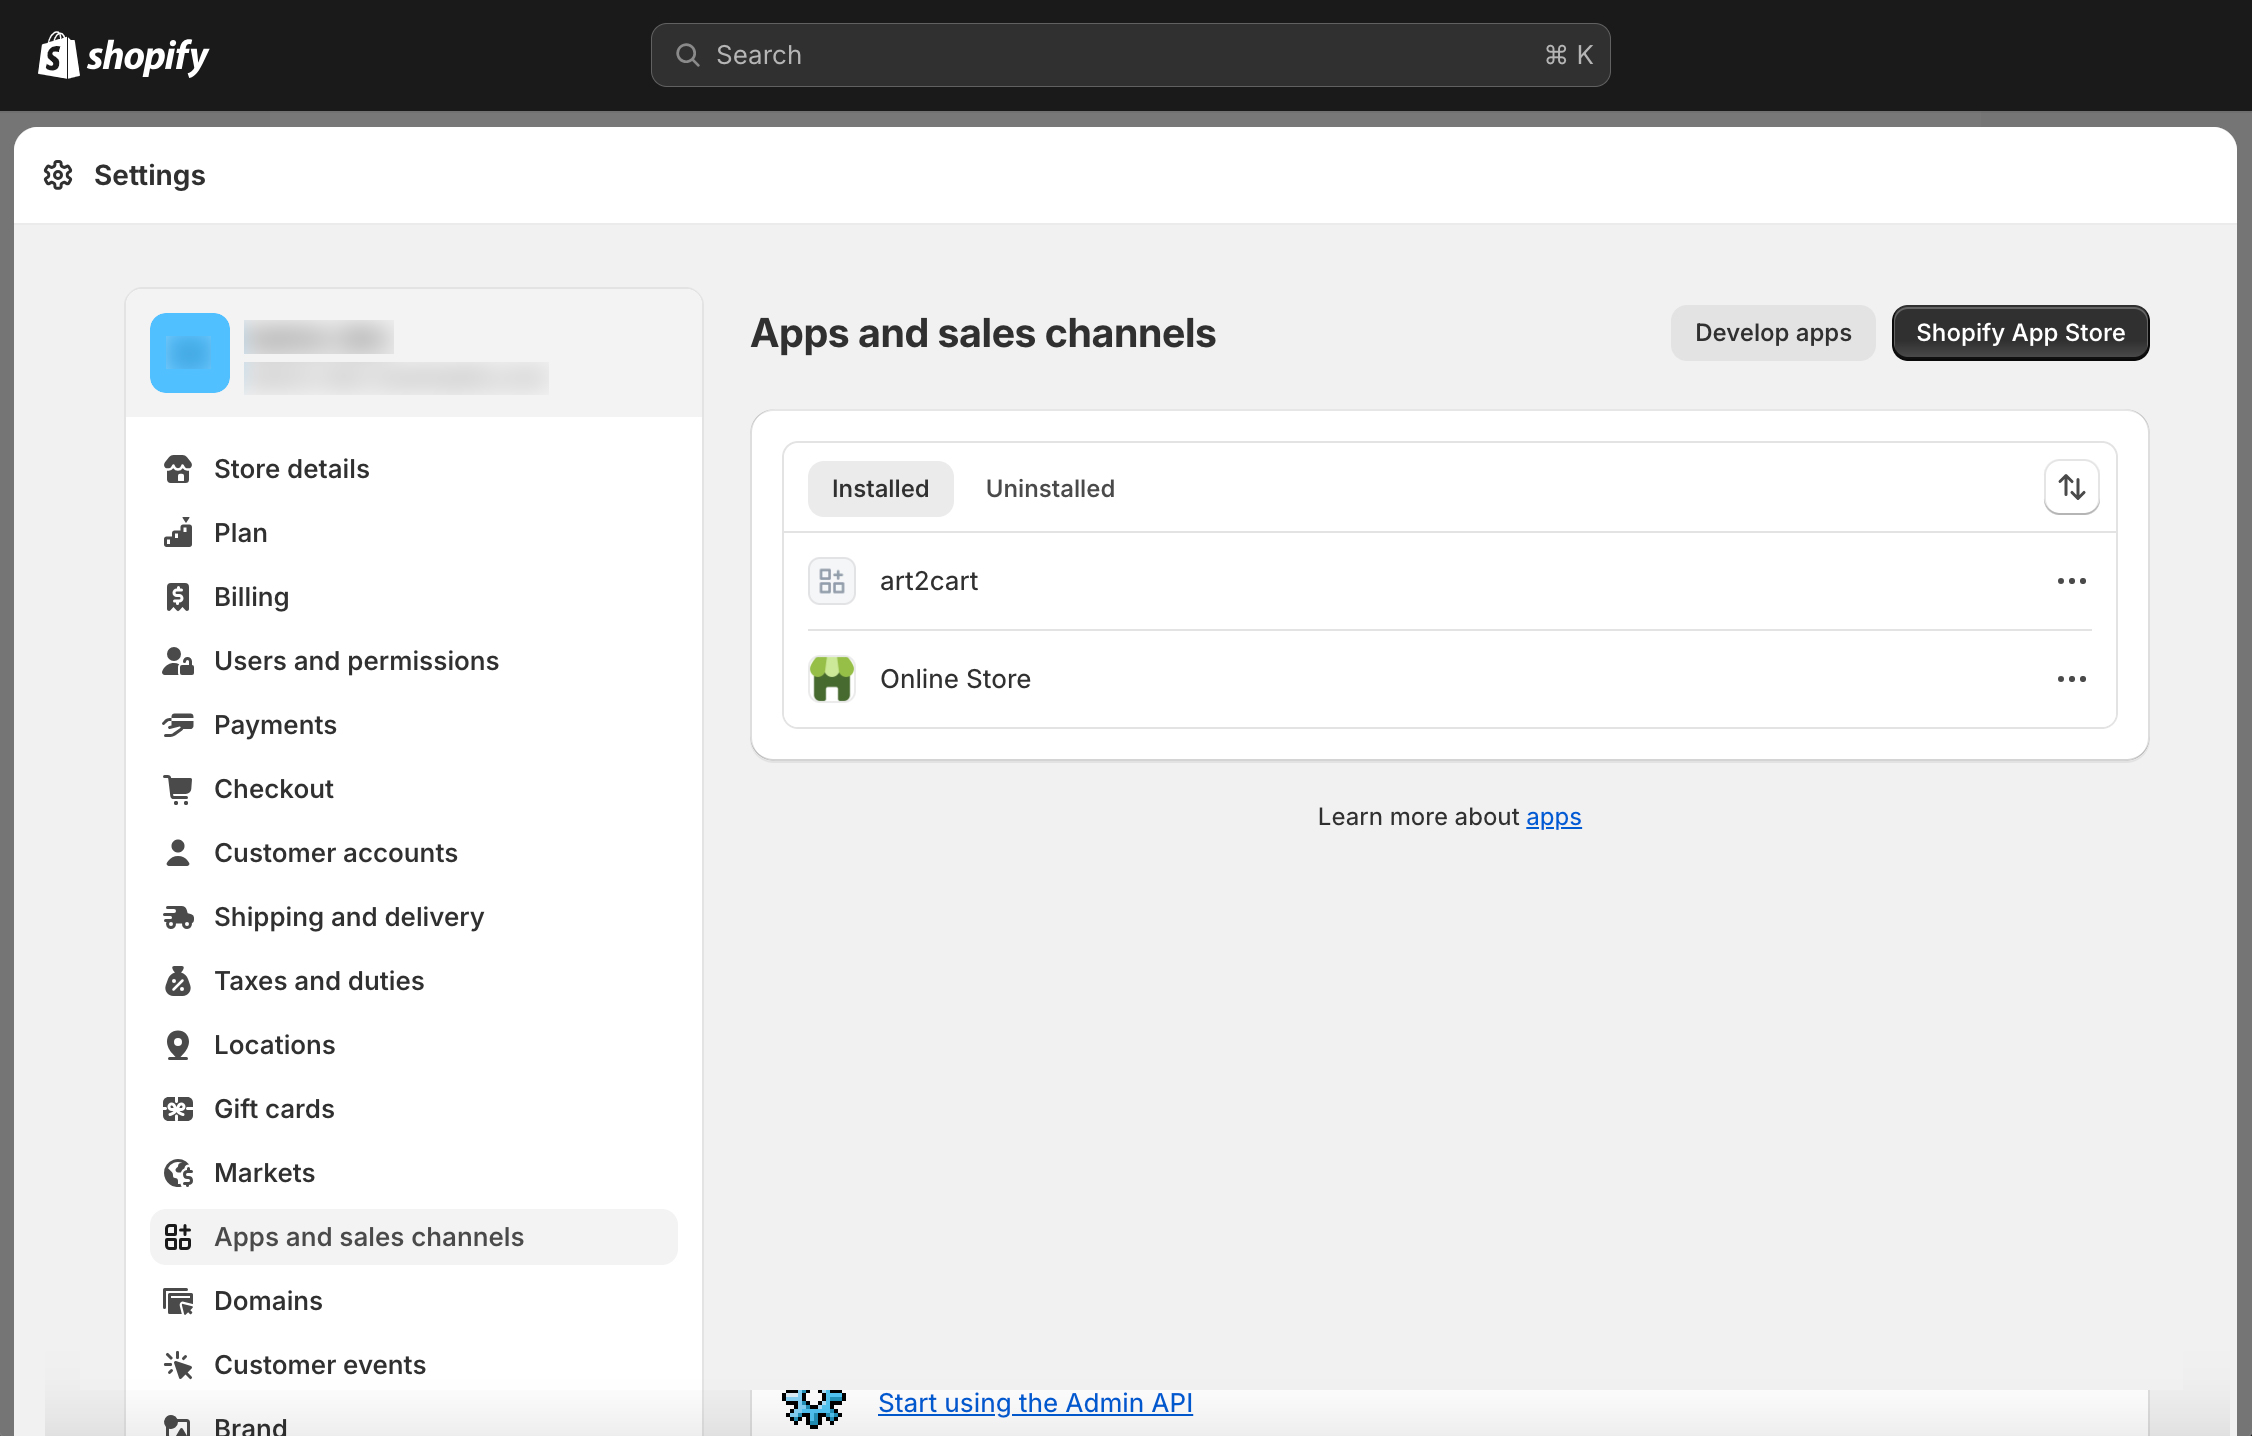
Click Sales channels in the left menu on the Shopify dashboard and the select Apps & sales channels Settings at bottom of Sales channel pop-up menu.
-
On Setting page, click on Apps and sales channels.
- Click Develop apps button and in the next window click Allow custom development and again on the confirmation dialog

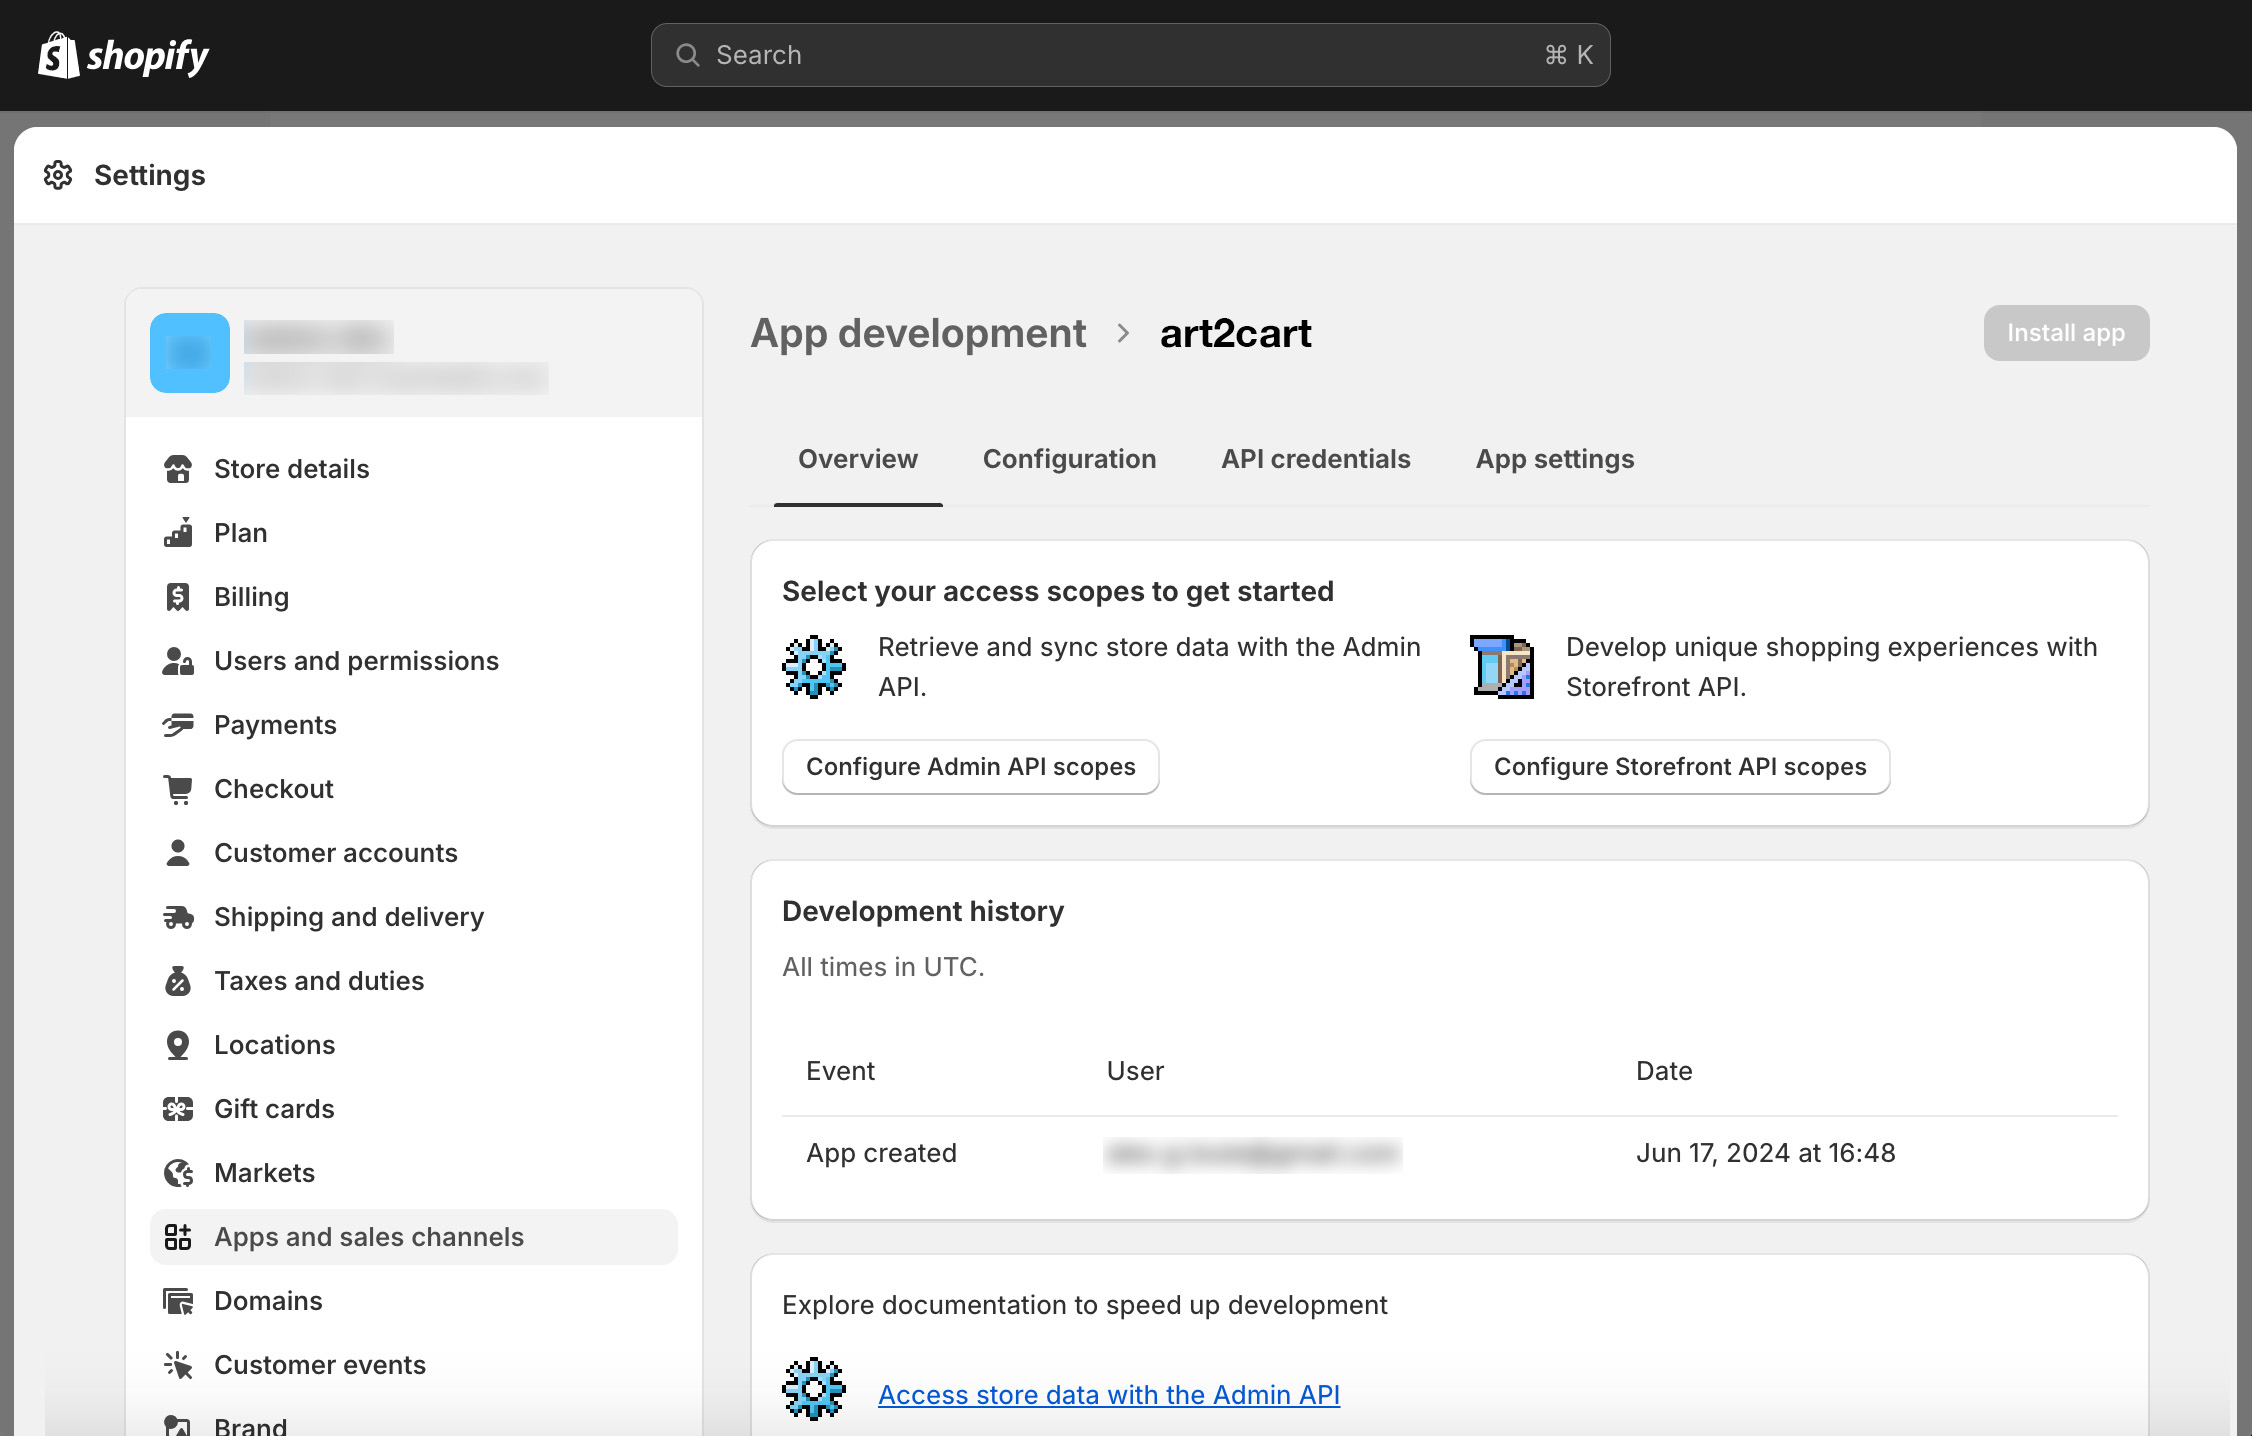
- Now Create an app, name it Art2Cart, and click Create app.

- On the App Dashboard, click the Overview tab and then click Configure Admin API Scopes.
-
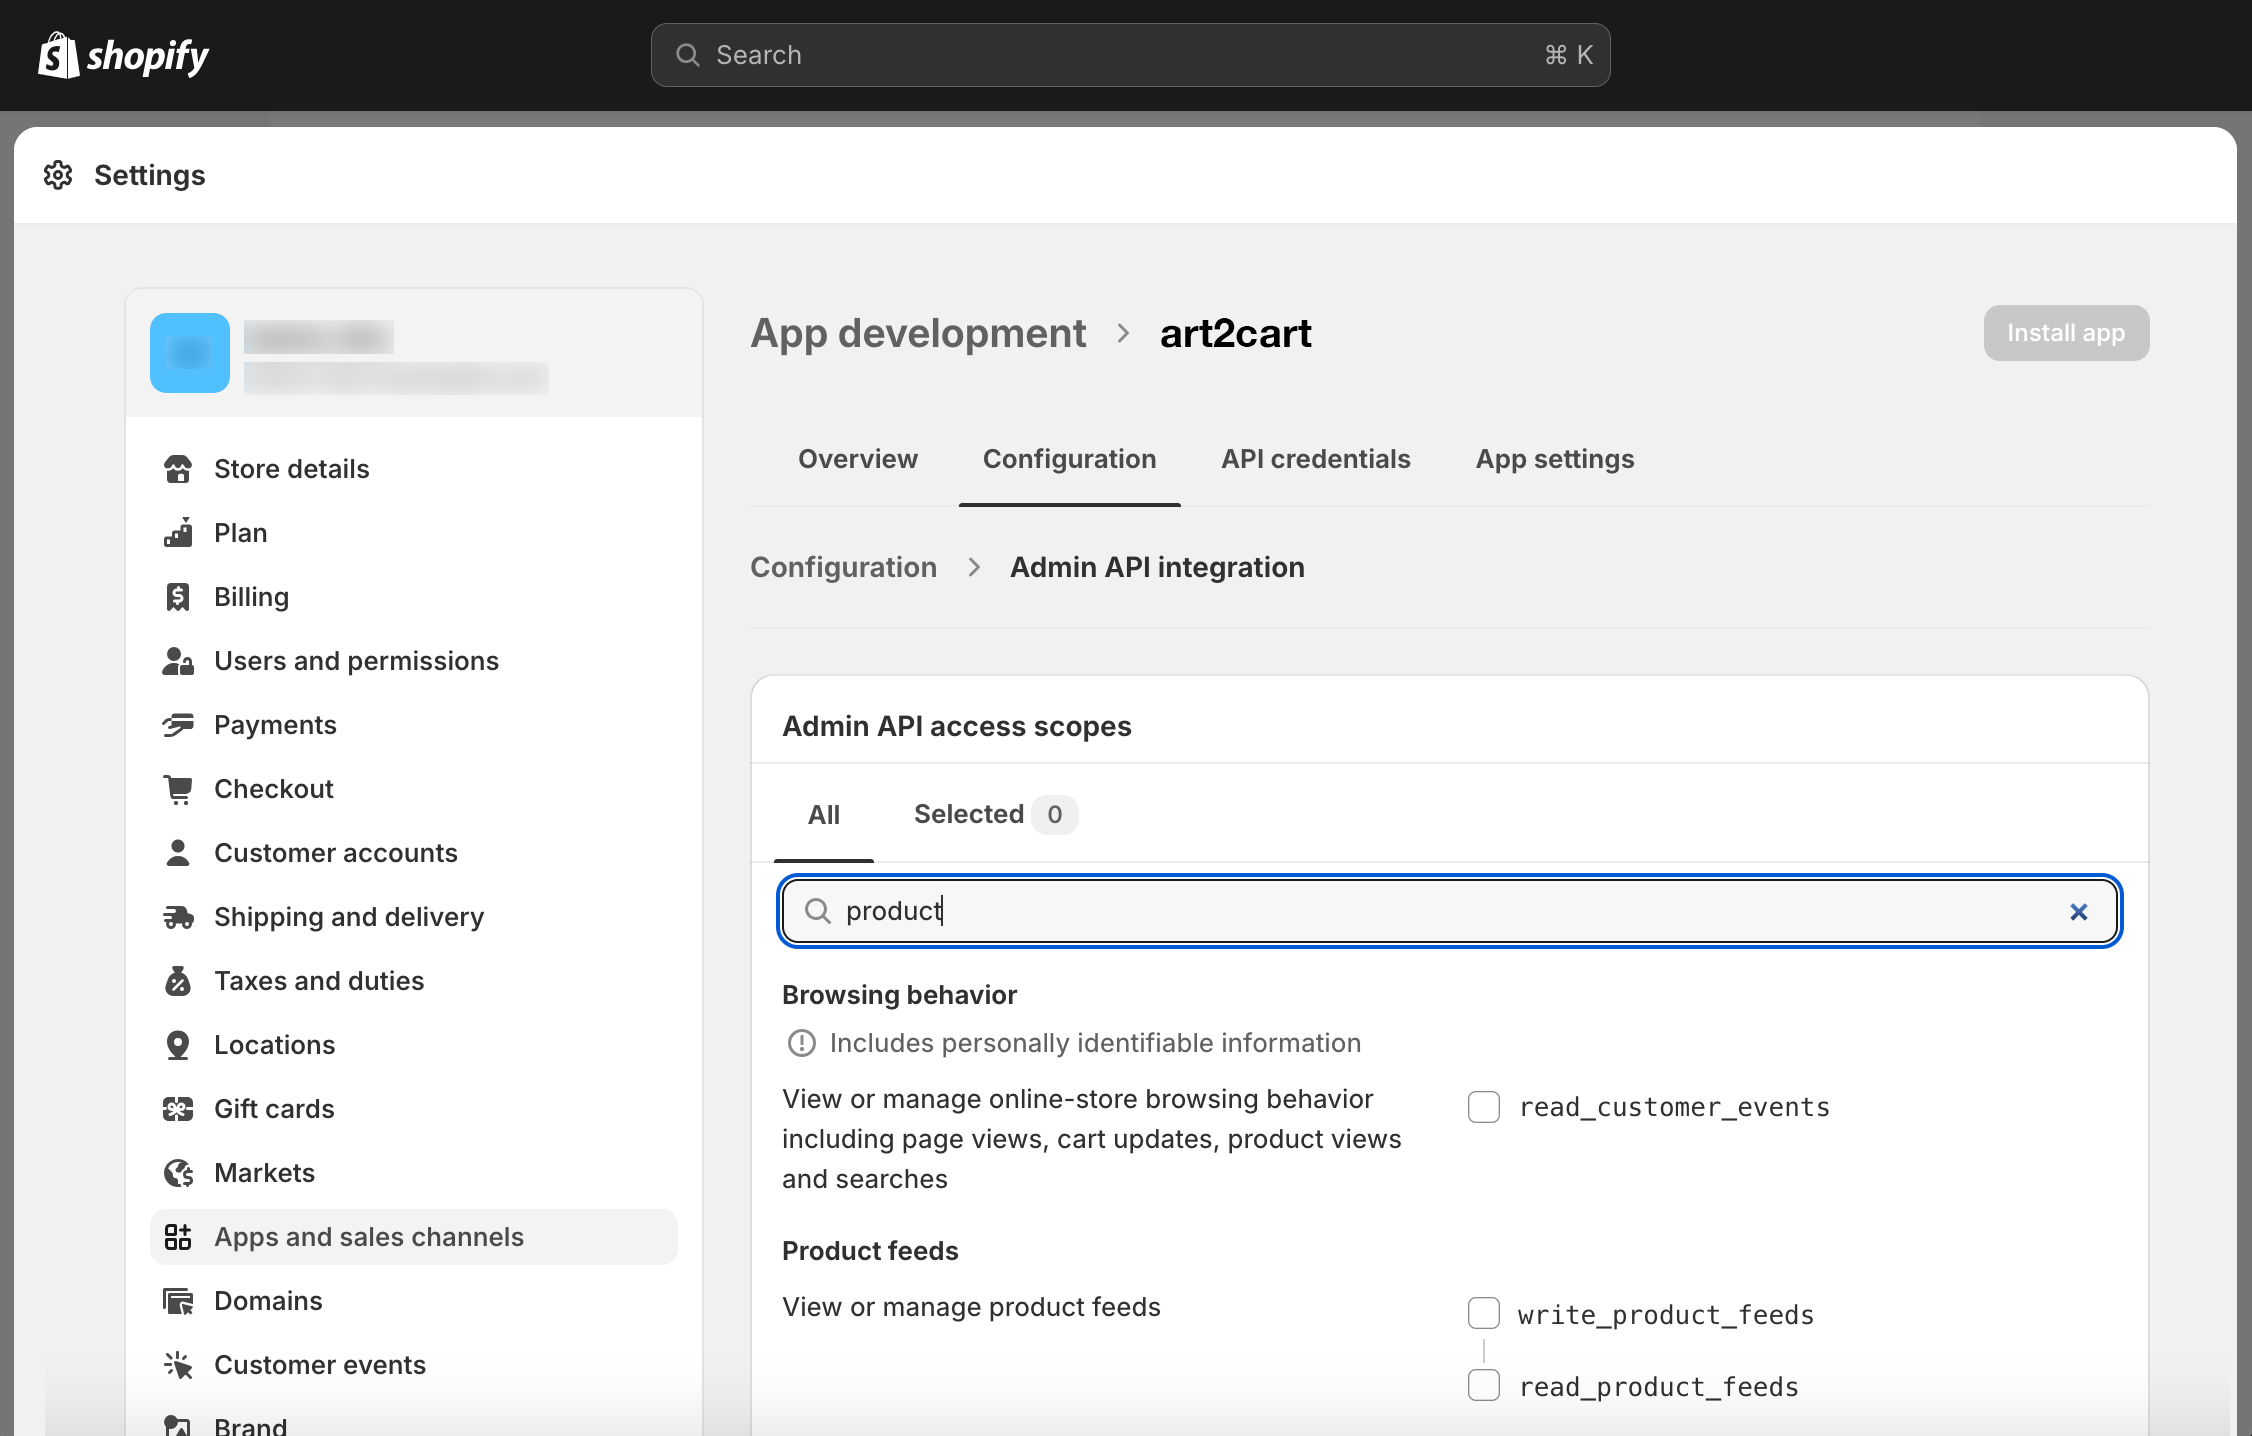
In the search filter on the Configuration tab, enter "product" and then click the checkboxes for
write_product_feeds, read_product_feeds, write_product_listings, read_product_listings, write_products, read_products, write_publications, read_publications, write_inventory, read_inventory, write_locations, and read_locations. -
Click Save to save these permissions and finally click Install app and confirm in the dialog box.
-
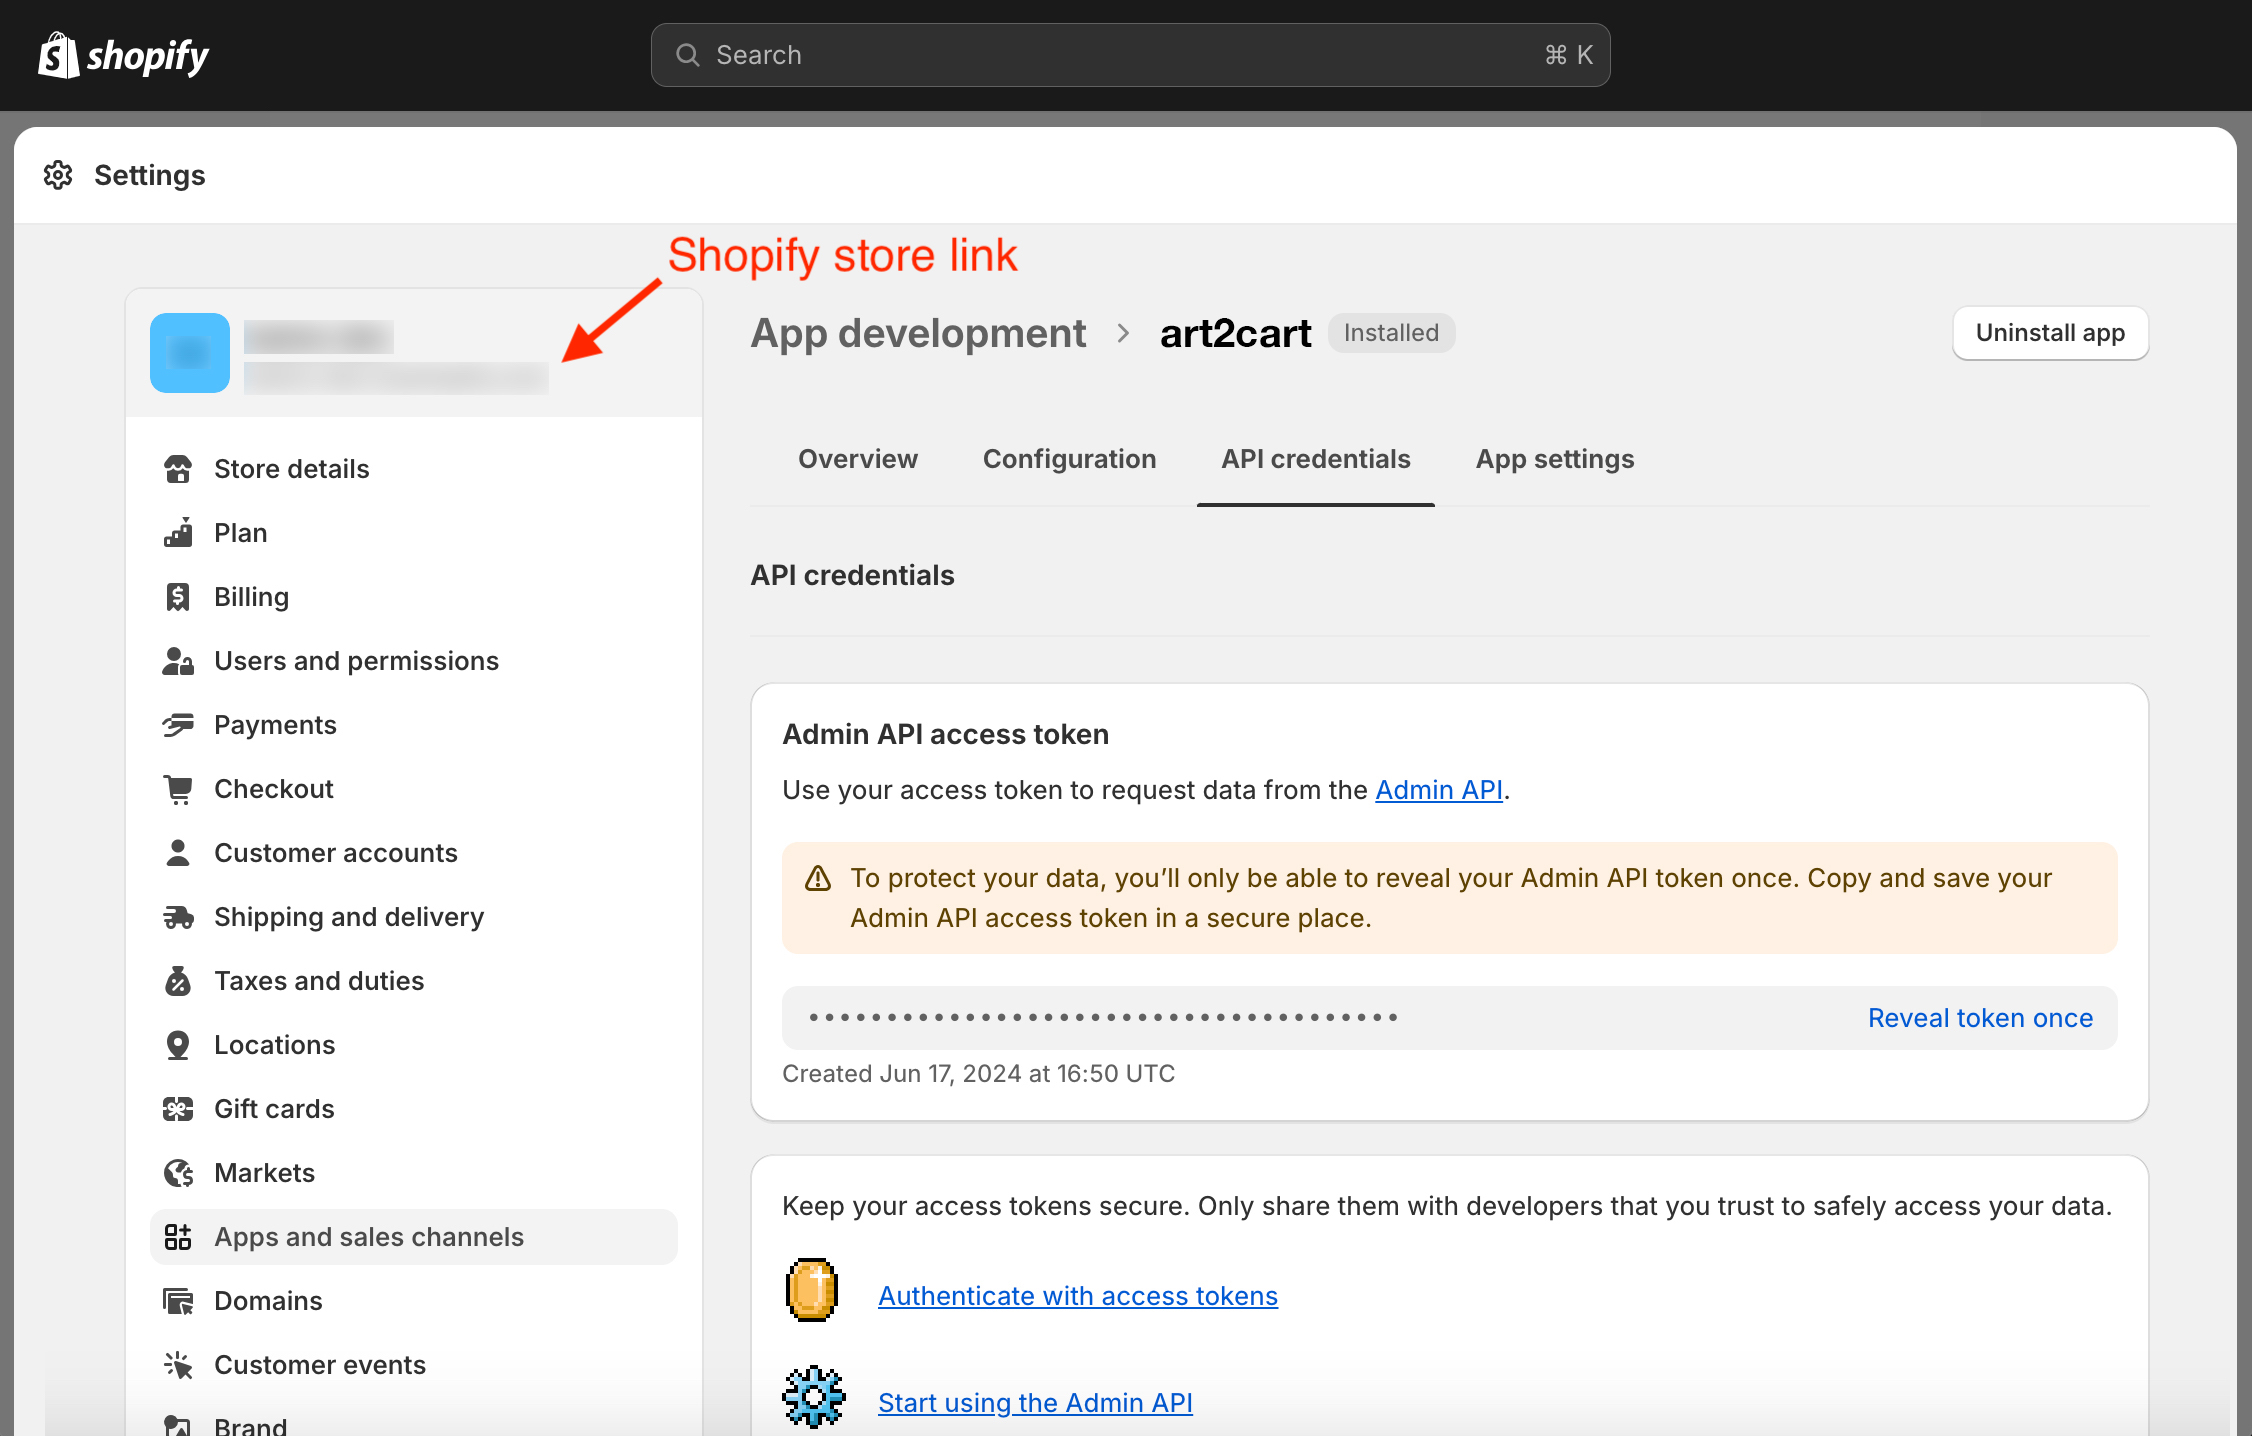
Back on the App Dashboard, click the API Credentials tab. In the Admin API access token section of the API credential tab, click Reveal token once.
-
Click the clipboard icon to copy the token. Also take note of your Shopify store link as indicated, as you will also need that information.
-
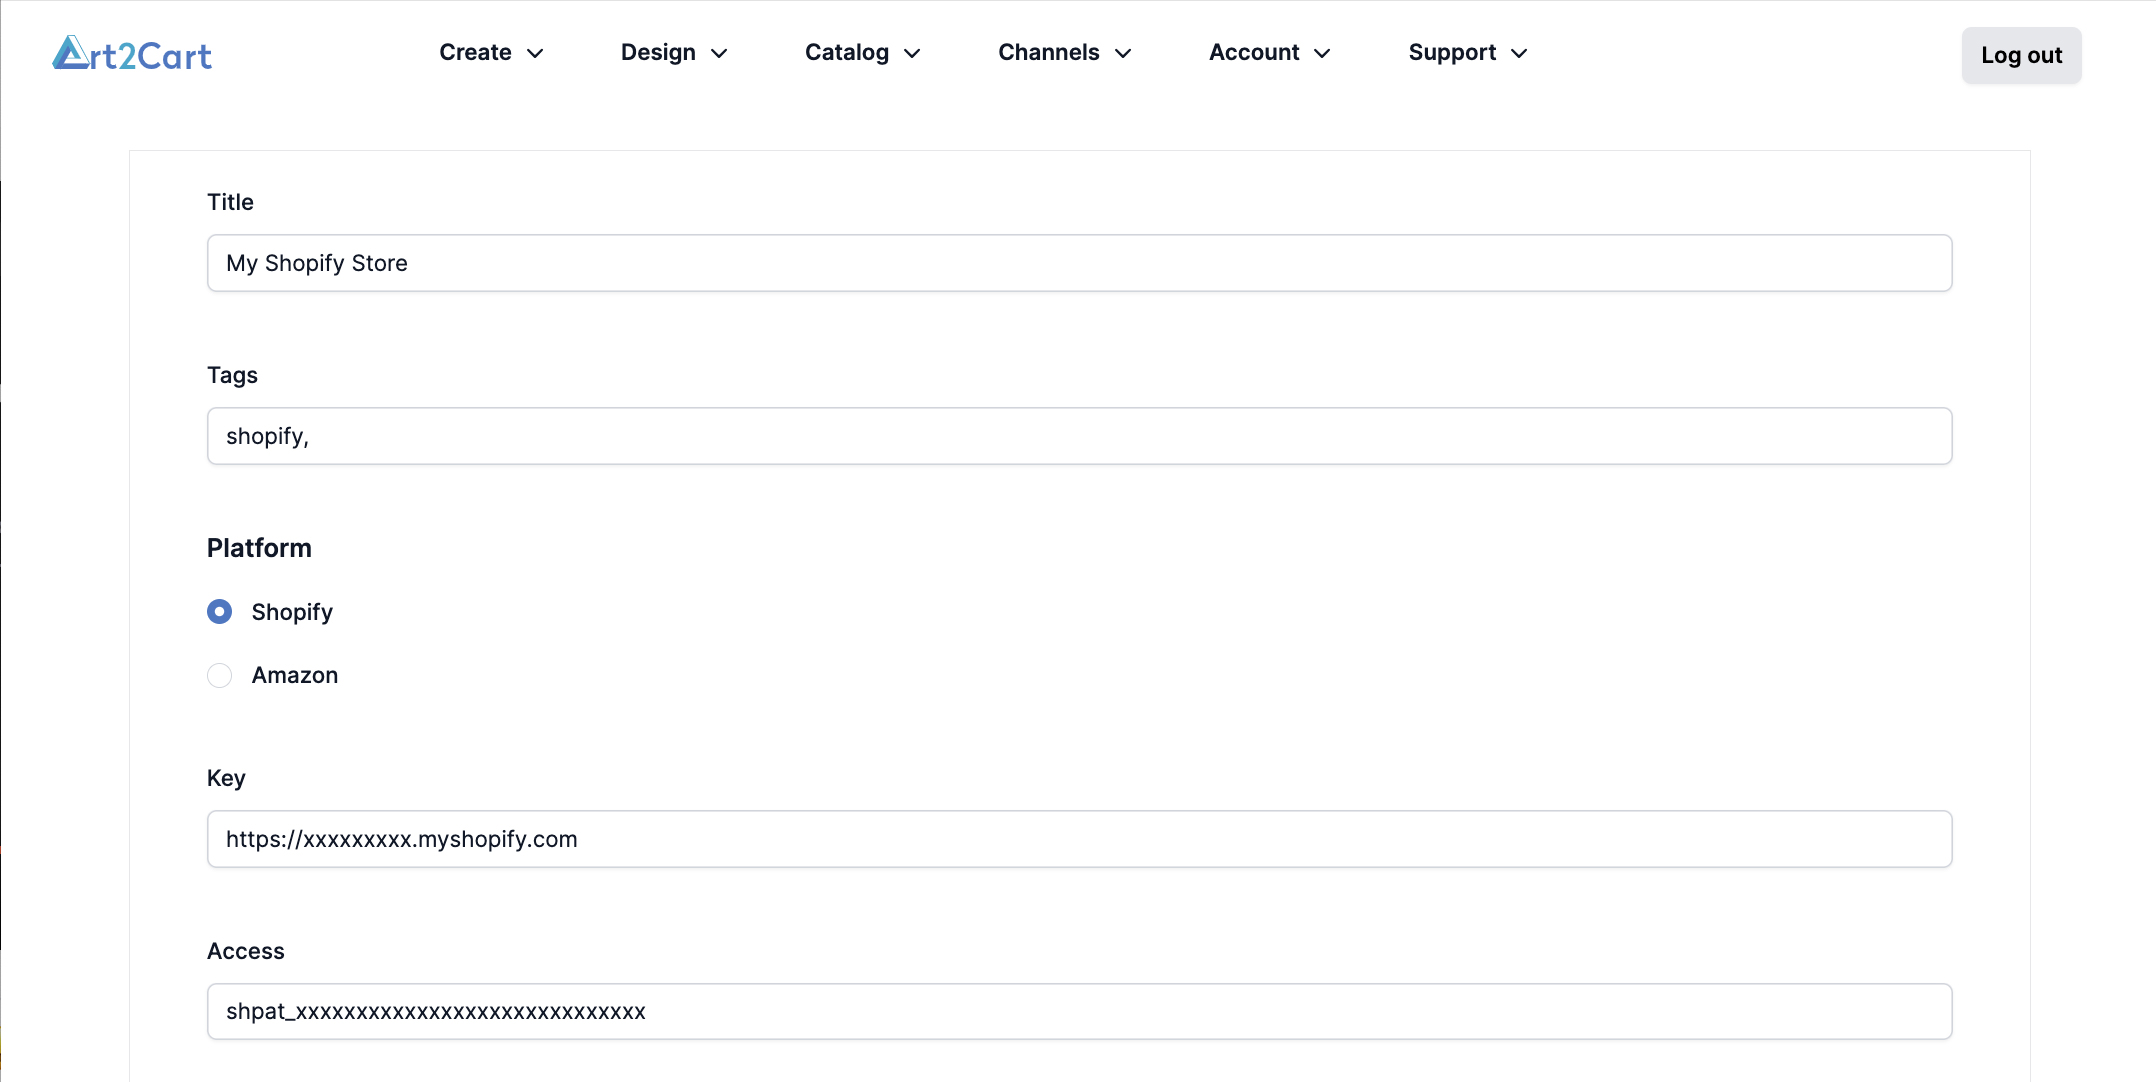
With the token and the store link, return to Art2Cart.com and select Stores from the Channels menu. Click Add Store.
-
Fill out the Store Name, any Tags and select the Shopify Platform. Then enter your store link into the Key field and the Shopify App token into the Access field. Click Save to allow Art2Cart to publish products and listings directly to your Shopify store.
- If you wish to remove Art2Cart permissions from Shopify, return to the App and sales setting page. Find the Art2Cart installed app (or whatever you named it in step 4), click on the [...] button, and select Uninstall from the pop-up menu.
Working with Shopify Metafields
Data from Art2Cart can be passed along with a generated Shopify listing by using metafields that are defined on the Stores page. Some additional setup is required in the Shopify dashboard as well to include this information in the finished listing. For additional reference on Art2Cart metafields, follow this link.
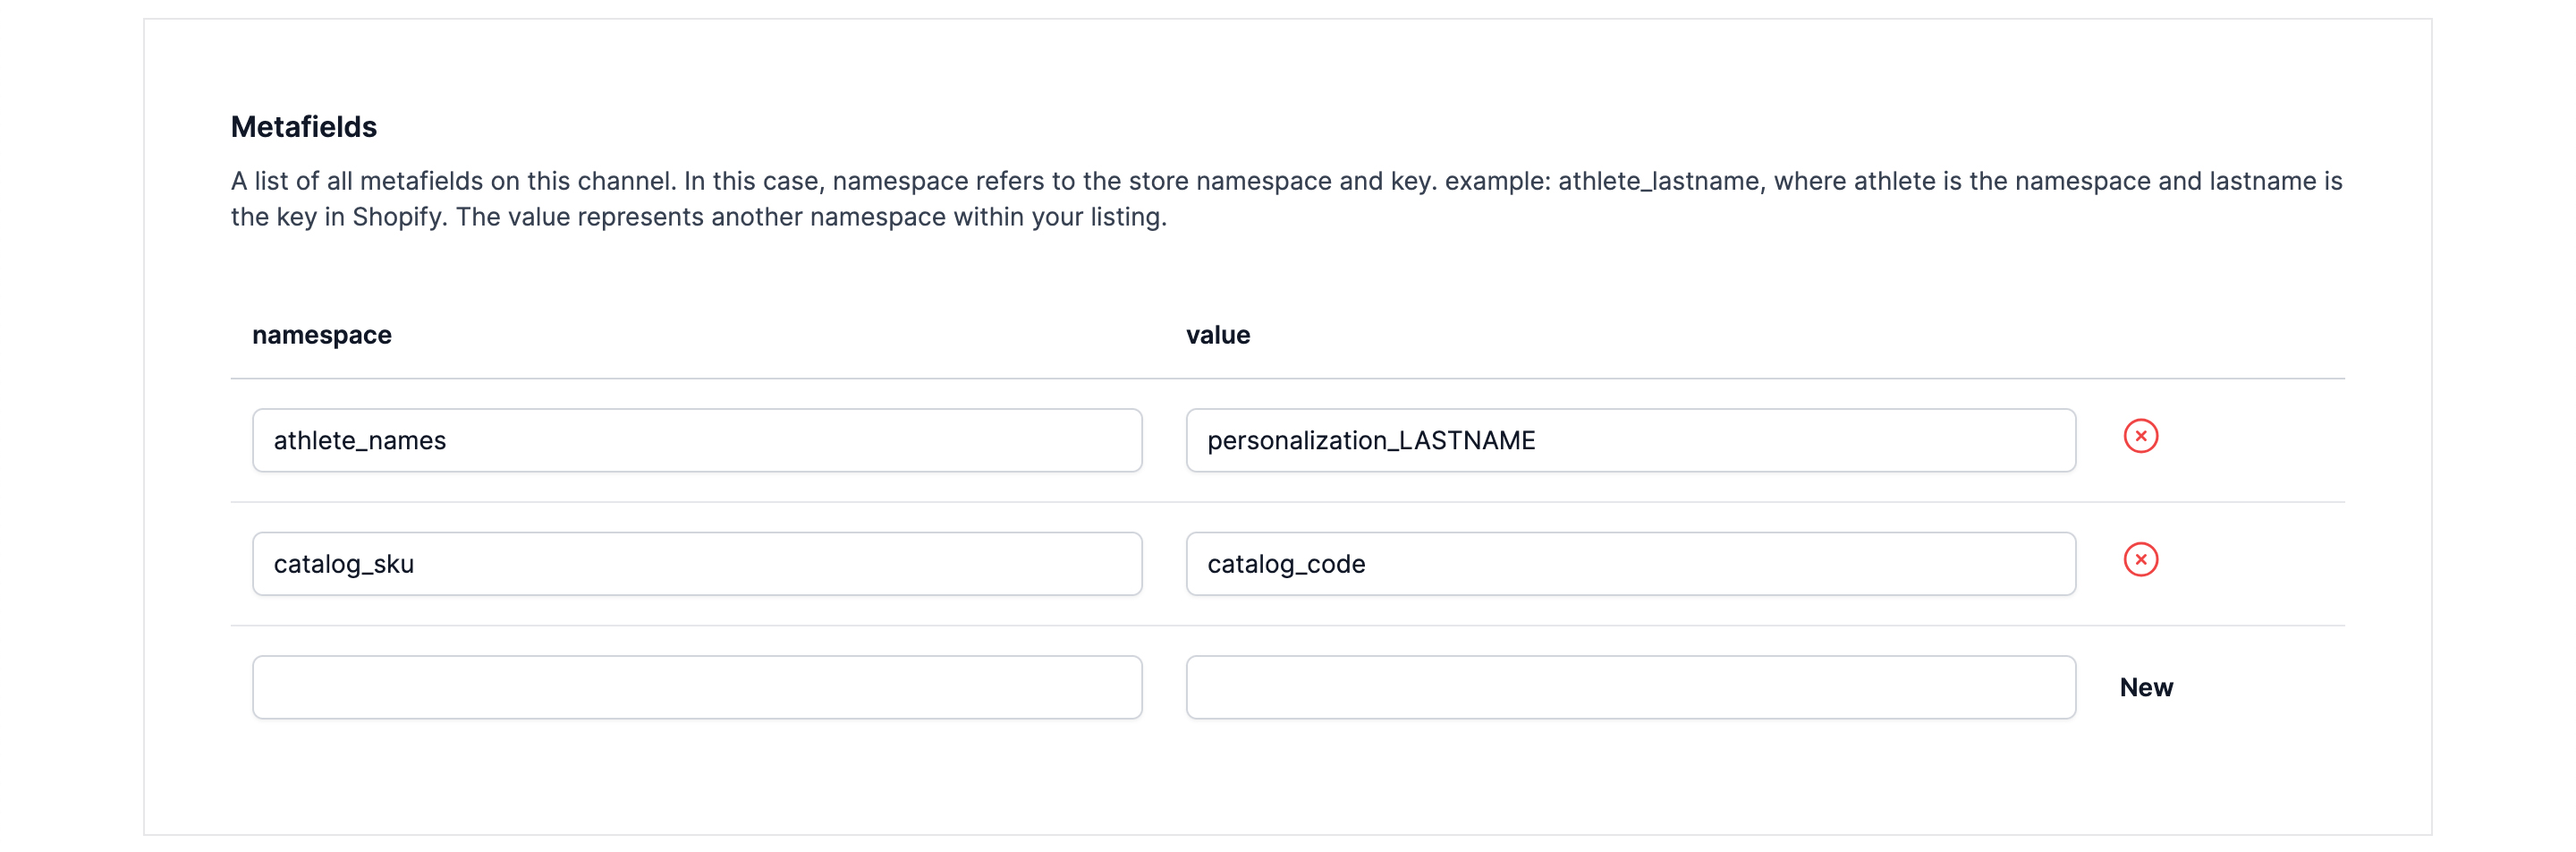
- First, in the Store page for the Shopify store, create an Art2Cart namespace with the pattern: ShopifyMetafieldNamespace_ShopifyMetafieldValue and then in the value field enter the desired data to be exported. **Note that the underscore "*" is a required separator here.**
-
Run your Listing Request in Art2Cart with a Shopify channel ouput.
-
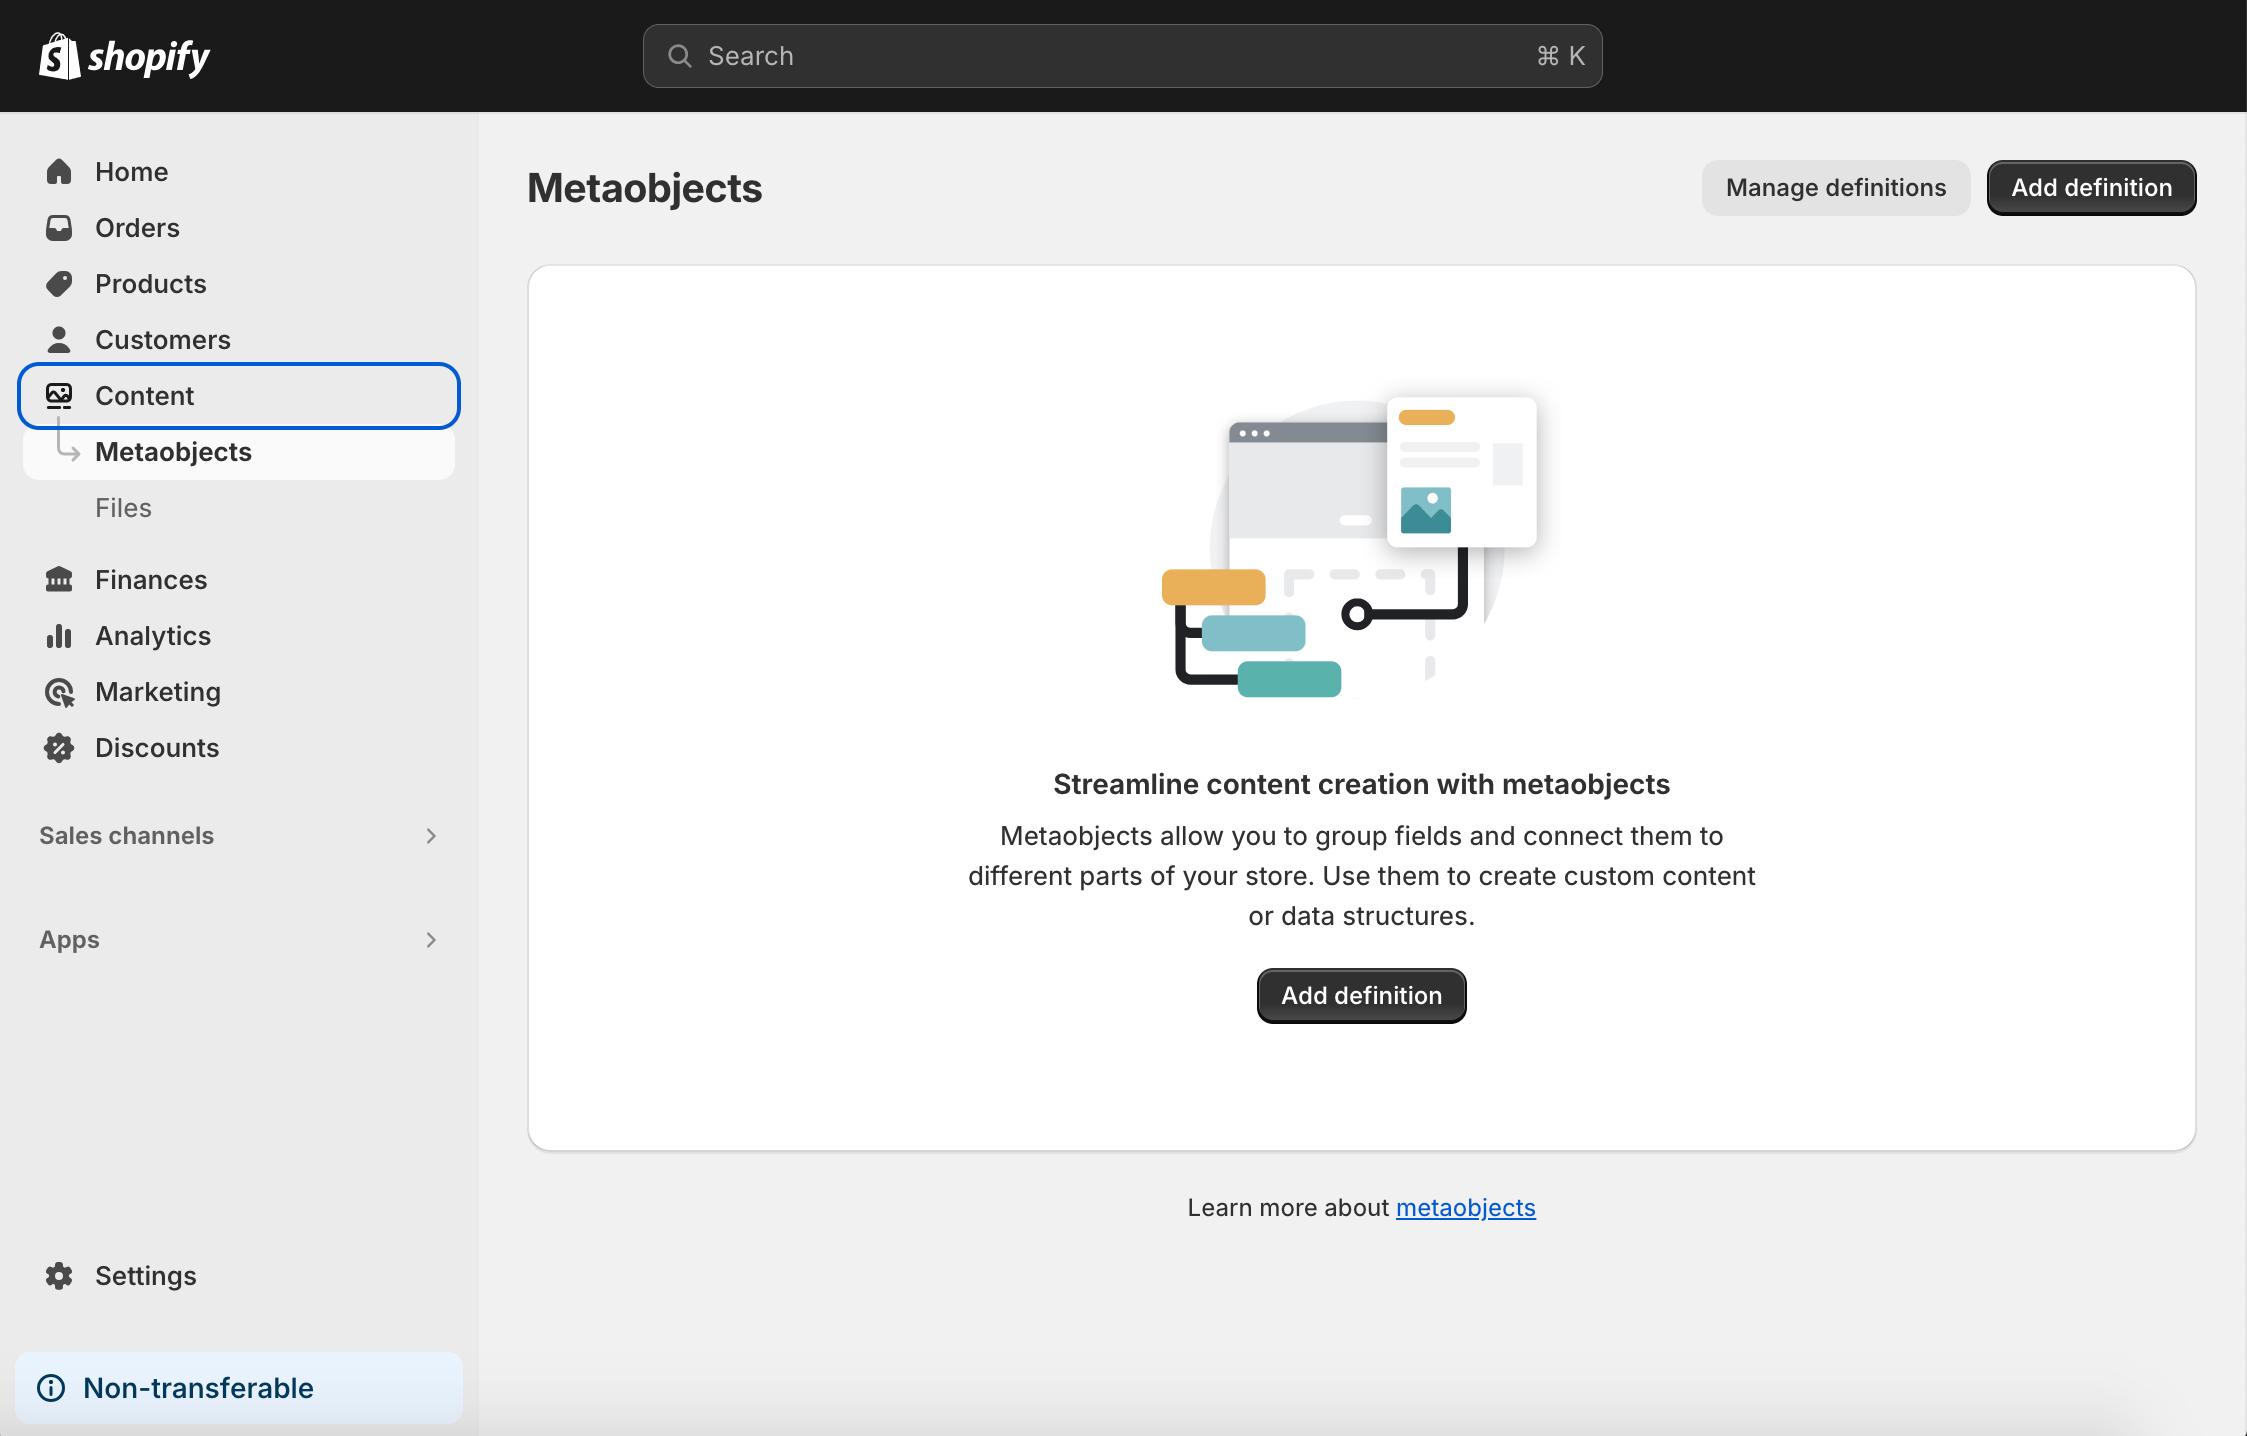
When the Art2Cart job is completed, go tothe the Shopify Store Admin page. From the left menu, select Contents - Metaobjects and click on the Manage Definition button. (Alternatively, click Settings on the left menu in the Admin page and then on the Setting page left menu, click Custom Data.)
- On the Custom Data Setting page, click on Products.
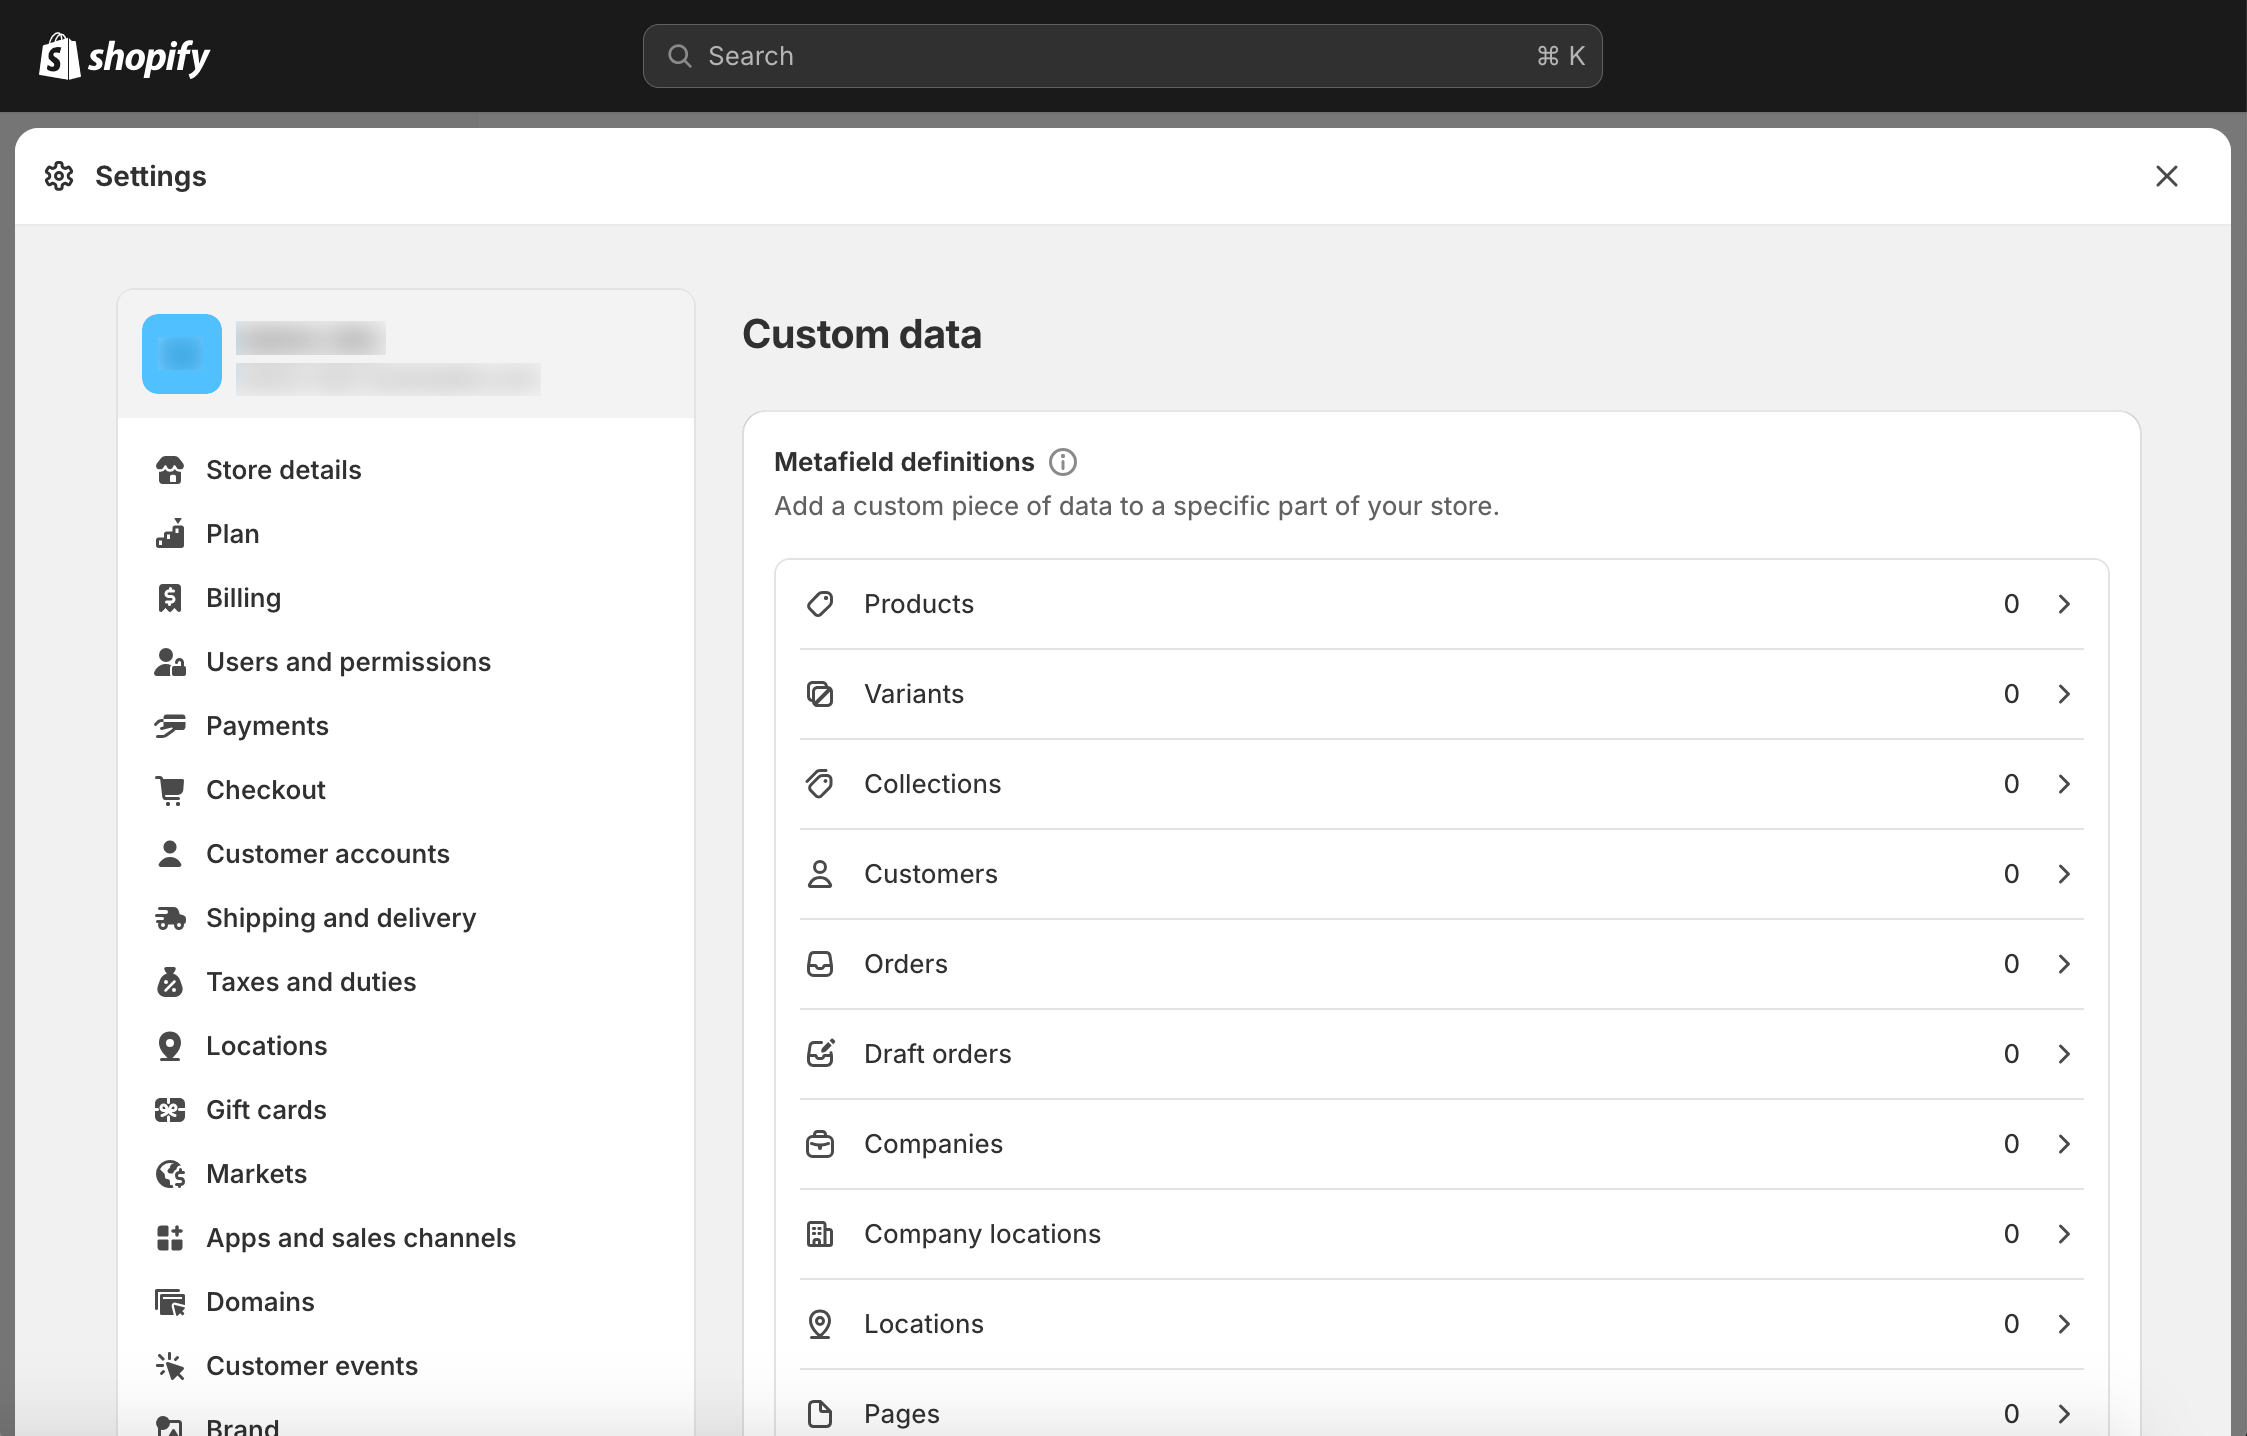
- On the Products Custom Data page, click on View unstructured metafields.

- In the list, click the Add definition button to define the metafield.
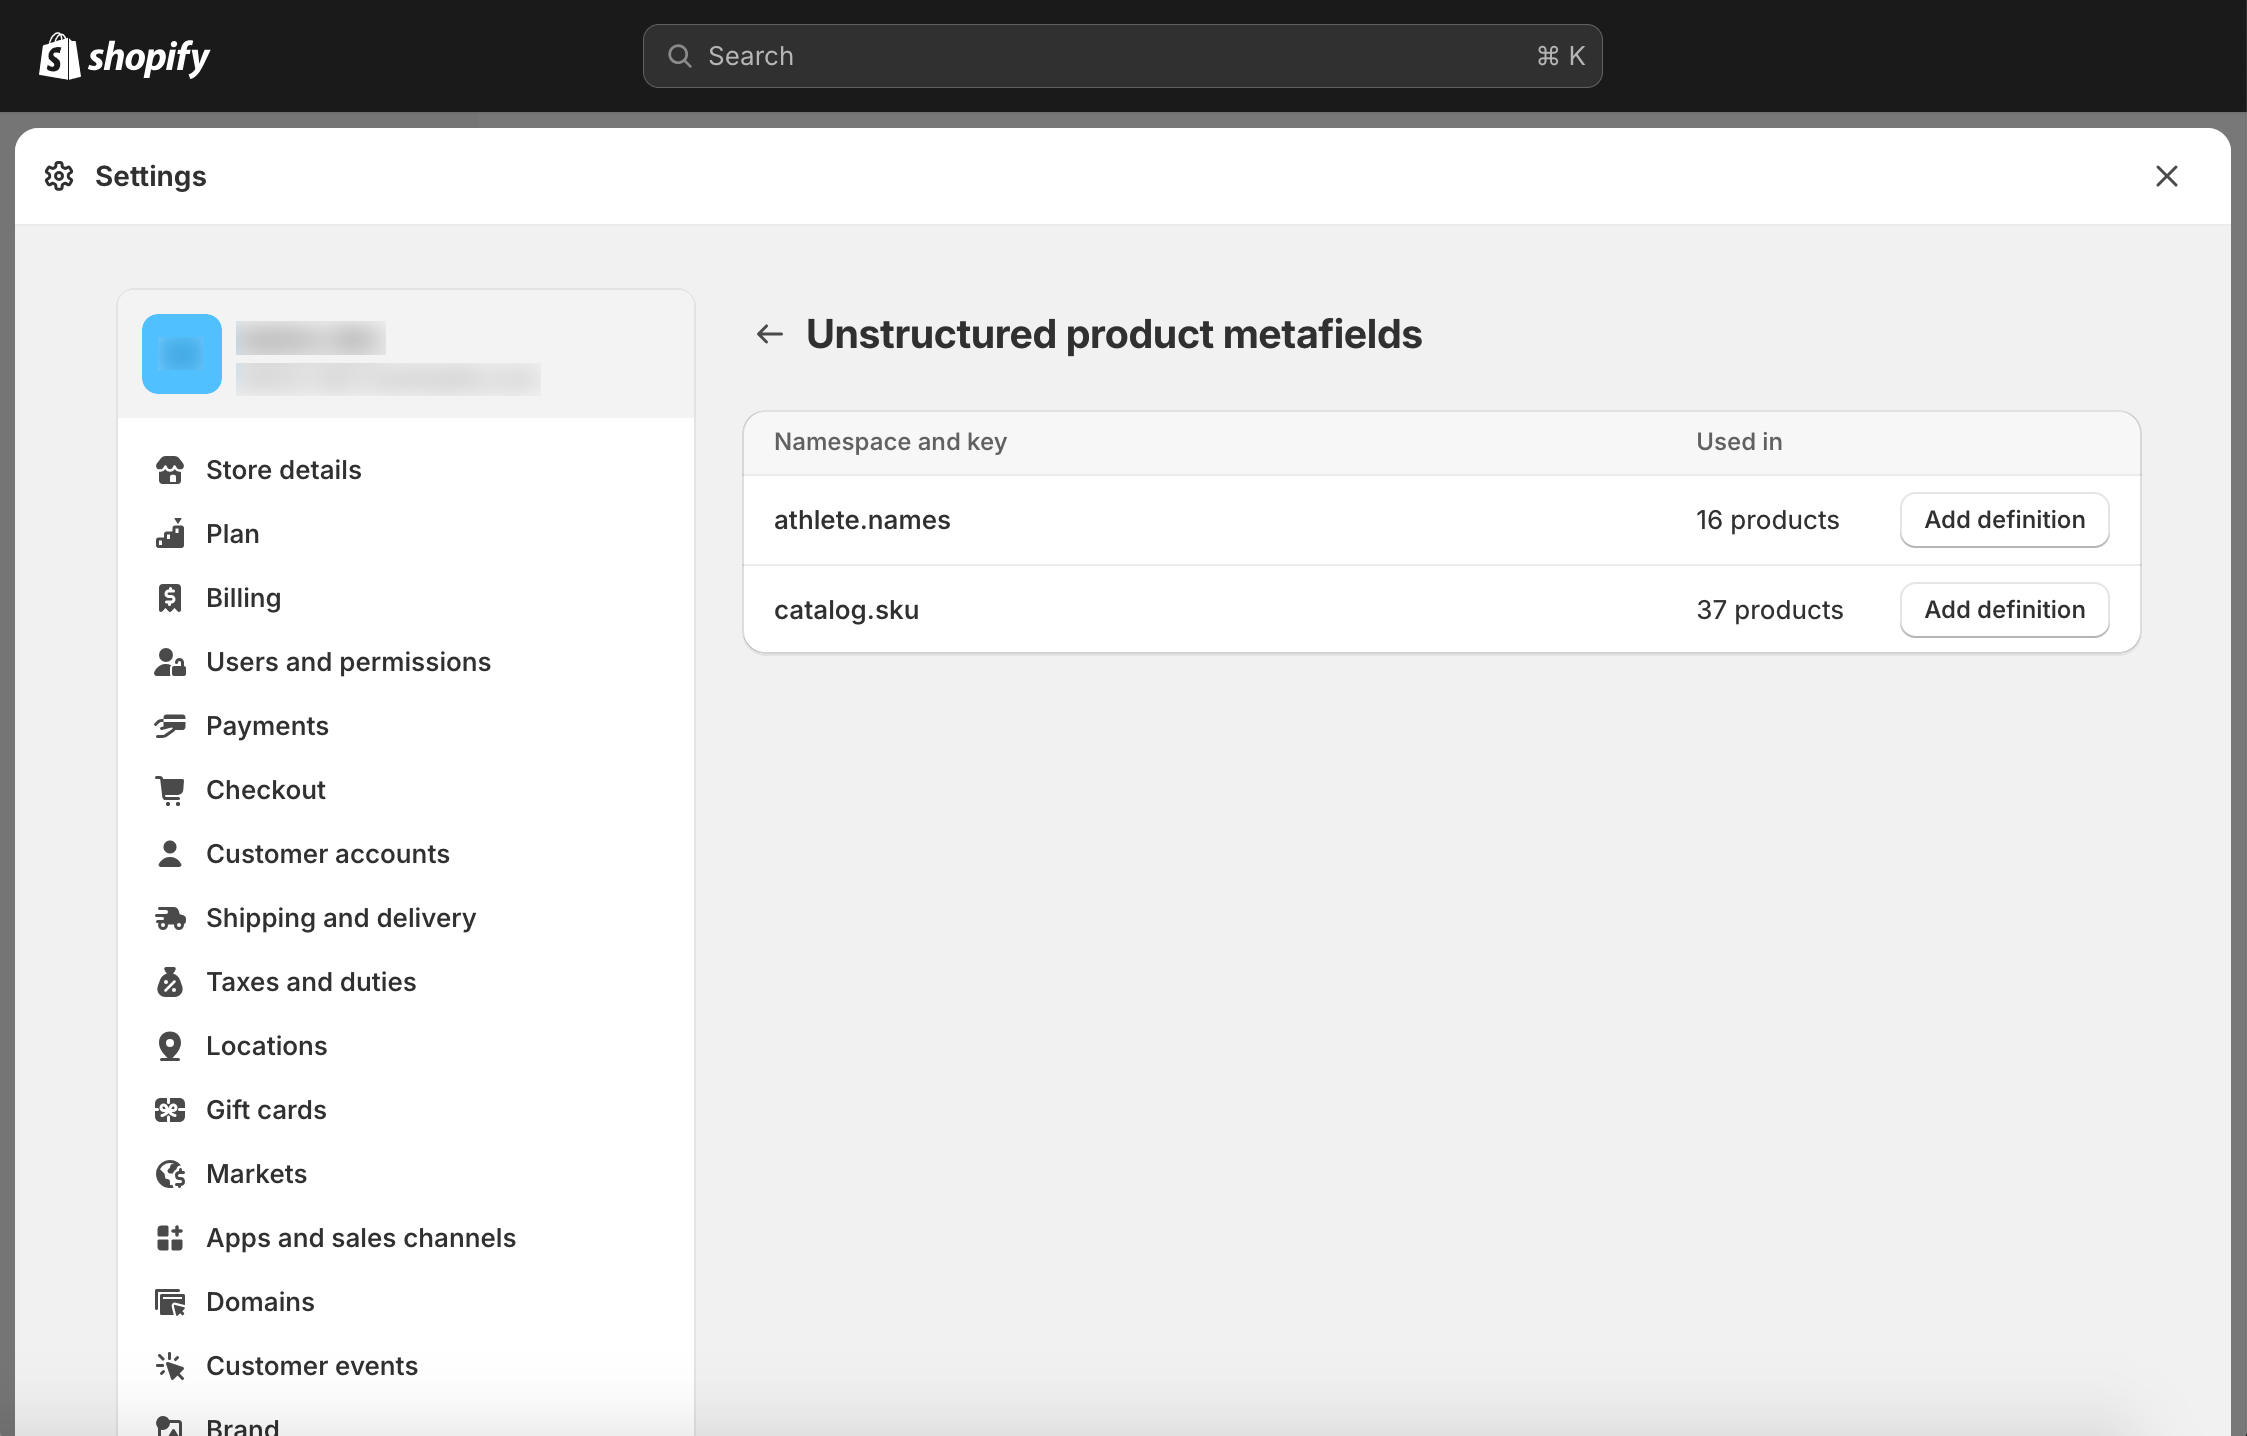
- On the Definition page, enter a display name for the metafield data and click the Select Type button. Select Single line text from the pop-up menu. At this time, Art2Cart only supports this option.

-
Save the definition. Repeat the Add Definition procedure for any remaining unstructured metafields in the list.
-
Close the Shopify Setting page by clicking the X in the upper right corner to return to the Shopify Admin.
-
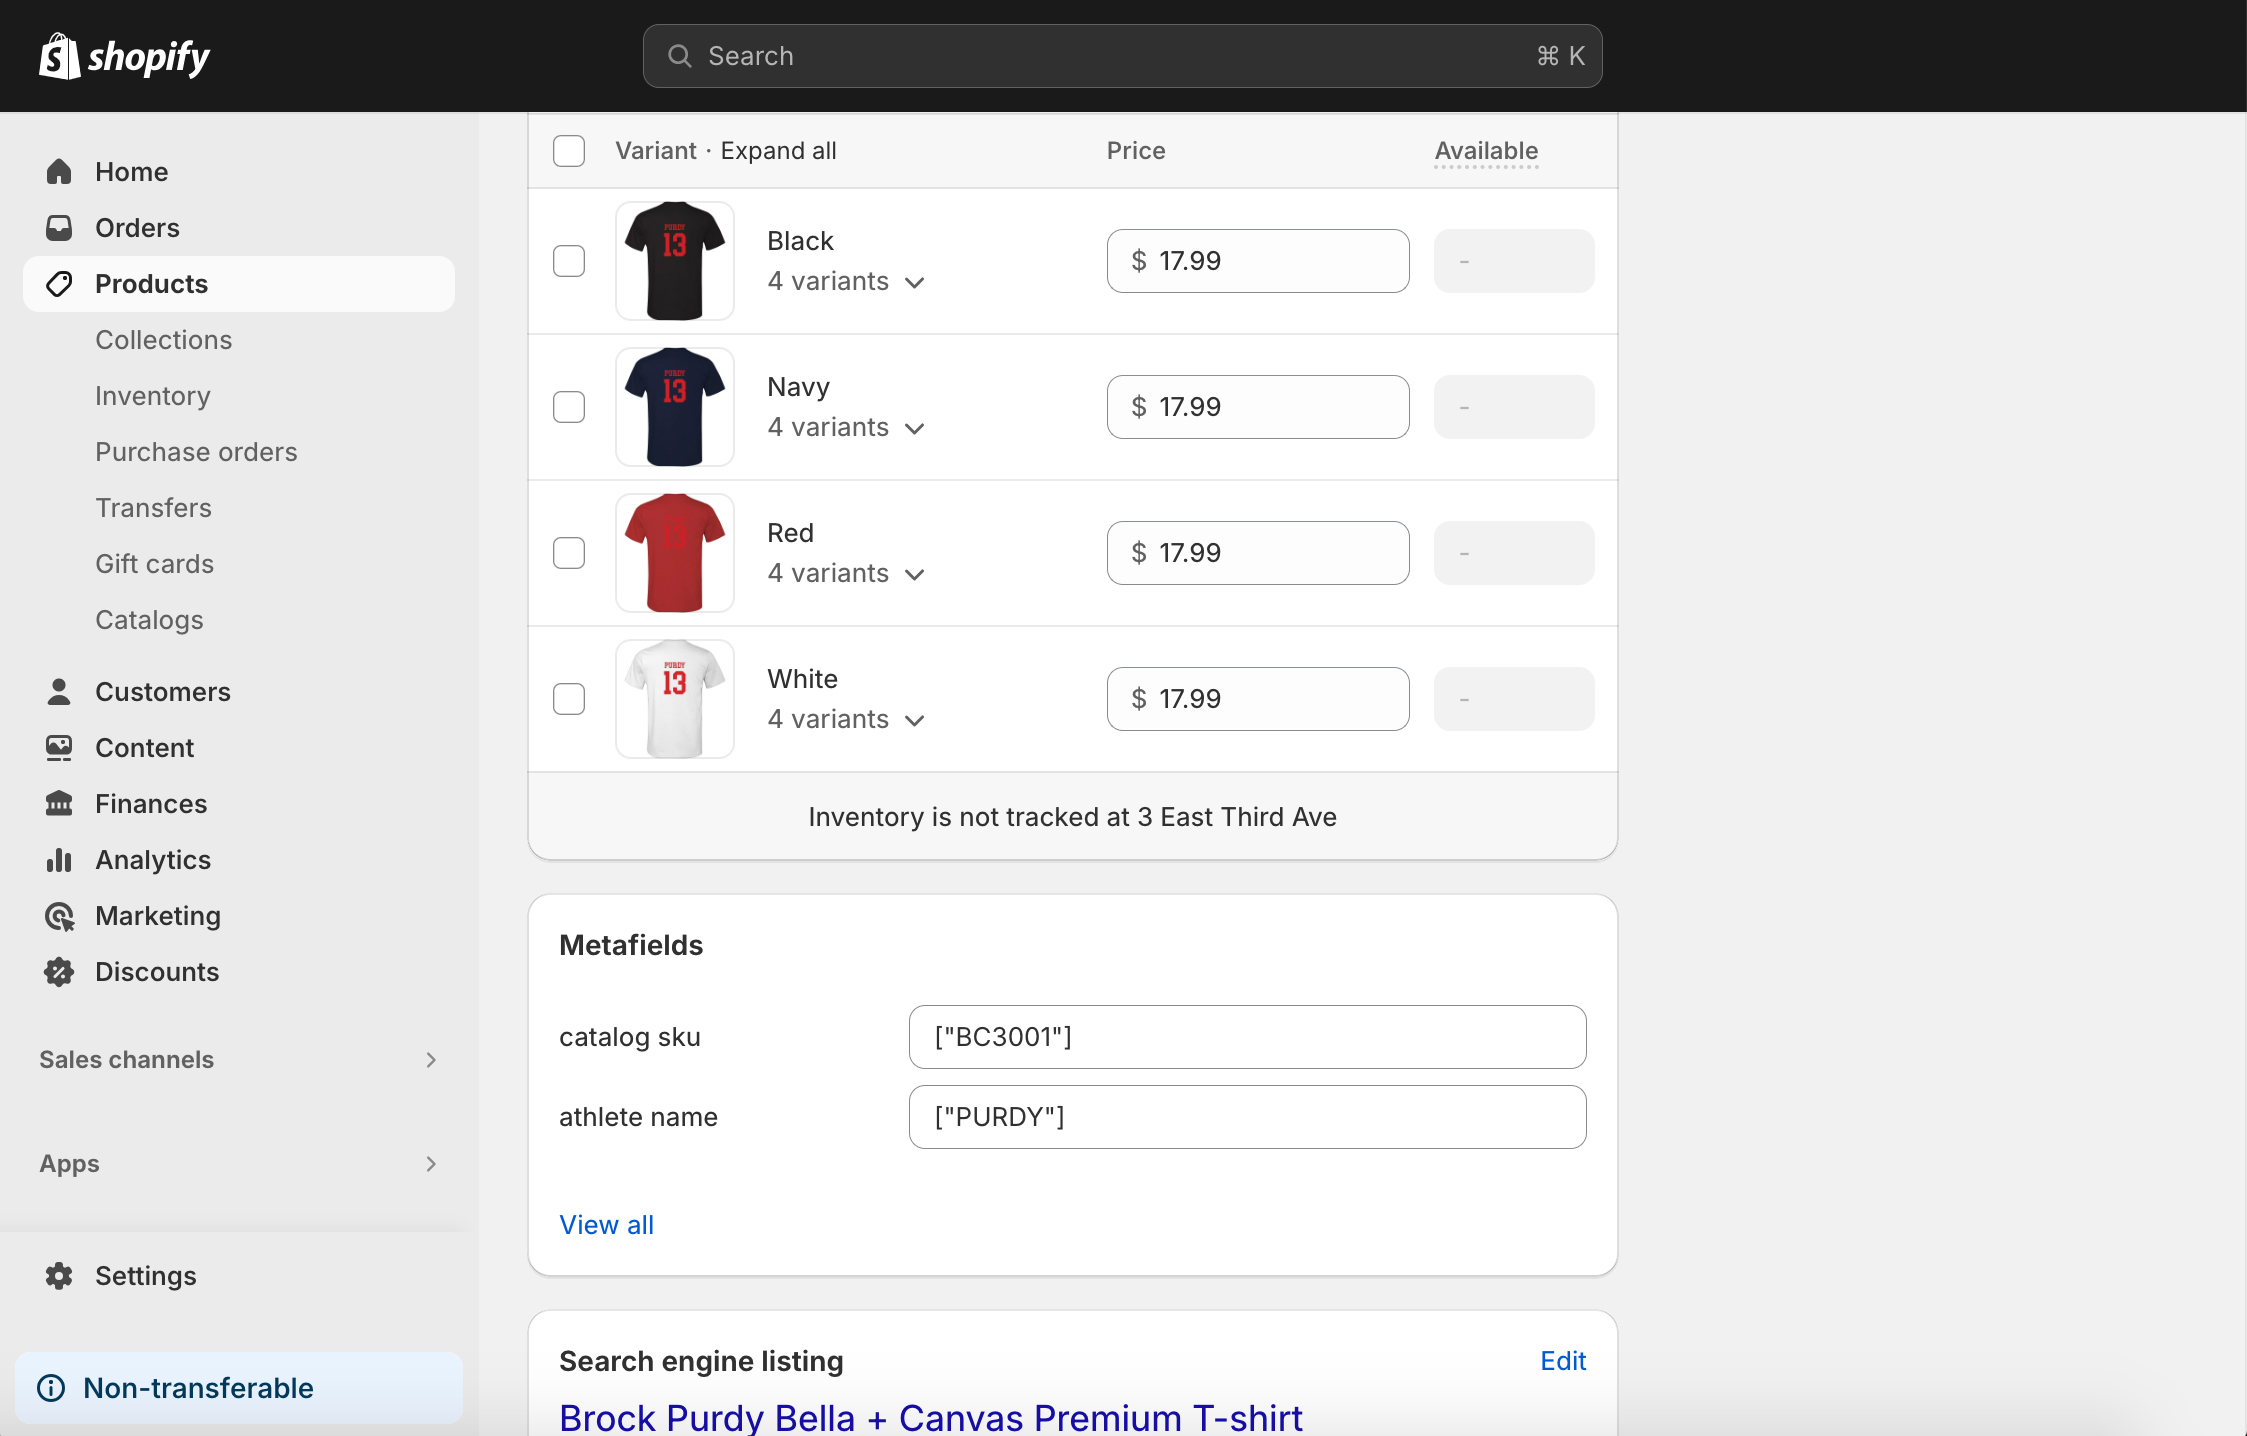
Finally, select Products from the Shopify Admin, find your product and scroll down to view the custom metafields and data.
WooCommerce
To get started, we will require write access to to publish products on your behalf via an API Key. The following documentation is from the Woo Commerce platform. More granular control instructions are available here:
https://woocommerce.github.io/woocommerce-rest-api-docs/#rest-api-keys
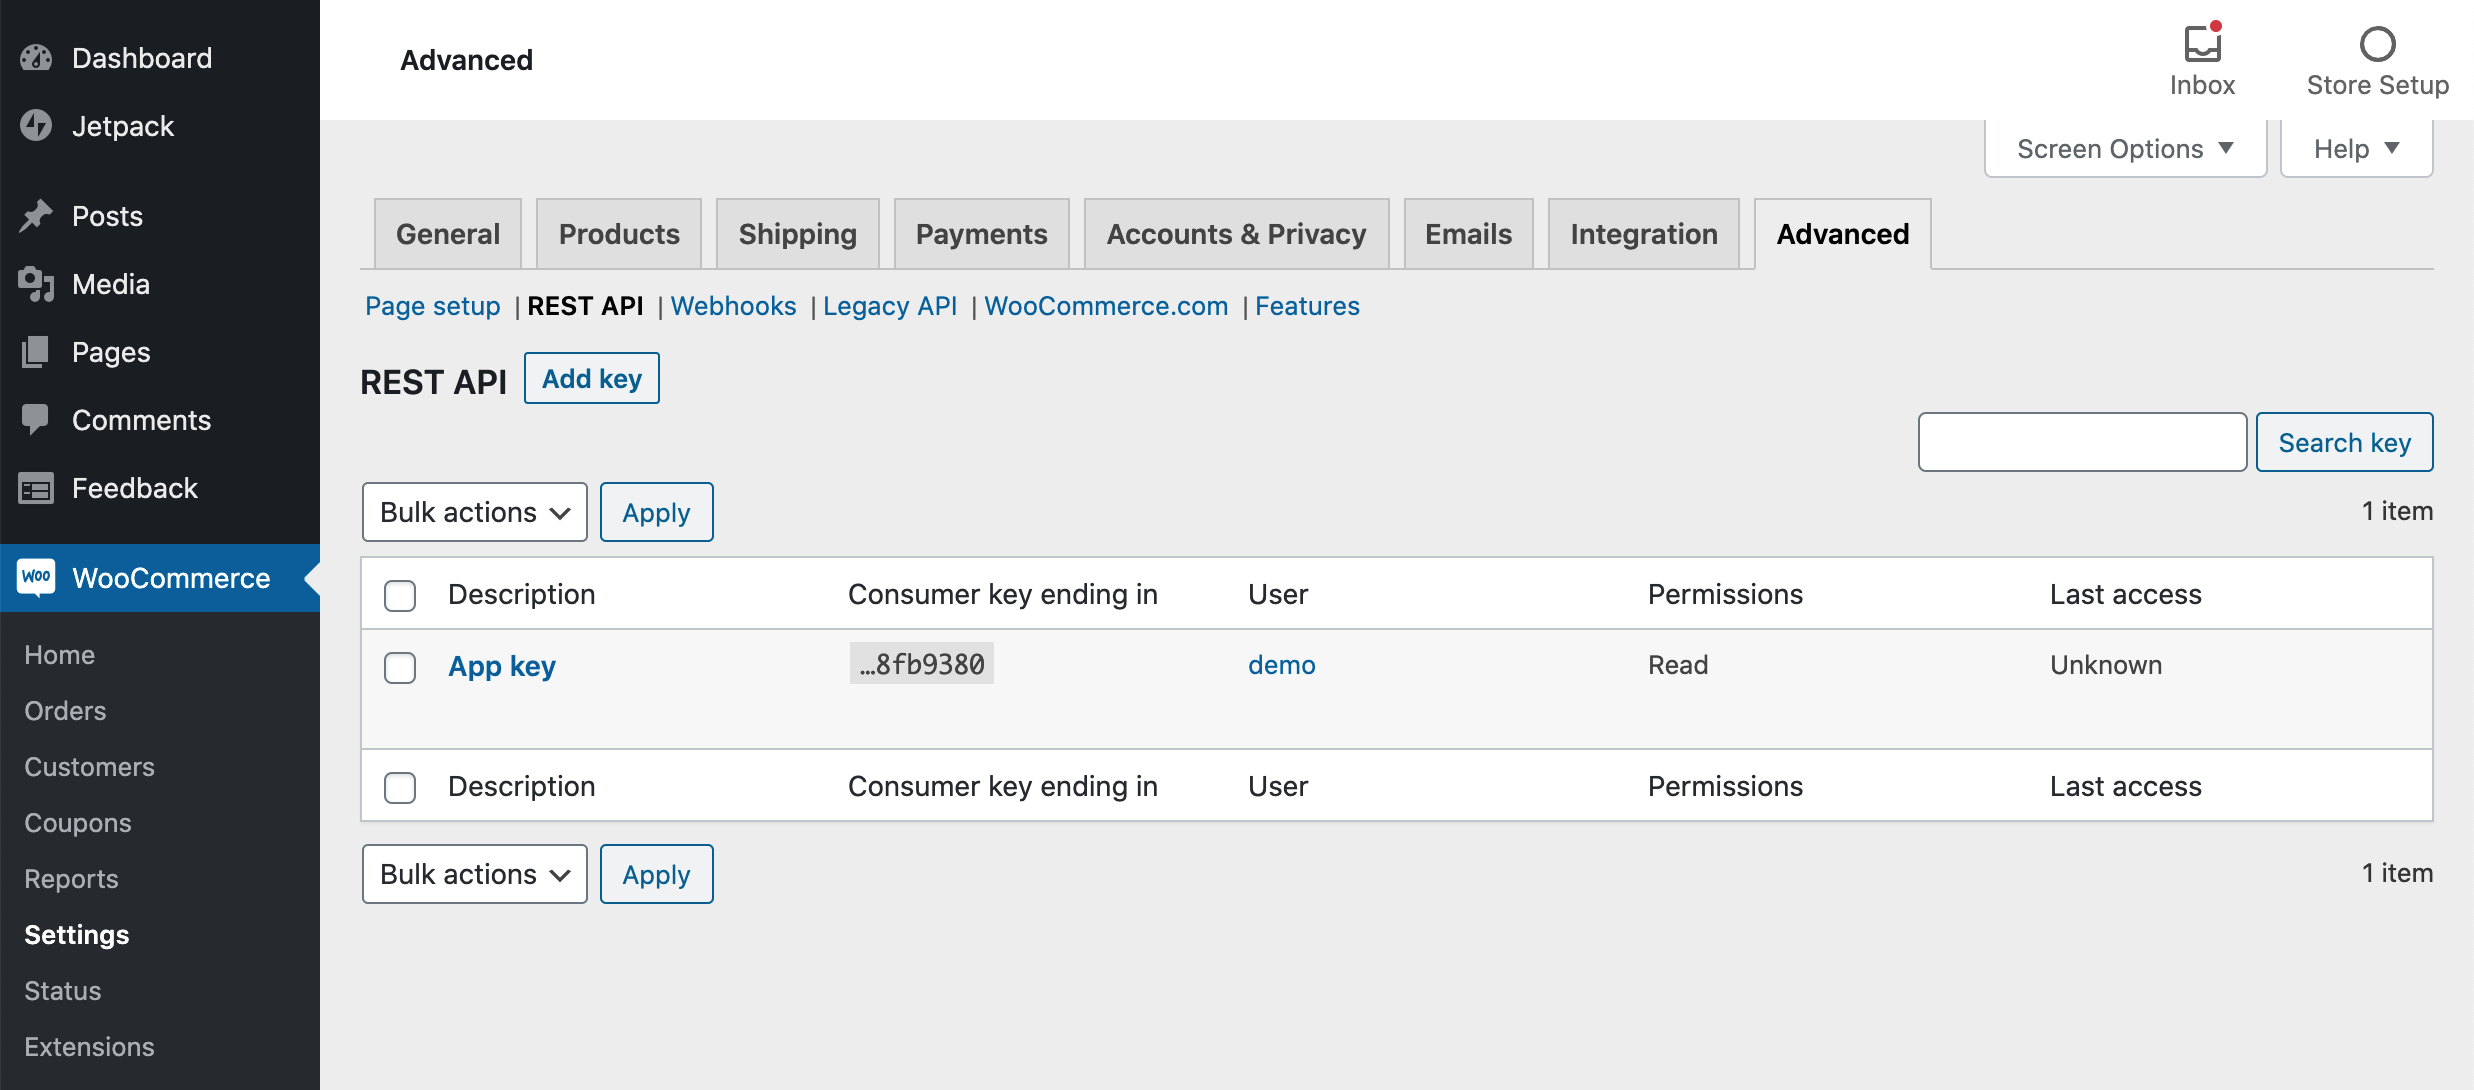
- First generate an API key. To create or manage keys for a specific WordPress user, go to WooCommerce > Settings > Advanced > REST API.

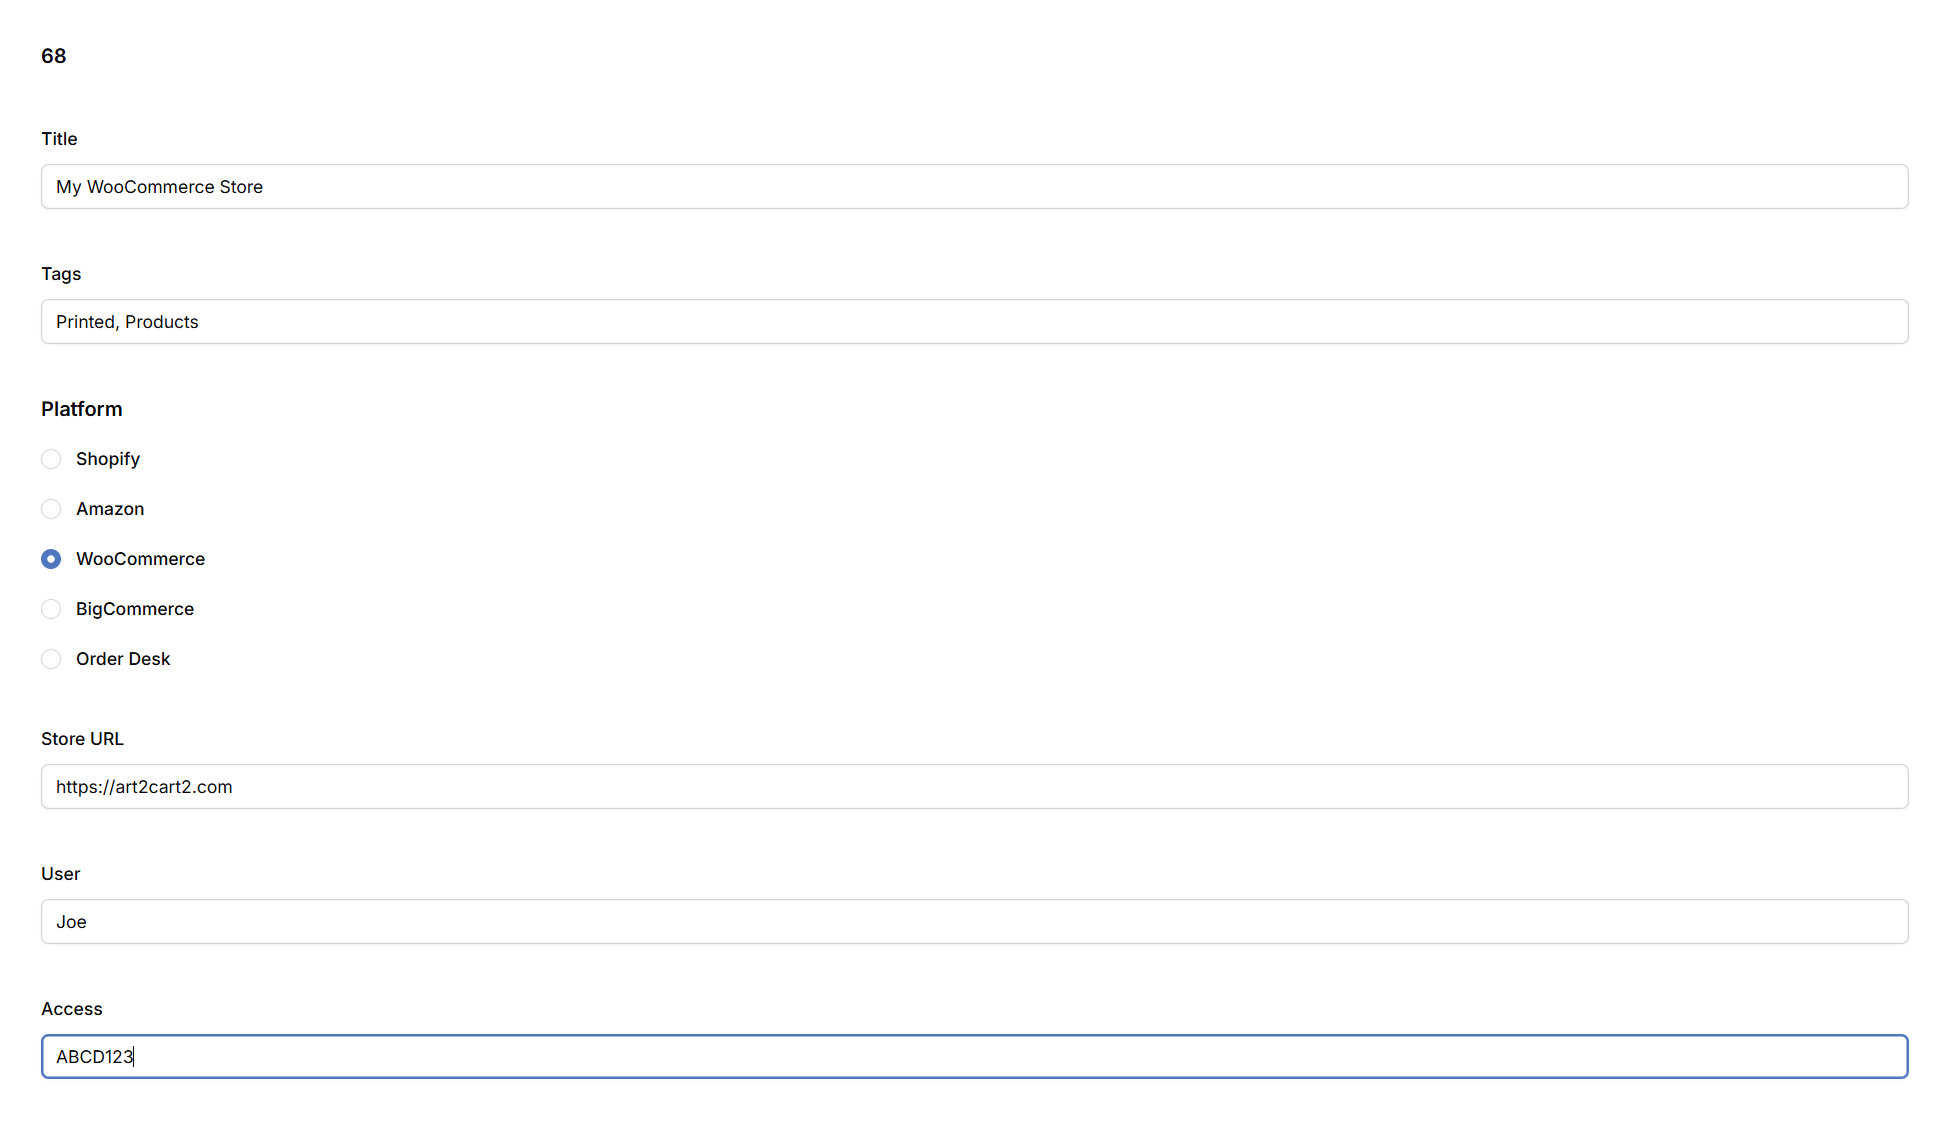
- Fill out the Store Name, any Tags and select the WooCommerce Platform. Then enter your store url, and credentials and the WooCOmmerce App token into the Access field. Click Save to allow Art2Cart to publish products and listings directly to your WooCommerce store.
- You are ready to go. Stay posted for more information about how to handle WooCommerce specific metadata, and tags.
BigCommerce
Coming Soon.
Amazon
Coming Soon.
Order Desk
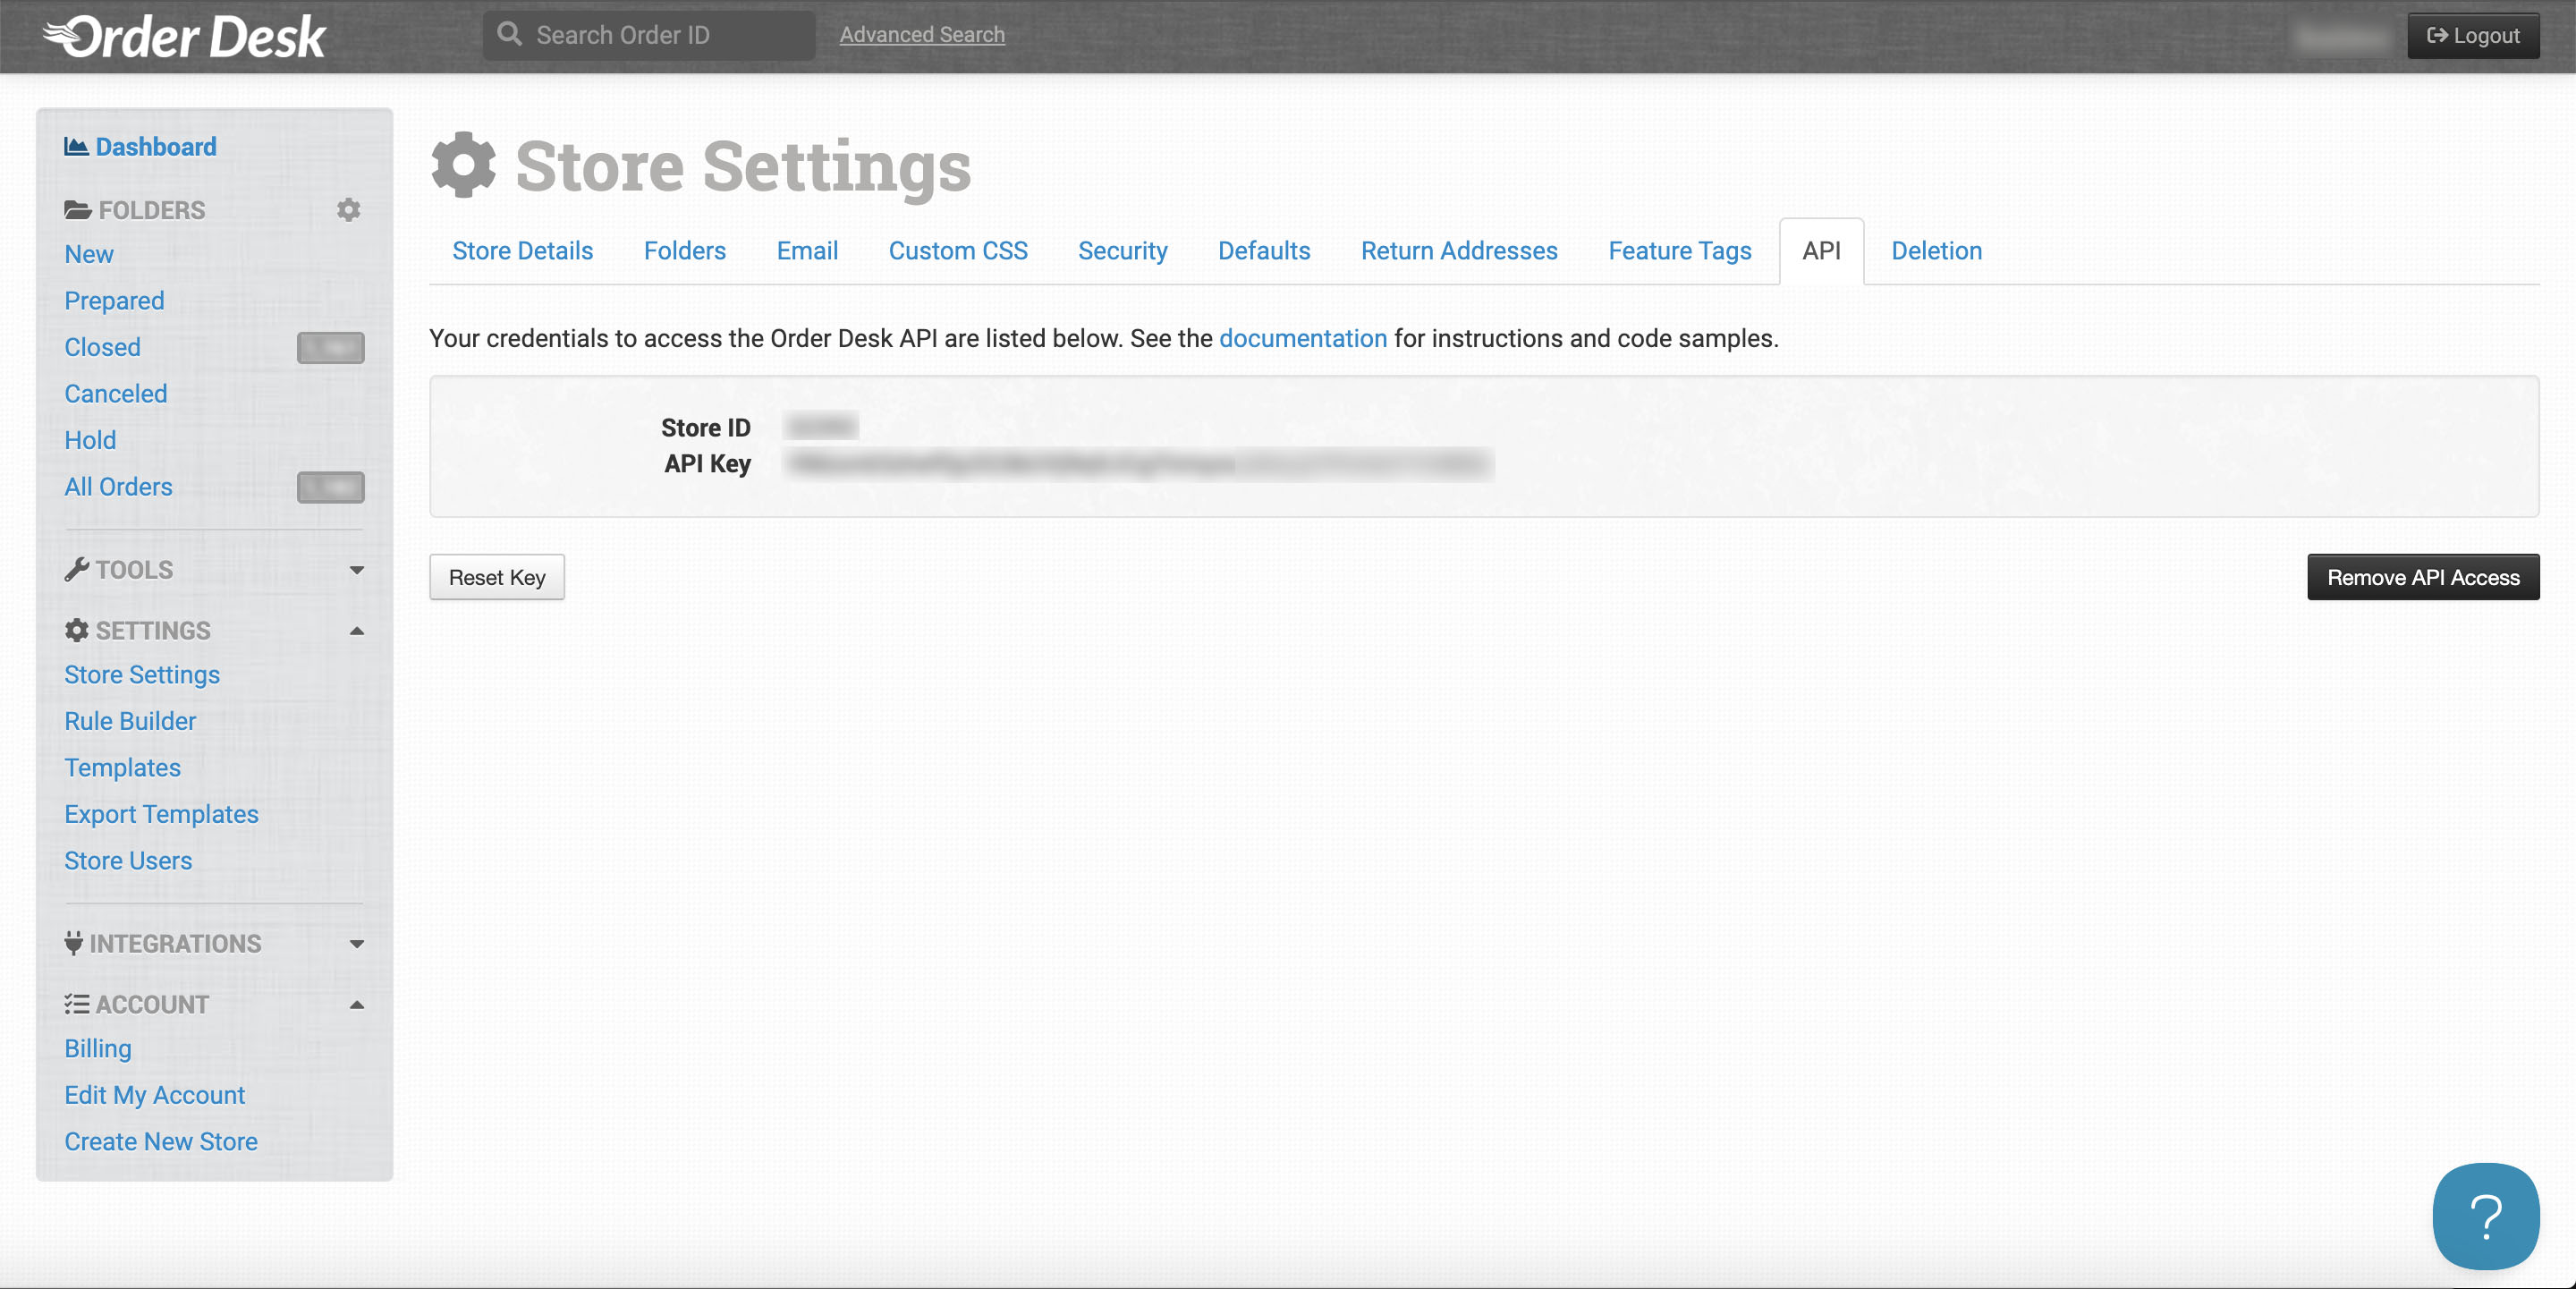
- In the Order Desk dashboard, go to the Store Settings page, click the API tab, and create an API Key, if one is not already created.
-
Copy the Store ID and the API Key.
-
In the Art2Cart dashboard, select Stores from the Channels menu.
-
Click Add Store to create a new store/e-commerce channel.
-
Fill out a name for the channel in title field, add any tags, add click the Order Desk radio button.
-
Enter the Store ID and then the API Key in the Access field.

-
Run your Listing Request in Art2Cart with a Order Desk channel ouput and make sure to include a SKU setting with the listing template.
-
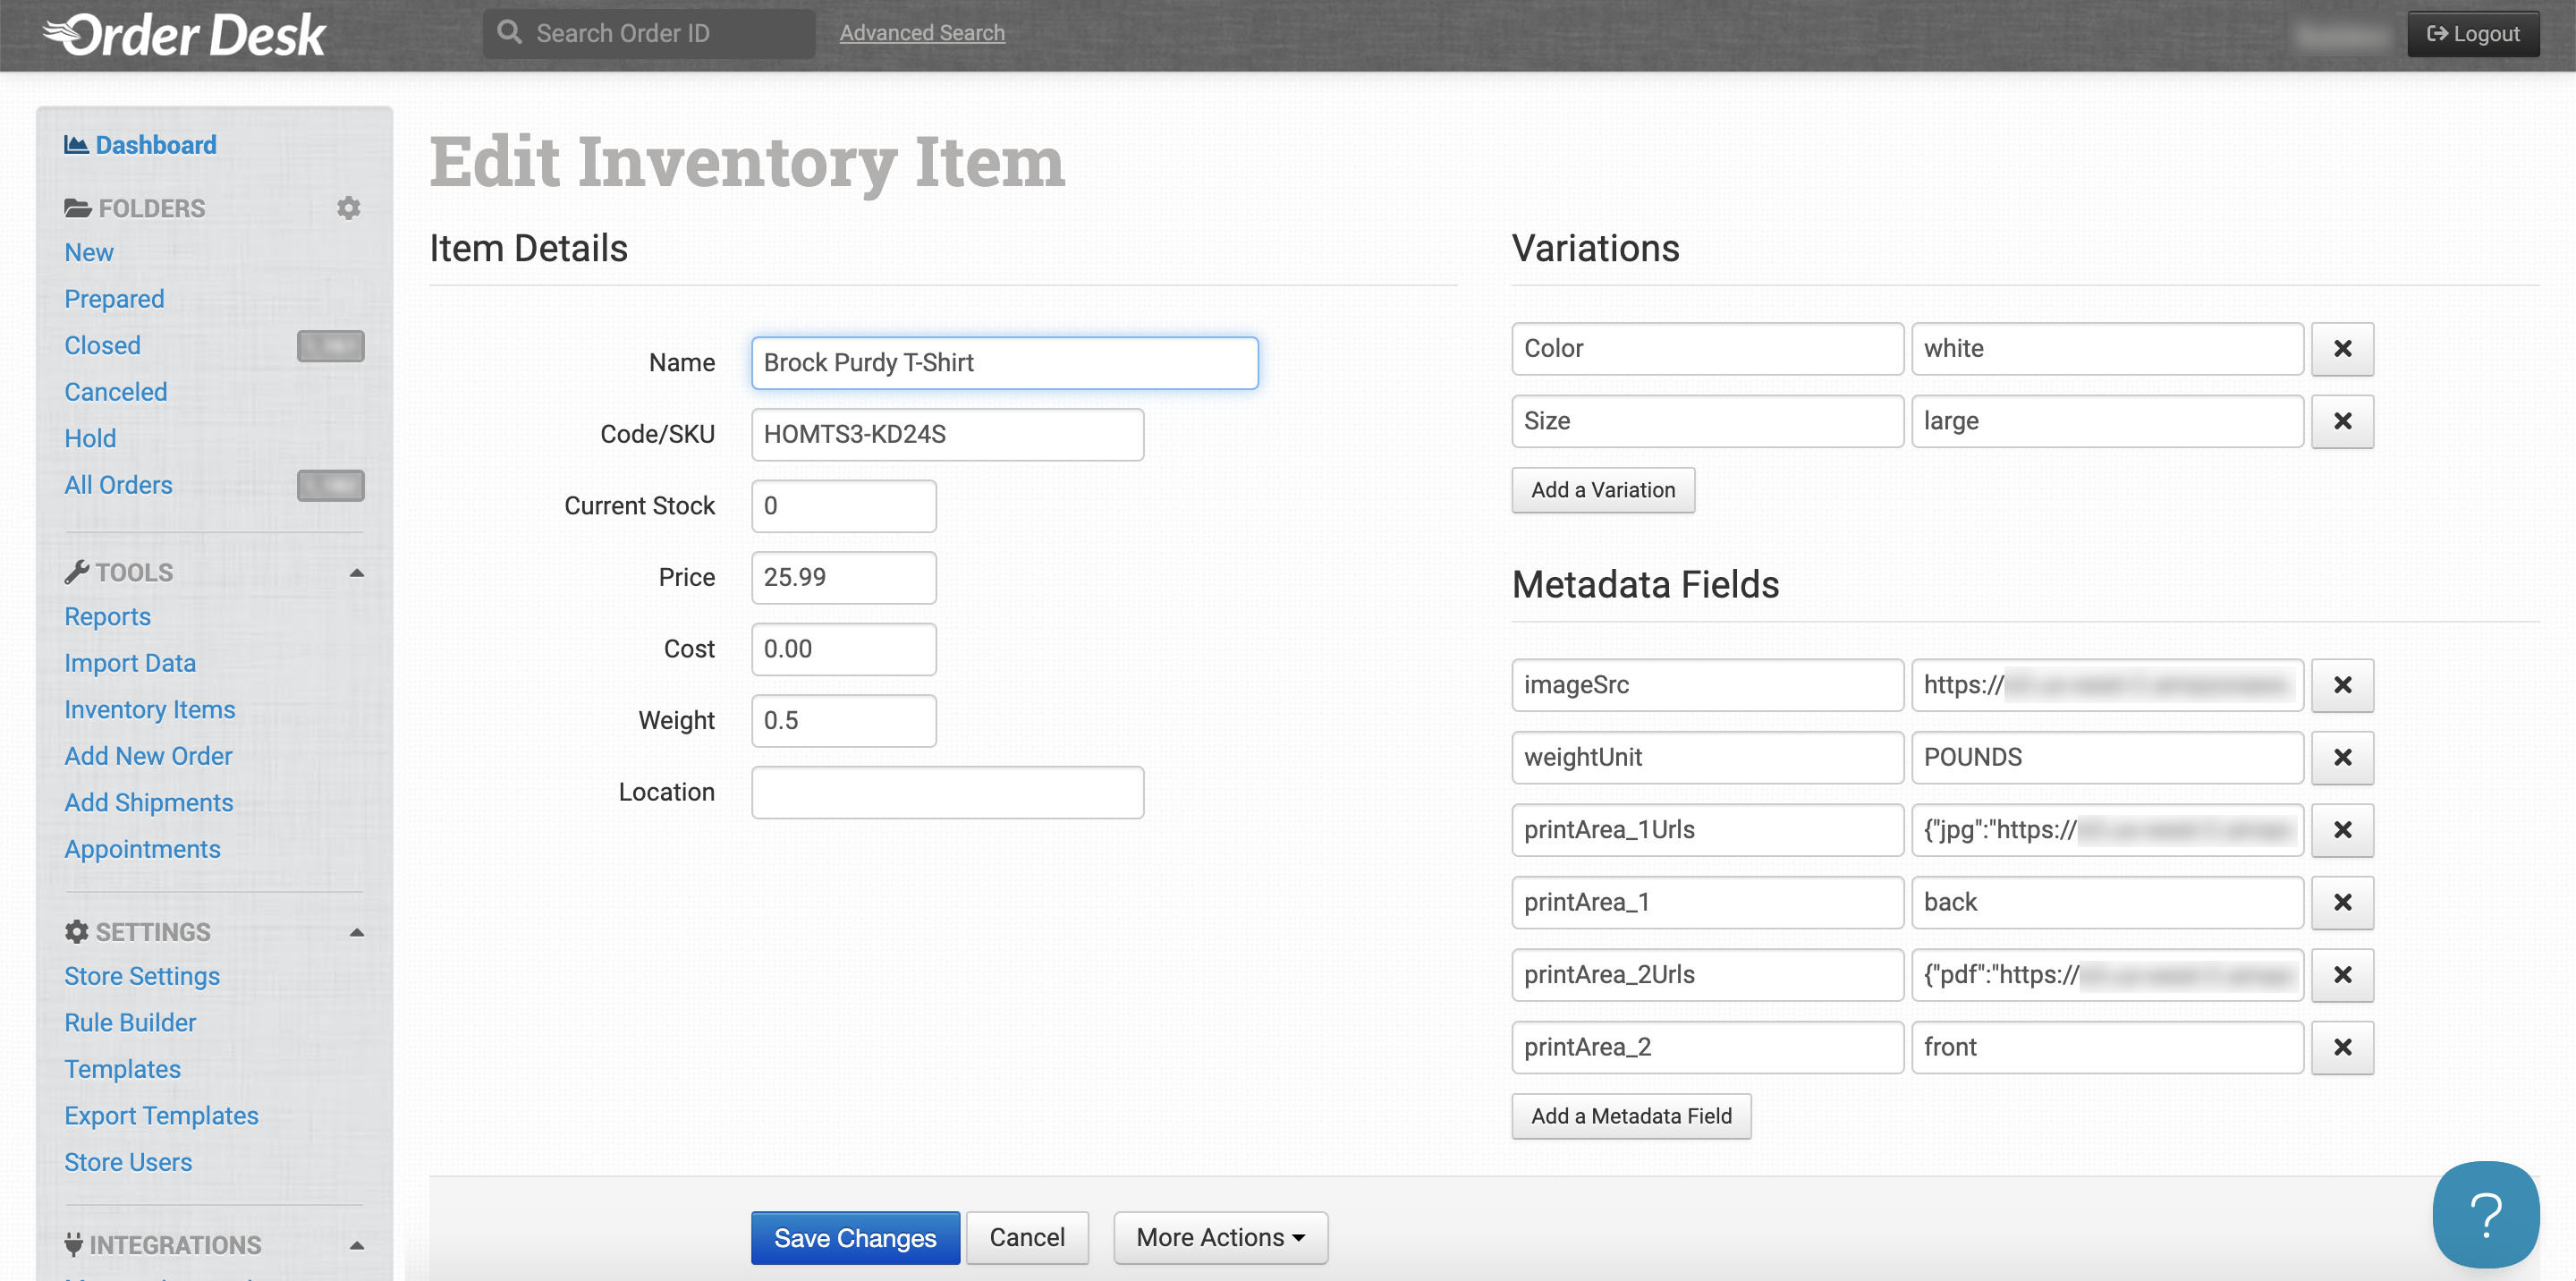
After your product is created in Art2Cart, a new inventory item will be added to Order Desk. By default, product title, SKU, variant information are included along with metafields for imageSrc, weightUnit, printArea*# and printArea*# Urls.
The imageSrc metadata field contains the url for the first view of the variant.
Each printArea metadata field references the catalog product design area names. The correseponding Urls metadata field is a JSON array that includes up to 3 links depending on the source design images for each design area of the catalog product.
While the preset field names cannot be changed, custom field and values can be defined using store metafields as described here.
More Channels, CRM and ERP
Art2Cart can serve other e-commerce platforms (e.g., Sellbrite, Etsy, etc), CRM platforms (e.g., Saleforce) or ERP systems (e.g., NetSuite). Please contact the Art2Cart team directly for additional information.